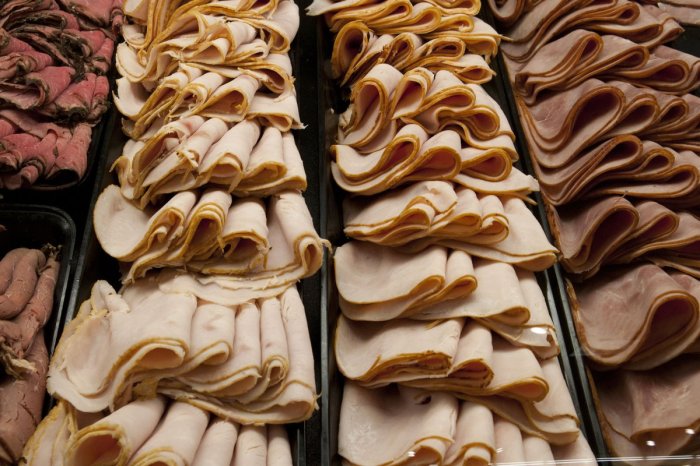
Author: Ceasar Ritchie

  • What is Levator Ani Syndrome? A Deep Dive

    What is Levator Ani Syndrome? A Deep Dive

    What is levator ani syndrome? This condition affects the pelvic floor muscles, specifically the levator ani, causing a range of symptoms and impacting daily life. Understanding the anatomy, potential causes, and available treatment options is key to managing this often-overlooked health issue. This comprehensive guide delves into the intricacies of levator ani syndrome, equipping you with essential knowledge to navigate this complex area of pelvic health.

    The levator ani muscles are crucial for pelvic floor function, supporting the pelvic organs and facilitating continence. When these muscles are weakened, damaged, or strained, a variety of symptoms can arise, leading to discomfort and impacting overall well-being. Understanding the underlying mechanisms behind levator ani syndrome is vital to effective management and treatment.

    Introduction to Levator Ani Syndrome

    Levator ani syndrome (LAS) is a condition characterized by pain and discomfort in the pelvic region, often stemming from the levator ani muscles. These muscles, a crucial component of the pelvic floor, play a vital role in supporting the pelvic organs and controlling bowel and bladder function. Understanding the anatomy and potential causes of LAS is key to recognizing and addressing this condition effectively.The levator ani muscles are a group of muscles located within the pelvic floor.

    They form a sling-like structure that supports the pelvic organs, including the bladder, uterus (in females), and rectum. These muscles are essential for maintaining continence, facilitating bowel and bladder emptying, and supporting the weight of the abdominal organs. Dysfunction or injury to these muscles can lead to various symptoms and discomfort.

    Anatomy of the Levator Ani Muscles

    The levator ani muscles are comprised of three main parts: the pubococcygeus, iliococcygeus, and puborectalis. These muscles work synergistically to create a dynamic support system for the pelvic organs. The pubococcygeus muscle is responsible for supporting the urethra and vagina, while the iliococcygeus muscle contributes to the support of the rectum. The puborectalis muscle forms a sling around the rectum, aiding in continence.

    Proper coordination of these muscles is critical for optimal pelvic floor function.

    Symptoms of Levator Ani Syndrome

    Common symptoms of Levator Ani Syndrome include chronic pelvic pain, pain during sexual activity, and pain during bowel movements. Other symptoms can range from urinary incontinence or urgency to a sensation of heaviness or pressure in the pelvis. These symptoms can vary in intensity and duration, and their presence can indicate underlying dysfunction of the levator ani muscles.

    Levator ani syndrome is a frustrating condition where the muscles supporting your pelvic floor become overly tight or strained, often leading to pain and discomfort. Before you use stool softeners, it’s important to understand if they’re even the right solution for your specific issue. Consider exploring the factors involved in your particular situation by visiting this resource on before you use stool softeners This knowledge can help you make informed decisions about treatment options and, ultimately, better manage levator ani syndrome.

    Potential Causes of Levator Ani Syndrome

    Understanding the potential causes of Levator Ani Syndrome is essential for appropriate diagnosis and treatment. A multifaceted approach is often required to identify the specific cause and develop a tailored management plan.

    So, you’re learning about levator ani syndrome? It’s a condition where the muscles supporting your pelvic floor aren’t functioning correctly. This can lead to a whole host of issues, like incontinence and pain. Sometimes, similar issues can be related to breathing problems, and understanding the differences between CPAP and BiPAP machines can be really helpful in managing these types of conditions.

    For a deeper dive into the technicalities of these machines, check out this helpful resource on what is the difference between cpap and bipap. Ultimately, understanding your body and the various options for support is key when dealing with levator ani syndrome.

    Cause Description Risk Factors Symptoms
    Trauma (e.g., childbirth, pelvic injury) Direct or indirect injury to the levator ani muscles, often resulting in inflammation and scarring. Multiple vaginal deliveries, high-impact pelvic injuries. Localized pelvic pain, pain during intercourse, pain during bowel movements, or a feeling of heaviness in the pelvic area.
    Chronic Constipation Straining during bowel movements can put excessive pressure on the pelvic floor muscles, potentially leading to inflammation and pain. Lack of fiber in diet, insufficient fluid intake, certain medications. Pelvic pain, pain with defecation, pain during intercourse.
    Prolonged Sitting Sustained pressure on the pelvic floor muscles can lead to fatigue, soreness, and potential inflammation. Occupations requiring prolonged sitting, individuals with sedentary lifestyles. Chronic pelvic pain, pain during intercourse, pain with bowel movements.
    Pelvic Organ Prolapse Weakening of the pelvic floor tissues can cause pelvic organs to descend, putting pressure on the levator ani muscles. Age, pregnancy, childbirth, genetic predisposition. Pelvic pain, pressure or heaviness in the pelvis, urinary incontinence, bowel incontinence.
    Inadequate Pelvic Floor Exercises Improper or insufficient pelvic floor exercises can result in weakened or strained muscles. Incorrect exercise technique, inadequate frequency of exercises. Pelvic pain, pain during intercourse, urinary or bowel incontinence.

    Prevalence of Levator Ani Syndrome

    The precise prevalence of Levator Ani Syndrome is not definitively established. However, given the significant role of the pelvic floor in everyday function, and the potential for various factors to impact these muscles, it is reasonable to anticipate that this condition affects a considerable portion of the population. Further research is needed to establish precise numbers.

    Diagnostic Methods

    What is levator ani syndrome

    Pinpointing Levator Ani Syndrome (LAS) can be tricky, as symptoms often overlap with other conditions. Accurate diagnosis relies on a comprehensive approach, combining meticulous physical examinations with appropriate imaging techniques. A thorough understanding of the diagnostic process is crucial for effective management and treatment.

    Physical Examinations

    Physical examinations are the initial cornerstone of diagnosing LAS. These evaluations focus on assessing the pelvic floor muscles’ strength, tone, and range of motion. A skilled practitioner will meticulously evaluate the patient’s posture, pain patterns, and any associated neurological symptoms. This process includes palpating the muscles of the pelvic floor to identify potential tenderness, spasms, or areas of restriction.

    The clinician will also note any observable asymmetries or dysfunctions in the region.

    Imaging Techniques

    Advanced imaging techniques provide valuable insights into the underlying anatomical structures of the pelvic floor, supplementing physical examinations. These methods often reveal structural abnormalities or irregularities that might contribute to the patient’s symptoms. Different imaging modalities offer varying degrees of detail, and the choice depends on the specific clinical question.

    Comparison of Diagnostic Methods

    Method Procedure Advantages Disadvantages
    Digital Rectal Examination (DRE) A physician inserts a gloved finger into the rectum to palpate the pelvic floor muscles, assessing tone, tenderness, and any abnormalities. Non-invasive, relatively inexpensive, provides immediate feedback on the pelvic floor musculature. Subjectivity in assessment, limited visualization of deeper structures, may not be sufficient for complex cases.
    Pelvic Floor Ultrasound Utilizes high-frequency sound waves to visualize the pelvic floor muscles, identifying any structural or functional issues. Provides real-time visualization of the pelvic floor, allowing for detailed assessment of muscle function and tissue health. Less invasive than MRI or CT. Limited depth of penetration, may not be optimal for deep-seated issues, requires specialized equipment and expertise.
    Magnetic Resonance Imaging (MRI) Uses a powerful magnetic field and radio waves to create detailed images of the pelvic floor structures, including muscles, nerves, and ligaments. Excellent soft tissue contrast, allows for detailed visualization of the entire pelvic floor and surrounding structures, identifying potential anatomical anomalies or nerve entrapment. Expensive, time-consuming, may require sedation for some patients, potentially exposes the patient to radiation.
    CT Scan Uses X-rays and computer processing to create cross-sectional images of the pelvic floor. Faster than MRI, may be preferable for patients with claustrophobia or metal implants, potentially provides more detailed anatomical information than ultrasound. Higher radiation exposure than ultrasound or MRI, limited soft tissue contrast, might not be as detailed as MRI for assessing muscle function.

    Limitations of Current Diagnostic Tools

    Currently, no single diagnostic method perfectly diagnoses Levator Ani Syndrome. The diagnostic process often involves a combination of approaches to reach a definitive diagnosis. Subjectivity in physical examinations, limited visualization with some imaging techniques, and the potential for overlapping symptoms with other conditions can lead to diagnostic challenges. Furthermore, the lack of standardized diagnostic criteria for LAS can complicate the process.

    Researchers are constantly working to refine diagnostic tools and improve diagnostic accuracy.

    Pelvic Floor Examination Procedure

    A pelvic floor examination for suspected Levator Ani Syndrome typically involves the following steps:

    1. Patient History and Review of Symptoms: The examiner gathers detailed information about the patient’s symptoms, medical history, and any relevant risk factors.
    2. Physical Examination: This includes visual inspection of the perineal region, followed by palpation of the pelvic floor muscles, assessing their tone, strength, and any tenderness or trigger points.
    3. Neurological Assessment: The examiner evaluates reflexes and sensation in the affected area to rule out neurological involvement.
    4. Imaging, if necessary: Depending on the specific case, imaging techniques like ultrasound, MRI, or CT scans may be ordered to visualize the pelvic floor structures in greater detail.
    5. Differential Diagnosis: The examiner considers other possible conditions that could be causing the patient’s symptoms.

    Treatment Approaches: What Is Levator Ani Syndrome

    Managing Levator Ani Syndrome involves a multifaceted approach tailored to the individual’s specific symptoms and severity. The primary goal is to alleviate pain, restore function, and improve quality of life. Treatment options range from conservative measures to surgical interventions, and the choice often depends on the patient’s response to initial therapies.Effective treatment for Levator Ani Syndrome hinges on accurate diagnosis and a thorough understanding of the underlying causes.

    A comprehensive assessment, including physical examination, imaging studies, and potentially electromyography, helps guide the selection of the most appropriate treatment strategy.

    Common Treatment Approaches

    Conservative therapies are frequently the initial line of defense for Levator Ani Syndrome. These approaches aim to reduce pain, improve muscle function, and promote healing without resorting to surgery. Physical therapy plays a crucial role in this phase, focusing on stretching, strengthening exercises, and manual therapy techniques to address muscle imbalances and restore proper pelvic floor function.

    Conservative Treatments

    Conservative treatments, such as physical therapy, pelvic floor exercises, and pain management strategies, are often employed initially. These approaches aim to address the underlying muscle imbalances and pain contributing to the syndrome. Pelvic floor physical therapy is particularly important, focusing on exercises that strengthen and stretch the pelvic floor muscles.

    Surgical Interventions

    Surgical interventions are considered for patients who do not respond adequately to conservative treatments or experience severe symptoms that significantly impact their quality of life. The most common surgical approaches for Levator Ani Syndrome aim to correct anatomical abnormalities, release tension on the levator ani muscles, and restore proper pelvic floor function. Surgery can involve various techniques, including muscle releases, nerve blocks, or procedures to address associated anatomical issues.

    Comparison of Treatment Options

    | Treatment | Description | Benefits | Drawbacks ||—|—|—|—|| Physical Therapy | Exercises, manual therapy, and education to improve muscle strength, flexibility, and coordination of the pelvic floor muscles. | Non-invasive, often covered by insurance, relatively low risk. Can improve overall pelvic floor health. | May take time to show significant improvement, requires patient commitment to exercises and follow-up appointments.

    Effectiveness varies depending on individual factors. || Medications (Pain Management) | Analgesics, muscle relaxants, or anti-inflammatory drugs to reduce pain and muscle spasms. | Can provide immediate pain relief, allowing for better participation in physical therapy. | May have side effects, such as gastrointestinal issues or drowsiness. Does not address the underlying cause of the syndrome.

    || Botox Injections | Injection of botulinum toxin into specific pelvic floor muscles to temporarily relax them and reduce pain. | Can provide temporary relief from pain and spasms, allowing for better function. May be less invasive than surgery. | Temporary relief, requires repeated injections, potential for side effects at the injection site, and may not be effective for all individuals.

    || Surgical Release | Surgical procedures to release tension on the levator ani muscles, address anatomical abnormalities, or correct nerve entrapment. | Potentially provides long-term relief for severe cases, addresses underlying structural issues. | Higher risk of complications, longer recovery time, and potential for recurrence of symptoms. Not suitable for all patients. |

    Potential Risks and Complications

    Potential risks and complications associated with each treatment approach vary significantly. Physical therapy generally carries minimal risk, but potential complications from medications include adverse drug reactions. Botox injections may cause temporary bruising or discomfort at the injection site. Surgical interventions carry a higher risk of complications, including bleeding, infection, nerve damage, and recurrence of symptoms. The choice of treatment always needs to be made in consultation with a healthcare professional, weighing the benefits and potential risks for each individual case.

    Symptoms and Associated Conditions

    Understanding the symptoms of Levator Ani Syndrome is crucial for accurate diagnosis and effective treatment. It’s important to recognize that symptoms can vary significantly from person to person, and often overlap with other pelvic floor disorders. This makes accurate diagnosis a challenge, highlighting the need for a comprehensive evaluation by a healthcare professional.

    Common Symptoms

    Identifying the range of symptoms associated with Levator Ani Syndrome is essential for proper diagnosis. This multifaceted condition can manifest in various ways, impacting both physical comfort and overall well-being. Pain, discomfort, and dysfunction are key elements to consider.

    • Pain: This can range from mild ache to sharp, intense pain in the pelvic area, perineum, or lower back. The pain may be constant or intermittent, and may worsen with certain activities like prolonged sitting or standing.
    • Discomfort: This can manifest as a feeling of pressure, heaviness, or fullness in the pelvic region. It can also present as a burning sensation, particularly during or after bowel movements or sexual activity.
    • Dyspareunia: Painful sexual intercourse is a common symptom, affecting both men and women. This pain can be superficial or deep and is often linked to the tension and dysfunction in the pelvic floor muscles.
    • Bowel and Bladder Dysfunction: Symptoms like constipation, diarrhea, incontinence (both urine and stool), urinary urgency, or a feeling of incomplete emptying of the bladder can occur. These are often related to altered muscle function and pressure within the pelvic region.
    • Sexual Dysfunction: This can manifest as reduced libido, difficulties with orgasm, or pain during or after sexual activity. This aspect of the condition often goes undiagnosed and untreated due to its sensitive nature.
    • Chronic Pelvic Pain: In some cases, Levator Ani Syndrome can contribute to a more general and persistent pain condition in the pelvis and surrounding areas.

    Connection to Other Pelvic Floor Disorders, What is levator ani syndrome

    Levator Ani Syndrome frequently coexists with or is mistaken for other pelvic floor disorders. Understanding these overlaps is crucial for differentiating the conditions and developing an effective treatment plan.

    Conditions like pelvic organ prolapse, endometriosis, interstitial cystitis, and chronic prostatitis can share overlapping symptoms with Levator Ani Syndrome. Therefore, a comprehensive evaluation is essential to pinpoint the exact cause of the patient’s symptoms.

    Symptom Comparison Table

    Condition Symptom 1 Symptom 2 Symptom 3
    Levator Ani Syndrome Pelvic pain, often deep and radiating Painful bowel movements or urination Dyspareunia (painful sex)
    Pelvic Organ Prolapse Feeling of heaviness or dragging in the pelvis Urinary or fecal incontinence Low back pain
    Endometriosis Pelvic pain, often cyclical Painful menstruation Dyspareunia
    Interstitial Cystitis Chronic pelvic pain Frequent urination Urgency and pain

    Potential Complications and Long-Term Effects

    The potential complications of Levator Ani Syndrome depend largely on the severity and duration of the condition. Left untreated, the chronic pain and dysfunction can negatively impact quality of life. Long-term effects can include chronic pelvic pain, decreased sexual function, and psychological distress. Early diagnosis and appropriate management are essential to mitigate these potential complications.

    Prognosis and Management

    What is levator ani syndrome

    Levator ani syndrome, while not a life-threatening condition, can significantly impact a person’s quality of life. Understanding the potential outcomes and effective management strategies is crucial for individuals experiencing this condition. This section explores the expected course of the syndrome, symptom management techniques, and the importance of consistent medical follow-up.

    Expected Outcomes

    The prognosis for levator ani syndrome varies depending on the severity of the condition, the individual’s response to treatment, and the presence of any underlying conditions. In many cases, individuals with mild to moderate levator ani syndrome experience significant improvement with appropriate management. Symptoms may lessen over time, and the individual may achieve a good quality of life.

    Levator ani syndrome is a condition that often causes pelvic pain, and while its exact causes aren’t fully understood, some researchers think it might be linked to similar factors impacting hair loss, like those associated with male or female pattern baldness. However, the exact mechanisms are still under investigation, and the connection between these conditions is currently speculative.

    Ultimately, levator ani syndrome is a complex issue requiring careful diagnosis and treatment.

    However, some individuals may experience persistent or recurring symptoms, potentially requiring ongoing management. A personalized approach, considering the individual’s specific situation, is essential to anticipate and manage the expected outcomes.

    Symptom Management Strategies

    Effective symptom management is key to improving the quality of life for those with levator ani syndrome. This involves a multifaceted approach tailored to the individual’s needs. Physical therapy plays a crucial role in strengthening pelvic floor muscles and improving flexibility. Pain management strategies may include over-the-counter medications, physical therapy, and, in some cases, prescription medications. Relaxation techniques, such as yoga or meditation, can help manage stress and muscle tension, contributing to symptom relief.

    Behavioral modifications, like adjusting bowel habits and avoiding prolonged sitting, can also reduce symptoms.

    Importance of Regular Follow-up Appointments

    Regular follow-up appointments are essential for monitoring the condition’s progress, adjusting treatment plans, and identifying potential complications. These appointments allow healthcare professionals to assess the effectiveness of current interventions, identify any new symptoms or changes in the condition, and adjust the treatment plan as needed. Follow-up visits provide a valuable opportunity to discuss any concerns, questions, or changes in lifestyle that may impact the condition.

    Lifestyle Modifications

    Implementing lifestyle changes can significantly contribute to managing levator ani syndrome. These modifications focus on reducing strain on the pelvic floor muscles and promoting overall well-being.

    • Maintaining a Healthy Diet: A balanced diet rich in fiber can help prevent constipation, reducing strain on the pelvic floor. Constipation can exacerbate symptoms, so maintaining regular bowel movements is crucial. Fruits, vegetables, and whole grains can contribute to digestive health.
    • Regular Exercise: Engaging in regular exercise, especially low-impact activities like walking or swimming, can help strengthen core muscles and improve overall fitness, potentially reducing the severity of symptoms. Avoid activities that put excessive stress on the pelvic floor.
    • Stress Management Techniques: Chronic stress can contribute to muscle tension and worsen levator ani syndrome symptoms. Practicing relaxation techniques, such as deep breathing exercises, meditation, or yoga, can help manage stress and promote overall well-being.
    • Posture Awareness: Maintaining good posture, especially when sitting or standing for extended periods, can help reduce strain on the pelvic floor muscles. Using ergonomic furniture and proper body mechanics can make a difference.
    • Avoiding Prolonged Sitting: Sitting for extended periods can put pressure on the pelvic floor. Taking breaks, standing up regularly, and using a supportive cushion when sitting can help reduce the impact on the muscles.

    Research and Future Directions

    Unraveling the complexities of levator ani syndrome requires ongoing research. Current understanding, while substantial, still leaves gaps in our knowledge regarding the precise mechanisms driving the condition, the best diagnostic tools, and the optimal treatment strategies. This section will explore key areas needing further investigation and highlight potential implications of recent findings.

    Areas Requiring Further Research

    A deeper understanding of the pathophysiology of levator ani syndrome is paramount. Researchers need to investigate the interplay of factors, including genetics, hormonal influences, and lifestyle habits, to identify specific risk factors and potential triggers. The development of more sophisticated imaging techniques, such as advanced MRI protocols and novel ultrasound methods, can offer a clearer picture of the pelvic floor musculature and potential structural anomalies.

    Additionally, longitudinal studies tracking the progression of the syndrome over time are essential to understand its natural course and predict individual outcomes.

    Potential Implications of Recent Research Findings

    Recent research on pelvic floor disorders has yielded valuable insights into the role of neuromuscular dysfunction in levator ani syndrome. This knowledge can lead to the development of more targeted diagnostic tests and the creation of personalized treatment plans. For instance, studies exploring the use of electromyography (EMG) to assess muscle activity in the pelvic floor may offer a more objective measure of muscle weakness or dysfunction.

    This could be used to guide rehabilitation exercises and tailor treatment protocols for each patient.

    Emerging Trends in Pelvic Floor Disorders

    The field of pelvic floor disorders is experiencing a surge in innovative approaches. Biofeedback therapy, combined with digital technologies, is gaining traction. Real-time feedback allows patients to visualize and control their pelvic floor muscles, leading to improved muscle activation and potentially faster recovery. Furthermore, the development of minimally invasive surgical techniques is transforming the treatment landscape. Robotic surgery, for example, offers enhanced precision and control during procedures, minimizing invasiveness and potentially improving patient outcomes.

    Illustrative Case Study

    A 35-year-old female presented with progressive pelvic pain and dyspareunia. She reported increasing difficulty with bowel and bladder control, accompanied by a sense of pelvic heaviness. Physical examination revealed decreased tone and reduced sensation in the levator ani muscles. Pelvic floor MRI demonstrated subtle but consistent structural abnormalities in the levator ani muscles, suggestive of chronic inflammation.

    Biofeedback therapy and targeted pelvic floor exercises were implemented. A combination of manual therapy and targeted exercises aimed at restoring muscle function and reducing inflammation proved successful in alleviating symptoms. The patient experienced a significant reduction in pain and improvement in bowel and bladder control within three months. This case exemplifies the potential for a multidisciplinary approach to treating levator ani syndrome.

    Closing Summary

    In conclusion, levator ani syndrome presents a multifaceted challenge to pelvic health. The condition, characterized by a range of symptoms and potential causes, necessitates a personalized approach to diagnosis and treatment. From physical examinations to imaging techniques and diverse treatment options, managing levator ani syndrome requires careful consideration of individual needs and circumstances. Ultimately, a proactive approach to managing this condition, coupled with ongoing research and advancements in pelvic floor care, holds the key to improving the quality of life for those affected.

  • Ankylosing Spondylitis and Teeth Problems A Deep Dive

    Ankylosing Spondylitis and Teeth Problems A Deep Dive

    Ankylosing spondylitis and teeth problems are intricately linked, creating a complex interplay between spinal health and oral well-being. This exploration delves into the specifics of this connection, examining the common oral health concerns associated with AS, the underlying mechanisms, and effective management strategies.

    This comprehensive guide will cover various aspects of oral health in individuals with ankylosing spondylitis (AS), from the underlying pathophysiology to practical management strategies and dietary considerations. We’ll also explore the impact of medications used to treat AS on oral health, and provide real-world examples through illustrative case studies.

    Introduction to Ankylosing Spondylitis and Oral Health

    Ankylosing spondylitis and teeth problems

    Ankylosing spondylitis (AS) is a chronic inflammatory disease primarily affecting the spine and sacroiliac joints. Characterized by progressive stiffness and pain, AS can significantly impact a person’s quality of life. Beyond the musculoskeletal system, AS can also affect other parts of the body, including the mouth and teeth. Understanding the connection between AS and oral health is crucial for comprehensive patient care.The inflammatory process inherent in AS can lead to various oral health complications.

    These range from increased risk of gum disease to specific dental issues that can arise due to the disease’s impact on the body’s immune response and systemic inflammation. Early detection and proactive management are vital to prevent more serious problems.

    Common Oral Health Concerns in AS

    Oral health issues in individuals with AS often stem from the systemic inflammation that characterizes the disease. This inflammation can affect the gums, teeth, and supporting structures. The increased risk of oral complications necessitates vigilant oral hygiene and regular dental check-ups.

    • Increased Risk of Periodontitis: The inflammatory response in AS can weaken the supporting tissues around the teeth, leading to periodontal disease (periodontitis). This can result in gum inflammation, bleeding, and eventual tooth loss. The inflammatory cytokines associated with AS directly contribute to the breakdown of periodontal ligaments and alveolar bone.
    • Dental Abscesses: Individuals with AS may be more susceptible to dental abscesses due to compromised immune responses and potential difficulties in healing. A compromised immune system can slow the healing process, making individuals more prone to infection. The pain and discomfort associated with abscesses can be significant and require prompt treatment.
    • Dry Mouth (Xerostomia): Medications used to manage AS can sometimes lead to dry mouth. This reduced saliva production can create an environment favorable to bacterial growth, increasing the risk of cavities and gum disease. The decreased saliva flow can also make it harder to maintain oral hygiene.
    • Malocclusion and Jaw Pain: AS can cause inflammation and stiffness in the jaw joints, potentially leading to malocclusion (misalignment of teeth). This can result in jaw pain and difficulty chewing, further impacting overall oral health.

    Prevalence of Dental Problems in AS

    Studies have shown a higher prevalence of oral health problems in individuals with AS compared to the general population. The exact figures can vary based on the specific study and the population sampled. However, the consistent finding is a noticeable increase in issues like periodontal disease and tooth loss. This suggests a direct link between AS and oral health complications, emphasizing the need for comprehensive dental care for individuals with this condition.

    Underlying Mechanisms Linking AS and Oral Issues

    The underlying mechanisms linking AS and oral health issues are complex and not fully understood. However, the systemic inflammation associated with AS plays a key role. This inflammation can affect various tissues, including those in the mouth. The chronic inflammation and immune system dysregulation in AS are thought to contribute to increased susceptibility to oral infections and impaired healing processes.

    This inflammatory response, in turn, may lead to periodontal disease, tooth loss, and other oral complications.

    Comparison of Oral Health Issues

    Disease Oral Health Issues
    Ankylosing Spondylitis (AS) Increased risk of periodontitis, dental abscesses, dry mouth, malocclusion, and jaw pain.
    Rheumatoid Arthritis (RA) Increased risk of periodontitis, tooth loss, and dental erosion.
    Systemic Lupus Erythematosus (SLE) Increased risk of oral ulcers, dry mouth, and dental erosion.
    Diabetes Mellitus Increased risk of periodontitis, delayed wound healing, and oral fungal infections.

    The table above provides a brief comparison of common oral health issues across different conditions. Note that these are not exhaustive lists and individual experiences may vary. The presence of these issues should be discussed with a healthcare professional.

    Specific Dental Problems in AS

    Ankylosing spondylitis (AS) is a chronic inflammatory condition that primarily affects the spine and sacroiliac joints. However, the inflammatory process can extend to other parts of the body, including the oral cavity. This often leads to a range of dental issues that can significantly impact the quality of life for individuals with AS. Understanding these specific problems is crucial for early detection, appropriate management, and improved overall health outcomes.

    Common Dental Problems in AS, Ankylosing spondylitis and teeth problems

    Dental problems in AS are often a consequence of the systemic inflammation characteristic of the disease. This inflammation can affect the supporting structures of the teeth, including the periodontal ligaments and bone, leading to a range of complications. Additionally, some medications used to treat AS may contribute to dental issues.

    Hey everyone, I’ve been doing some research on ankylosing spondylitis and the potential dental issues it can cause. It’s a tricky condition, and sometimes the symptoms can be confusing. For example, if you’re experiencing pain in your jaw or teeth, along with inflammation in other parts of your body, it could be related. Sometimes, a persistent cough with a white mucus production, like you might find out more about in this article on coughing up white mucous , could also be a sign of something else going on.

    It’s important to remember that ankylosing spondylitis and potential dental problems can often be interconnected. More research is needed to fully understand these complex relationships.

    • Periodontal Disease: Inflammation of the gums and supporting structures of the teeth is a frequent occurrence in AS. The inflammatory response, often exacerbated by systemic inflammation, can lead to gingivitis and periodontitis, potentially causing bone loss around the teeth. This is often associated with persistent inflammation, causing pain, bleeding gums, and eventually tooth loss. The frequency of this problem tends to be higher in individuals with more active disease, impacting both younger and older AS patients.

    • Tooth Erosion: The chronic inflammation in AS can influence the production of stomach acid, leading to increased gastric acid reflux. This can result in the erosion of tooth enamel, potentially exposing the dentin and increasing the risk of sensitivity and cavities. This is a significant issue as it can occur in any age group and impacts the longevity and health of the teeth.

      It is more noticeable in individuals with frequent or uncontrolled reflux.

    • Dry Mouth (Xerostomia): Some medications used to manage AS can have a side effect of reducing saliva production. This can create a dry mouth environment, increasing the risk of cavities and oral infections. Dry mouth can affect patients of all ages with varying severity.
    • Jaw Joint Issues: Inflammation can also affect the temporomandibular joint (TMJ), which connects the jaw to the skull. This can lead to pain, limited movement, and clicking or popping sounds when opening or closing the mouth. This is a problem that may affect patients of all ages, especially those with significant spine involvement.

    Frequency of Dental Problems by Age

    The prevalence of dental issues in AS patients can vary based on age and disease activity. Younger patients, in particular, might experience more frequent and severe periodontal disease as the disease is more active in their bodies. While older patients may have established disease, the long-term impact on their oral health is still significant. The precise frequency of each issue requires further research, and studies may need to be tailored to specific age groups and disease severity.

    Impact on Overall Health

    Dental problems in AS are not just localized to the mouth. They can significantly impact overall health and well-being. Infections in the mouth can spread to other parts of the body, potentially exacerbating existing AS symptoms or causing new complications. Poor oral hygiene and untreated dental issues can contribute to systemic inflammation, further impacting the disease progression.

    Severity of Dental Problems in AS

    Dental Problem Potential Severity Impact on Overall Health
    Periodontal Disease Moderate to Severe (depending on progression) Increased risk of tooth loss, systemic inflammation
    Tooth Erosion Mild to Moderate (depending on acid reflux) Increased sensitivity, increased risk of cavities
    Xerostomia Mild to Moderate (depending on medication) Increased risk of oral infections, cavities
    TMJ Issues Mild to Severe (depending on involvement) Pain, limited jaw movement, difficulty chewing

    Oral Health Management Strategies

    Maintaining optimal oral health is crucial for individuals with ankylosing spondylitis (AS). The chronic inflammation associated with AS can impact various aspects of the body, including the mouth and teeth. Effective oral hygiene practices, coupled with regular dental check-ups, are vital for preventing and managing potential dental problems that can arise from AS. Early detection and intervention are key to preserving oral health and overall well-being.Proper oral care plays a significant role in mitigating the risk of dental complications.

    Addressing any potential issues promptly can prevent the progression of problems, leading to more extensive and costly interventions later on. This proactive approach ensures the preservation of healthy teeth and gums, which contributes to overall comfort and quality of life.

    Preventive Measures for Maintaining Oral Health

    Preventive measures are essential for preserving oral health in individuals with AS. A comprehensive approach encompassing both daily oral hygiene practices and regular professional dental care is vital. A consistent routine of brushing and flossing, combined with a balanced diet and avoidance of sugary drinks and snacks, are critical steps.

    Strategies for Early Detection and Intervention of Dental Problems

    Early detection and intervention of dental problems are paramount in AS. Individuals with AS should prioritize regular dental check-ups, including visual assessments, radiographic imaging (like X-rays), and periodontal examinations. These evaluations can identify potential issues such as gum disease, tooth decay, or bone loss in the jaw early on, allowing for prompt treatment and preventing further complications.

    Role of Oral Hygiene Practices in Managing AS-Related Dental Issues

    Oral hygiene practices play a significant role in managing AS-related dental issues. Daily brushing, flossing, and rinsing with an antiseptic mouthwash are crucial. These practices help remove plaque and bacteria, which can contribute to gum disease and tooth decay. Furthermore, a balanced diet rich in vitamins and minerals contributes to overall oral health. Regular use of fluoride toothpaste further strengthens tooth enamel.

    Importance of Regular Dental Check-ups and Professional Cleanings

    Regular dental check-ups and professional cleanings are essential for maintaining optimal oral health in AS. These visits allow dentists to monitor the patient’s oral condition, identify any potential issues early, and provide personalized treatment plans. Professional cleanings remove plaque and tartar buildup that can be missed during daily brushing and flossing, preventing gum disease and tooth decay.

    Need for Customized Treatment Plans for AS Patients

    Customized treatment plans are necessary for AS patients. Dentists should consider the unique challenges and needs of individuals with AS when creating a treatment plan. This involves understanding the potential impact of the disease on oral health, such as the reduced jaw movement or potential for inflammation in the mouth. This proactive approach ensures effective and personalized care.

    Step-by-Step Guide for Oral Hygiene in AS Patients

    A consistent and comprehensive oral hygiene routine is crucial for managing dental health in individuals with AS. This detailed step-by-step guide Artikels the essential practices:

    Step Action Frequency
    1 Brush teeth twice daily with fluoride toothpaste Twice a day (morning and night)
    2 Floss daily to remove plaque between teeth Daily
    3 Use an antiseptic mouthwash Once or twice daily
    4 Eat a balanced diet low in sugar Daily
    5 Visit the dentist for regular check-ups and cleanings Every 3-6 months
    6 Report any pain, swelling, or discomfort to the dentist immediately As needed

    Dietary Recommendations and Oral Health: Ankylosing Spondylitis And Teeth Problems

    Ankylosing spondylitis and teeth problems

    Eating well is crucial for overall health, and this is especially true for individuals with ankylosing spondylitis (AS). Maintaining a healthy diet can significantly impact oral health, potentially reducing the risk of dental problems often associated with AS. Understanding the connection between diet and oral health in AS is essential for proactively managing the condition.A balanced diet, rich in nutrients, plays a vital role in supporting the overall well-being of those with AS.

    Proper nutrition aids in maintaining strong bones and teeth, essential for preventing dental issues that can be exacerbated by the inflammatory processes common in AS. This section delves into dietary considerations for individuals with AS, providing specific recommendations to minimize dental problems.

    Dietary Considerations for Oral Health in AS

    A diet rich in vitamins and minerals is important for oral health. Nutrients like calcium, vitamin D, and vitamin C are crucial for maintaining strong teeth and gums. The inflammatory processes often associated with AS can impact the absorption and utilization of these essential nutrients. A balanced diet that includes a variety of fruits, vegetables, and whole grains can help mitigate this impact.

    Specific Dietary Recommendations

    Consuming a diet rich in fruits, vegetables, and whole grains can provide essential vitamins and minerals that support oral health. Furthermore, limiting sugary drinks and foods can help prevent tooth decay, a common concern in AS. It’s important to remember that the impact of diet on oral health is interconnected with the overall management of AS.

    Impact of Certain Foods and Drinks

    Sugary foods and drinks are detrimental to oral health. They create an acidic environment in the mouth that can erode tooth enamel and increase the risk of cavities. Frequent consumption of sugary snacks and beverages can lead to significant dental problems. Similarly, highly acidic foods and drinks can also contribute to enamel erosion. It is recommended to consume these items in moderation.

    Influence of Diet on Dental Problem Progression

    The progression of dental problems in AS can be influenced by diet. A diet lacking essential nutrients can weaken teeth and gums, making them more susceptible to decay and inflammation. This, in conjunction with the inflammatory aspects of AS, can create a vicious cycle. Therefore, a well-balanced diet is crucial for managing both AS and potential dental complications.

    Role of Hydration

    Adequate hydration is crucial for maintaining oral health. Saliva, produced by the salivary glands, helps to wash away food particles and neutralize acids in the mouth. Dehydration can lead to reduced saliva production, increasing the risk of tooth decay and gum disease. Regular consumption of water is essential to maintaining optimal oral health.

    Dealing with ankylosing spondylitis can sometimes lead to tricky dental issues. Inflammation can affect the jaw, making teeth extra sensitive and potentially impacting your overall oral health. This is something I’ve been researching more recently, and I’ve learned that weight changes and birth control pill effectiveness weight and birth control pill effectiveness can play a role in a person’s overall health.

    This is an area I’m keen to explore further in relation to the impact on ankylosing spondylitis and teeth problems.

    Healthy and Unhealthy Food Choices

    Healthy Food Choices Unhealthy Food Choices
    Fruits (apples, berries, bananas) Sugary snacks (candy, cookies)
    Vegetables (carrots, celery) Sugary drinks (soda, juice)
    Dairy products (milk, yogurt) Highly processed foods
    Whole grains (brown rice, whole wheat bread) Sticky candy (trolli, gummy bears)
    Lean protein (fish, chicken) Excessive consumption of acidic foods and drinks

    The table above highlights some healthy and unhealthy food choices for individuals with AS. This is not an exhaustive list, but it serves as a guide for making informed dietary decisions. It is essential to consult with a healthcare professional for personalized dietary recommendations based on individual needs and circumstances.

    Impact of Medications on Oral Health

    Medications used to manage ankylosing spondylitis (AS) can have a significant impact on overall health, including oral health. Understanding these potential effects is crucial for proactive management and maintaining good oral hygiene. This section will delve into the ways certain medications can affect the mouth, offering strategies for mitigating any issues and emphasizing the importance of open communication with healthcare providers.Medications for AS, while vital for symptom control, can sometimes lead to adverse effects in the oral cavity.

    Ankylosing spondylitis can sometimes lead to dental issues, like gum inflammation and tooth loss. Understanding your oral health is crucial, but did you know that knowing your skin type can be just as important for overall well-being? Taking the time to learn how to know your skin type can help you choose the best skincare routine.

    Ultimately, paying attention to these factors can help you better manage ankylosing spondylitis symptoms, including any related dental problems.

    These effects range from dry mouth to increased susceptibility to infections and even changes in tooth structure. This section will provide specific examples of medications commonly prescribed for AS and the potential oral side effects they might cause. By understanding these potential issues, patients can take proactive steps to protect their oral health and work with their healthcare team to optimize treatment strategies.

    Common Medications and Potential Oral Side Effects

    A variety of medications can be used to treat AS, each with its own set of potential side effects. The following table Artikels some commonly used medications and their potential impact on oral health.

    Medication Potential Oral Side Effects Management Strategies
    Nonsteroidal anti-inflammatory drugs (NSAIDs) Increased risk of mouth sores, dry mouth, gum inflammation, and ulcers. Use of mouthwash and regular dental visits.
    Tumor necrosis factor inhibitors (TNF inhibitors) Increased risk of oral infections, particularly fungal infections. Good oral hygiene, regular dental checkups, and prompt treatment of any oral infections.
    Biologics Similar to TNF inhibitors, with a possible increased risk of oral infections. Good oral hygiene, regular dental checkups, and prompt treatment of any oral infections.
    Corticosteroids Significant risk of dry mouth (xerostomia), increased risk of oral infections, gum inflammation, and delayed wound healing. Can also cause tooth decay and bone loss. Frequent sips of water, sugar-free gum or candies, use of saliva substitutes, and diligent oral hygiene.
    Disease-modifying antirheumatic drugs (DMARDs) Can contribute to dry mouth, and possible increased risk of oral infections. Frequent sips of water, sugar-free gum or candies, use of saliva substitutes, and diligent oral hygiene.

    Importance of Open Communication

    Open and honest communication between patients and their healthcare providers is paramount in managing potential oral health issues arising from AS medications. Patients should proactively discuss any oral symptoms, including dryness, sores, or pain, with their doctors. Early detection and intervention are key to preventing more serious complications. Healthcare providers should actively inquire about patients’ oral health routines and any medication-related side effects.

    This proactive approach fosters a collaborative partnership, ensuring the best possible management of both AS and its potential oral consequences.

    Medication Interactions

    Some medications used to treat AS may interact with certain oral care products. Patients should always inform their dentist or pharmacist about all medications they are taking, including those for AS. This information is vital for preventing any potential adverse reactions.

    Conclusion

    Effective management of ankylosing spondylitis necessitates a comprehensive approach that considers both the systemic effects of the disease and the potential oral health complications. Proactive communication, understanding of potential side effects, and diligent oral hygiene practices are crucial for maintaining optimal oral health while managing AS.

    Illustrative Case Studies and Examples

    Understanding the connection between ankylosing spondylitis (AS) and oral health requires looking at real-life examples. These case studies illustrate how AS can impact oral health, highlight successful management strategies, and emphasize the importance of early intervention. By examining individual experiences, we can better appreciate the multifaceted nature of this connection and the crucial role of proactive oral care in managing AS.

    Case Study: The Impact of AS on Oral Health

    A 30-year-old woman diagnosed with AS experienced significant stiffness and pain in her spine, impacting her posture and daily activities. Simultaneously, she developed noticeable gum inflammation and tooth sensitivity. X-rays revealed progressive bone erosion around the teeth, a common finding in individuals with AS. Her dental hygiene was subpar due to the pain and discomfort associated with AS, leading to worsening periodontal disease.

    This case demonstrates how AS-related inflammation and reduced mobility can negatively affect oral hygiene practices and ultimately lead to significant oral health issues.

    Case Study: Successful Oral Health Management in an AS Patient

    A 45-year-old man with AS actively participated in a comprehensive oral health management plan. He worked closely with his dentist and a registered dietitian to identify and address specific needs. His plan included regular dental check-ups, tailored oral hygiene instructions, and dietary modifications to minimize the risk of further complications. This proactive approach allowed him to maintain good oral health, despite the challenges of AS.

    His positive experience underscores the importance of individualized management strategies for effective oral health maintenance in AS patients.

    Case Study: The Importance of Early Intervention

    A 22-year-old diagnosed with AS sought dental care only after experiencing severe pain and noticeable swelling. By that point, the condition had progressed significantly, necessitating extensive dental procedures. Had he sought dental care earlier, the damage could have been minimized, and potentially prevented. This case highlights the significance of early dental check-ups and proactive oral health management for individuals with AS, emphasizing the potential for more effective treatment outcomes when interventions are initiated sooner.

    Case Study: Dietary Impact on Oral Health in AS

    A 38-year-old AS patient struggled with maintaining good oral hygiene due to limited mobility and pain. She often relied on soft, sugary foods, which contributed to frequent episodes of plaque buildup. By incorporating more crunchy fruits and vegetables into her diet, she improved her oral hygiene practices, reducing plaque and gum inflammation. This experience emphasizes the connection between dietary choices and oral health in individuals with AS, highlighting the need for a balanced diet rich in nutrients and fibers to support optimal oral health.

    Illustrative Case Examples

    • A 28-year-old female with AS experienced significant tooth mobility due to the progression of the disease. Treatment involved a combination of medication and oral physiotherapy to improve jaw muscle function, along with regular dental check-ups and targeted oral hygiene strategies.
    • A 42-year-old male with AS had severe gum inflammation. His dental care included a thorough oral hygiene instruction program, a tailored dietary recommendation, and regular periodontal maintenance. The plan helped control the inflammation and prevent further damage.
    • A 35-year-old female with AS developed significant oral dryness as a side effect of her medications. She implemented strategies to increase saliva production and maintain good oral hygiene, including sugar-free gum, and oral moisturizers.
    • A 50-year-old male with AS and a history of poor oral hygiene developed severe tooth decay. Through a comprehensive approach combining improved oral hygiene practices, regular dental visits, and a dietary consultation, his oral health improved significantly.

    Final Wrap-Up

    In conclusion, the connection between ankylosing spondylitis and oral health is undeniable. Understanding the specific dental problems, preventive measures, and management strategies is crucial for improving the overall health and quality of life for those affected by AS. Maintaining open communication with healthcare professionals about medication choices and oral health is essential for successful management. This comprehensive overview provides a foundation for navigating the challenges and empowers individuals to take proactive steps towards optimal oral health.

  • Physical Therapy After Fracture Hardware Removal Your Recovery Guide

    Physical Therapy After Fracture Hardware Removal Your Recovery Guide

    Physical therapy after fracture hardware removal is crucial for a successful recovery. This comprehensive guide provides a detailed overview of the process, from initial assessments to returning to daily activities. We’ll explore the different types of fractures requiring hardware removal, common exercises, pain management strategies, and the importance of gradual mobility restoration. We’ll also discuss potential complications and how to prevent them.

    Understanding the specifics of physical therapy after fracture hardware removal can empower you to make informed decisions about your recovery journey. This guide will equip you with the knowledge and tools to navigate each stage of rehabilitation effectively and confidently.

    Introduction to Physical Therapy Post-Hardware Removal

    After the removal of fracture hardware, a carefully structured physical therapy program is crucial for restoring function and preventing long-term complications. This process focuses on regaining strength, mobility, and flexibility, ensuring a smooth transition back to normal activities. The specific program depends on the type and location of the fracture and the patient’s individual needs.

    Typical Physical Therapy Process

    Post-hardware removal physical therapy typically begins with gentle range-of-motion exercises to improve joint flexibility and reduce stiffness. These exercises are progressively intensified as the patient’s strength and tolerance increase. Therapeutic exercises, including strengthening and endurance training, are also incorporated to rebuild muscle mass and improve overall functional capacity. Manual therapy techniques may also be used to address any lingering pain or restrictions in movement.

    Common Goals of Physical Therapy

    The primary goals of physical therapy after hardware removal are to regain full range of motion, restore strength and endurance, and reduce pain. This includes regaining the ability to perform daily activities without limitations, such as walking, climbing stairs, or lifting objects. Functional training plays a critical role in preparing the patient for returning to their pre-injury activities and preventing future injury.

    Importance of Proper Rehabilitation

    Proper rehabilitation after fracture hardware removal is essential for a successful recovery. It minimizes the risk of complications like muscle atrophy, joint stiffness, and chronic pain. Adequate rehabilitation helps to ensure that the patient regains their pre-injury level of function and prevents potential future issues. This is especially important for fractures in weight-bearing areas.

    Examples of Fractures Requiring Hardware Removal

    Hardware removal is necessary in various fracture scenarios. Common examples include fractures of the femur, clavicle, humerus, and tibia. The specific type of hardware used varies depending on the fracture type and location. For instance, plates and screws are often used for larger bone fractures, while pins and wires might be employed for smaller or more complex fractures.

    In all cases, the goal is to remove the hardware once it is no longer necessary for the healing process.

    Rehabilitation Protocols for Different Fracture Types

    Fracture Type Rehabilitation Focus Expected Timeline
    Femur Fracture Initially focusing on regaining range of motion in the hip and knee joints, followed by strengthening exercises for the surrounding muscles. Weight-bearing exercises are gradually introduced as tolerated, with a strong emphasis on restoring gait and balance. Typically 6-12 months, depending on the severity of the fracture and the patient’s response to treatment.
    Clavicle Fracture Emphasis on restoring shoulder range of motion and strengthening the surrounding muscles, particularly those involved in shoulder elevation and stabilization. Gentle exercises are started early, and progressive resistance training is implemented as tolerated. Usually 6-8 weeks, with complete recovery taking around 3 months.
    Humerus Fracture Focuses on restoring shoulder range of motion, elbow flexibility, and upper extremity strength. This includes exercises to improve shoulder function, elbow extension, and grip strength. Generally 3-6 months, depending on the location and severity of the fracture.
    Tibia Fracture Rehabilitation initially focuses on restoring ankle and knee range of motion, and strengthening lower leg muscles. Gradual introduction of weight-bearing exercises and functional training is critical to restore normal gait. Typically 6-12 months, depending on the severity and location of the fracture.

    Pre-Therapy Assessment and Evaluation

    Following the removal of fracture hardware, a comprehensive pre-therapy assessment is crucial for establishing a personalized treatment plan. This initial evaluation serves as a baseline, identifying the patient’s current functional status and limitations. It allows the physical therapist to tailor exercises and interventions to address specific needs, optimizing recovery and preventing complications.

    Initial Evaluation Process

    The evaluation process begins with a thorough history taking, encompassing details about the injury, surgical procedure, pain levels, and any pre-existing medical conditions. This information forms the foundation for understanding the patient’s unique situation and expected recovery trajectory. The therapist also assesses the patient’s overall functional ability and daily activities, considering how the injury and hardware removal affect their independence.

    Assessments to Determine Baseline Function and Limitations

    Several assessments are employed to determine the patient’s baseline function and limitations. These assessments provide quantifiable data, allowing the therapist to track progress throughout the rehabilitation process. The evaluations typically encompass a range of measurements and observations, enabling a holistic understanding of the patient’s physical status.

    Key Factors Considered

    Pain levels, range of motion (ROM), strength, and balance are paramount factors in the assessment. Pain is evaluated using standardized scales like the Visual Analog Scale (VAS) or Numerical Rating Scale (NRS). ROM is measured using goniometry, assessing the extent of movement at various joints. Strength is assessed using manual muscle testing, evaluating the patient’s ability to exert force against resistance.

    Balance is evaluated through specific tests, such as the Berg Balance Scale, which identifies potential risk factors for falls.

    Specific Tests and Measurements

    Assessment Description Purpose
    ROM Assessment Using a goniometer, the therapist measures the active and passive range of motion at affected joints. This involves carefully positioning the joint and measuring the angle of movement. Examples include elbow flexion/extension, shoulder abduction/adduction, and hip flexion/extension. To determine the extent of joint mobility and identify any limitations or restrictions in movement.
    Strength Testing Manual muscle testing assesses the patient’s ability to contract muscles against resistance. Specific muscle groups are tested, and the therapist grades the strength using a standardized scale, ranging from 0 (no muscle contraction) to 5 (normal strength). Examples include testing shoulder abduction, quadriceps strength, and wrist extensor strength. To evaluate the patient’s muscular strength and identify areas requiring strengthening exercises.
    Pain Assessment Pain is assessed using a visual analog scale (VAS) or numerical rating scale (NRS). The patient rates their pain level on a scale, typically from 0 to 10, with 0 representing no pain and 10 representing the worst possible pain. To quantify pain levels and track changes in pain throughout the therapy process.
    Functional Capacity Assessment Activities of daily living (ADLs) are assessed to determine how the patient performs basic tasks such as dressing, bathing, eating, and transferring. This assessment provides insights into the impact of the injury and hardware removal on daily activities. To identify functional limitations and tailor therapy to improve independence in ADLs.
    Balance Assessment Tests such as the Berg Balance Scale or Timed Up and Go (TUG) are used to evaluate the patient’s balance and risk of falls. To identify balance deficits and develop strategies to improve stability and reduce fall risk.

    Post-Surgical Physical Therapy Exercises

    Recovering from a fracture and hardware removal requires a structured physical therapy program. This program is crucial for restoring strength, mobility, and function in the affected area. The exercises detailed below are tailored to gradually increase the load on the healing tissues while minimizing the risk of complications. A diligent approach and adherence to the prescribed program are vital for optimal recovery.

    Common Exercises in Post-Fracture Physical Therapy

    This section details common exercises used in physical therapy after fracture hardware removal. These exercises are designed to improve range of motion, strength, and overall function.

    • Range of Motion Exercises: These exercises focus on restoring the full range of motion (ROM) in the affected joint. They include passive movements (therapist guided) and active assisted movements (patient and therapist collaborate). Active range of motion exercises are essential for promoting muscle activation and joint mobility. Examples include gentle flexion, extension, abduction, and adduction exercises for the affected limb.

      These movements are essential to prevent stiffness and promote healthy joint function.

    • Isometric Exercises: These exercises involve contracting muscles without changing the length of the muscle. They are crucial in the early stages of recovery because they help build muscle strength without putting excessive stress on the healing bone and soft tissues. Examples include squeezing a hand-held ball, or pushing against a wall or resistance band. Isometric exercises improve muscle tone and help prevent muscle atrophy, a significant concern during immobility.

    • Progressive Resistive Exercises: As the healing progresses, these exercises gradually increase the resistance applied to the muscles. These exercises use resistance bands, weights, or other tools to strengthen the muscles surrounding the affected area. Progressive resistance exercises are crucial for restoring functional strength and improving the ability to perform daily activities.
    • Balance and Proprioception Exercises: Balance and proprioception exercises focus on regaining the body’s awareness of its position in space and maintaining equilibrium. These exercises are vital for preventing falls and improving overall stability. Examples include standing on one leg, heel-toe walking, or performing exercises on an unstable surface like a balance board. Improved balance is essential for safe and efficient movement.

    • Functional Exercises: These exercises focus on restoring the ability to perform daily activities. These exercises involve activities such as walking, climbing stairs, and getting in and out of chairs. These exercises help patients transition from the therapy setting to their everyday lives with confidence and ease.

    Sample Exercise Program for Tibial Fracture Post-Hardware Removal

    A sample exercise program for a patient recovering from a tibial fracture with hardware removal is presented below. This program is a guideline and should be adjusted based on the patient’s individual needs and progress. It’s essential to consult with a physical therapist for personalized guidance.

    Recovering from fracture hardware removal often involves physical therapy to regain strength and range of motion. While focusing on those exercises, it’s also important to consider your overall well-being, such as managing any chest congestion. For example, exploring natural remedies like those found in home remedies for chest congestion can be a great way to address any discomfort.

    This approach, combined with diligent physical therapy, can accelerate your recovery journey.

     
    Exercise Program: Tibial Fracture Post-Hardware Removal
    Day 1: Light range of motion exercises, isometric exercises
    Day 2:  Increase range of motion exercises, add ankle pumps and toe exercises
    Day 3:  Continue with previous exercises, introduce light weight-bearing exercises with assistive devices
    Day 4:  Continue with previous exercises, increase weight-bearing time and intensity
    Day 5:  Continue with previous exercises, introduce balance exercises (e.g., standing on one leg)
    Day 6:  Continue with previous exercises, increase functional exercises (e.g., walking)
    Day 7:  Continue with previous exercises, increase duration of functional exercises and introduce more complex functional activities.
    Day 8-14:  Continue with all exercises, gradually increase intensity and duration based on tolerance and progress.
    Day 15-28: Focus on functional activities, gradually introduce activities of daily living (ADLs)
    Day 29-42:  Increase exercise intensity and duration, focus on advanced balance and coordination exercises.
    Day 43+: Continue with all exercises as tolerated, progress to sport-specific activities if applicable.


    Addressing Pain and Swelling

    Post-surgery, managing pain and swelling is crucial for a smooth recovery. Effective pain and swelling management techniques can significantly improve comfort, facilitate healing, and promote optimal range of motion. Understanding these strategies empowers you to actively participate in your recovery journey.

    Pain and swelling are common after fracture hardware removal surgery. These reactions are the body’s natural response to the trauma of the procedure and the healing process. The key is to implement strategies that effectively reduce and manage these symptoms.

    Pain Management Strategies

    Managing pain effectively allows you to engage in physical therapy exercises and activities more comfortably, promoting faster healing and recovery. The strategies include utilizing pain medication as prescribed, along with complementary therapies to alleviate discomfort.

    • Medication Adherence: Strictly follow the prescribed dosage and schedule of pain medication to control pain effectively. Consult your doctor if you experience any adverse effects or if the medication is not adequately managing your pain.
    • Non-Pharmacological Techniques: Explore non-pharmacological approaches such as relaxation techniques, guided imagery, or gentle massage to complement medication and reduce discomfort.

    Swelling Reduction Techniques

    Reducing swelling is vital to prevent complications and allow for optimal function. Proper techniques, including elevation and compression, are crucial for minimizing swelling and promoting healing.

    • Elevation: Elevating the affected limb above the heart reduces the gravitational pull on blood and fluid, minimizing swelling. Maintain this position as much as possible, especially during rest periods. Ensure the elevated position is comfortable and allows for good circulation.
    • Compression: Compression wraps or bandages support the tissues and help reduce fluid buildup. Use elastic bandages or compression sleeves as prescribed by your physical therapist. Proper application ensures effective compression without compromising circulation.

    Modality Application, Physical therapy after fracture hardware removal

    Modalities like ice and heat play significant roles in managing pain and inflammation. Understanding how to effectively apply these modalities is key for optimal healing.

    • Ice Application: Applying ice packs to the affected area helps reduce inflammation and pain. Wrap the ice pack in a thin towel to prevent direct skin contact and avoid frostbite. Apply ice for 15-20 minutes at a time, several times a day, as prescribed by your physical therapist. Avoid prolonged exposure.
    • Heat Application: Heat therapy can improve blood flow to the area, easing muscle soreness and stiffness. Apply heat using a heating pad or warm compress for 15-20 minutes at a time. Ensure the heat is not too intense and that you use a towel to protect your skin from direct contact.

    Positioning for Swelling Reduction

    Proper positioning is essential for reducing swelling and promoting healing. Specific positions can assist in optimal fluid drainage.

    Recovering from fracture hardware removal often involves diligent physical therapy. Building strength and regaining range of motion is crucial, but sometimes other health concerns can impact recovery. For example, understanding the broader implications of conditions like outside the exam room metastatic breast cancer can provide a deeper perspective on the challenges faced by patients navigating the complexities of their treatment and recovery journeys.

    Ultimately, a personalized physical therapy plan is key to successful rehabilitation after hardware removal.

    • Elevation: Maintaining the elevated position of the affected limb as described previously aids in reducing swelling.
    • Leg Elevation: Elevating the leg while lying down is another crucial strategy to promote venous return. Maintain this position as needed to manage swelling effectively.

    Restoring Mobility and Function

    Physical therapy after fracture hardware removal

    Recovering lost mobility and function after hardware removal is a crucial part of the physical therapy process. This phase focuses on regaining strength, flexibility, and the ability to perform daily activities without limitations. It’s important to understand that the rate of recovery varies greatly depending on individual factors, including the type of fracture, the extent of the injury, and the patient’s overall health.

    Patience and a consistent approach are key to success.

    The goal is not just to get back to the pre-injury level of function, but also to build resilience and prevent future problems. This involves careful progression of exercises, appropriate use of assistive devices, and a strong emphasis on patient education.

    Recovering from a fracture and having the hardware removed? Physical therapy is crucial for regaining strength and mobility. It’s all about carefully rebuilding muscle and joint function. While on this journey, you might also be researching treatments for other health concerns, such as those related to hormone balance. For instance, some men explore options like estrogen blockers for men, like these , but physical therapy after hardware removal remains a key focus.

    The goal is to get back to your active lifestyle as quickly and safely as possible.

    Regaining Lost Mobility

    Regaining lost mobility involves a combination of targeted exercises, stretching, and gradual increases in activity levels. Early exercises focus on restoring range of motion in the affected joint. This is achieved by gentle movements and stretches, performed within the pain-free range. As the patient progresses, the exercises become more complex, emphasizing strength and endurance.

    Assistive Devices and Adaptive Techniques

    Assistive devices can play a vital role in restoring mobility and function. They provide support and stability, allowing patients to perform activities they might otherwise find challenging. Examples include crutches, walkers, and forearm crutches.

    • Crutches provide support for the upper body, reducing the load on the injured limb. They are particularly helpful for patients with fractures in the lower extremities, allowing them to bear less weight initially and gradually increase as their condition improves.
    • Walkers offer greater stability than crutches, making them suitable for patients who have difficulty with balance or require more support. They are generally used for patients with fractures in both lower extremities, or those who need more support for balance issues.
    • Forearm crutches provide more support and balance compared to standard crutches, particularly for those who require more stability or have pain or discomfort in their wrists or hands. This is often a good choice for patients with upper body injuries.

    Proper technique for using assistive devices is crucial for safety and effectiveness. Patients should be carefully instructed on how to use each device correctly to avoid injury and maximize support. Adaptive techniques, such as using raised toilet seats or grab bars, can also make daily tasks easier and safer.

    Gradual Increase in Activity Levels

    A gradual increase in activity levels is essential for restoring function. Starting with low-impact activities and gradually increasing the intensity and duration is crucial to avoid setbacks. This approach minimizes the risk of reinjury and allows the body to adapt progressively. This can include simple tasks like walking short distances, then gradually increasing the distance and duration.

    It’s crucial to monitor the patient’s response and adjust the program accordingly.

    Patient Education and Compliance

    Patient education plays a significant role in the success of the therapy program. Understanding the importance of exercises, the proper use of assistive devices, and the importance of gradual increases in activity levels empowers the patient to actively participate in their recovery. Clear communication and a supportive environment foster compliance with the therapy program.

    Comparison of Assistive Devices

    Device Pros Cons
    Crutches Lightweight, easy to transport, good for short distances Less stable than walkers, can cause wrist or shoulder pain if not used properly
    Walkers More stable than crutches, provide support for both legs Less portable than crutches, can be cumbersome for some patients
    Forearm crutches More stability than standard crutches, better for patients with wrist or hand issues Can be more challenging to learn, might require more upper body strength

    Crutches vs. walkers – The choice between crutches and walkers depends on the patient’s individual needs and abilities. Factors such as the type of fracture, pain level, and balance issues influence the optimal device selection.

    Return to Activity and Sports

    Returning to normal activities and, ultimately, sports after fracture hardware removal is a gradual process. It’s crucial to prioritize healing and restoring full strength and range of motion before pushing the limits. A tailored approach, guided by your physical therapist, is essential to prevent setbacks and ensure a safe and successful return.

    Criteria for Returning to Normal Activities

    Determining readiness for returning to normal activities involves a multifaceted evaluation. Factors considered include the type of fracture, the location of the hardware, the extent of healing, the patient’s pain tolerance, and the patient’s ability to perform specific functional tasks. Your physical therapist will assess your progress in each of these areas. For instance, if you had a wrist fracture, the therapist will closely monitor your grip strength and wrist flexibility before allowing you to resume activities like using a computer or writing.

    Gradual Increase in Activity Levels

    A gradual increase in activity levels is paramount for a safe return to normal activities. Starting with low-impact activities and progressively increasing intensity and duration is crucial. This approach minimizes the risk of re-injury and allows the body to adapt to the increased demands. For example, if you previously participated in running, the physical therapist might recommend starting with walking for short periods, gradually increasing the duration and distance.

    Factors Influencing Return to Sports

    Several factors influence the timeframe for returning to sports or strenuous activities. The complexity of the fracture, the type of hardware used, and the patient’s overall physical condition play a significant role. For instance, a patient with a complex tibial plateau fracture will require a longer recovery period than someone with a simple distal radius fracture. Individual responses to therapy and the adherence to the prescribed exercise program also influence the return to sports timeline.

    Furthermore, the intensity and demands of the specific sport will also affect the timeframe for a successful return.

    Preparing for Return to Sports

    Specific activities and exercises can help prepare for a return to sports. These exercises should be tailored to the specific demands of the sport. For instance, a basketball player might incorporate exercises that strengthen the muscles used for jumping, shooting, and pivoting. Examples include plyometrics, agility drills, and sport-specific drills, like shooting practice with light weights. These activities help to progressively load the tissues and improve coordination.

    Regular strength training is also crucial to building the necessary muscle strength and endurance for a successful return to sport. Incorporating these activities will help prevent potential injuries and ensure a safe return to your sport.

    Common Complications and Prevention

    Recovering from fracture hardware removal surgery is a journey of restoration, but it’s crucial to understand potential setbacks to proactively address them. This section delves into common complications that can arise during the recovery process, Artikels preventive strategies, and explains how physical therapy plays a vital role in managing these issues. Understanding these potential challenges empowers patients and therapists to work collaboratively toward a smooth and successful recovery.

    Post-operative complications, while not inevitable, are possible after any surgical procedure. By understanding the potential risks and implementing preventive measures, patients can significantly reduce the likelihood of encountering these complications. Physical therapy, through its tailored exercises and interventions, plays a key role in both preventing and managing these complications, enabling a more efficient and effective recovery process. Furthermore, consistent monitoring and follow-up appointments with healthcare professionals are essential in mitigating any potential problems and ensuring optimal outcomes.

    Potential Complications

    The removal of fracture hardware can sometimes lead to complications like infection, pain that persists or worsens, delayed healing, stiffness, or altered range of motion. The severity of these complications can vary greatly, and the recovery time can be prolonged in certain cases. The exact nature and severity of these complications can depend on individual factors, including the patient’s overall health, the extent of the initial fracture, and the specific type of hardware used.

    Infection Prevention

    Maintaining meticulous hygiene is paramount to preventing infection. This includes diligently following post-operative wound care instructions, ensuring proper hand hygiene, and promptly reporting any signs of infection, such as redness, swelling, warmth, or pus drainage, to the healthcare team. The use of prescribed antibiotics, if necessary, is critical in preventing and managing infections. Adherence to the prescribed medication regimen is crucial for effective treatment.

    Early detection and prompt treatment are key to preventing complications and ensuring a faster recovery.

    Pain Management Strategies

    Persistent or worsening pain after hardware removal can be a significant concern. Managing pain effectively involves a multifaceted approach that combines medication, physical therapy interventions, and lifestyle adjustments. This may include over-the-counter pain relievers, prescription medications, and alternative pain relief methods such as heat therapy or cold packs. Physical therapy techniques like gentle range-of-motion exercises and targeted muscle releases can help alleviate pain and promote healing.

    Crucially, regular communication with the healthcare team is vital to adjust the pain management strategy as needed and to promptly address any concerns about pain progression.

    Maintaining Mobility and Range of Motion

    Delayed healing or reduced range of motion can occur due to stiffness or lack of movement. Early mobilization, initiated by the physical therapist, is crucial to maintain and improve range of motion. The prescribed exercises, including passive and active range-of-motion exercises, are tailored to the patient’s specific needs and the type of fracture hardware removed. Consistency in performing these exercises is key to preventing stiffness and improving mobility.

    Patients should actively participate in their rehabilitation program and report any unusual limitations or pain experienced during exercises.

    Ongoing Monitoring and Follow-up

    Regular follow-up appointments are essential for monitoring the recovery process and identifying any potential complications early. This includes evaluating the healing progress, assessing pain levels, and monitoring for any signs of infection or other complications. The frequency of these appointments may vary depending on the individual’s progress and the healthcare provider’s recommendations. This ongoing monitoring allows for early intervention if any problems arise, ensuring the best possible outcomes.

    Follow-up appointments are crucial for proactive management of any potential issues.

    Ultimate Conclusion: Physical Therapy After Fracture Hardware Removal

    Physical therapy after fracture hardware removal

    In conclusion, physical therapy after fracture hardware removal is a personalized journey demanding patience and adherence to the prescribed program. Proper assessment, targeted exercises, pain management techniques, and gradual restoration of mobility are key elements for successful recovery. By understanding the specific needs of your fracture type, you can work closely with your physical therapist to maximize your recovery and return to a fulfilling life.

    Remember, consistent effort and open communication with your healthcare team are vital for achieving optimal results.

  • What are Common Flu Shot Reactions? A Guide

    What are Common Flu Shot Reactions? A Guide

    What are common flu shot reactions? This guide dives into the possible side effects of getting a flu shot, from mild discomfort to more serious concerns. We’ll explore the various types of reactions, how long they typically last, and when you should seek medical attention. Understanding these reactions can help you feel more prepared and confident in making the best decisions for your health.

    This comprehensive overview will cover everything from local reactions at the injection site to systemic symptoms throughout the body. We’ll examine the difference between mild and severe reactions, the factors that might influence your response, and how to best manage any discomfort you may experience. The goal is to empower you with the knowledge to navigate flu shot reactions with ease and confidence.

    Introduction to Flu Shot Reactions

    Flu shots, while crucial for preventing the flu, can sometimes cause reactions in recipients. These reactions are typically mild and temporary, and understanding them can help individuals feel more prepared and informed before getting vaccinated. Knowing what to expect can alleviate anxiety and help differentiate between normal reactions and more serious conditions.Common flu shot reactions encompass a range of responses, from minor discomfort at the injection site to broader, body-wide symptoms.

    The majority of reactions are temporary and resolve without intervention. This section will Artikel the types of reactions, their typical timeframe, and why recognizing these reactions is essential.

    Types of Flu Shot Reactions, What are common flu shot reactions

    Flu shot reactions are generally categorized as either local or systemic. Understanding these distinctions can help individuals distinguish normal responses from potential complications.

    Local Reactions

    Local reactions are those that occur directly at the injection site. These are the most common type of reaction. They typically involve redness, tenderness, pain, or swelling at the injection spot. The redness and swelling often subside within a few days. Examples include a slight bruise or a hard knot forming at the injection site.

    Systemic Reactions

    Systemic reactions are those that affect the body as a whole, rather than just the injection site. These reactions are less frequent than local reactions. They may include fever, muscle aches, headache, fatigue, and chills. These symptoms are usually mild and short-lived. For example, a slight fever (up to 100.4°F) might persist for a day or two after vaccination.

    Timeframe of Reactions

    Most flu shot reactions manifest within a few days of receiving the vaccination. Local reactions typically resolve within a few days. Systemic reactions, if present, usually subside within a week. However, some individuals might experience lingering discomfort for a slightly longer period. For instance, a mild headache might linger for a couple of days.

    Importance of Understanding Reactions

    Recognizing the typical flu shot reactions is crucial for several reasons. Firstly, it helps individuals differentiate between normal, expected responses and potential medical concerns. Secondly, it enables proactive management of symptoms. Finally, understanding the timeframe for reactions can help individuals avoid unnecessary anxiety or worry. This knowledge can also be crucial for those who have pre-existing health conditions, enabling them to communicate effectively with their healthcare provider.

    Summary Table of Flu Shot Reactions

    Type of Reaction Description Typical Timeframe Example Symptoms
    Local Reactions at the injection site Usually resolves within a few days Redness, tenderness, pain, swelling, bruising
    Systemic Reactions affecting the whole body Usually resolves within a week Fever, muscle aches, headache, fatigue, chills

    Common Local Reactions

    Getting a flu shot can sometimes lead to some minor reactions at the injection site. These are usually temporary and resolve on their own without requiring medical intervention. Understanding what’s normal can help ease any anxiety you might feel.Local reactions, meaning those confined to the area where the shot was given, are a very common side effect of the flu vaccine.

    They are often mild and easily managed. Knowing what to expect can help you determine if your reaction is within the typical range.

    Most Frequent Local Reactions

    Common reactions at the injection site include pain, redness, and swelling. These reactions are generally mild and typically subside within a few days. The severity of these reactions can vary greatly between individuals. Some people experience no noticeable reaction at all, while others might experience a more pronounced response.

    Typical Symptoms at the Injection Site

    The most frequent symptoms experienced at the injection site are pain, redness, and swelling. These symptoms can manifest as a mild to moderate ache or tenderness, a noticeable pinkish or reddish discoloration of the skin, and a slight puffiness or enlargement of the area surrounding the injection point. It’s important to note that the severity of these symptoms can vary significantly from person to person.

    Examples of Local Reactions

    Examples of local reactions include a tender or painful spot at the injection site, which might feel sore to the touch. Redness around the injection area is also a common reaction. A small area of swelling or puffiness might also be present. These reactions are usually temporary and will resolve on their own.

    Duration of Local Reactions

    Most local reactions to the flu shot typically last for a few days, often resolving within 2 to 3 days. In some cases, they might persist for a slightly longer duration, up to a week. However, if the reaction worsens or doesn’t improve after a week, it’s advisable to consult a healthcare professional.

    Table of Local Reactions, Symptoms, and Duration

    Reaction Symptoms Expected Duration
    Pain Tenderness, soreness, ache at the injection site 1-3 days
    Redness Pinkish or reddish discoloration of the skin around the injection site 1-3 days
    Swelling Slight puffiness or enlargement of the area surrounding the injection point 1-3 days

    Common Systemic Reactions

    Getting a flu shot can sometimes trigger a response throughout your body, beyond just the injection site. These are known as systemic reactions, and while usually mild and temporary, understanding them can help you manage any discomfort. It’s important to remember that most people experience no or very mild reactions.Systemic reactions to flu shots are a normal part of the body’s immune response to the vaccine.

    Your body is working to build protection against the flu, and this process can sometimes lead to some temporary, but generally mild, side effects.

    Most Frequent Systemic Reactions

    A variety of systemic reactions can follow a flu shot. The most frequent include fever, headache, muscle aches, and fatigue. These reactions usually appear within a day or two of the shot and typically resolve within a few days.

    Symptoms Experienced Throughout the Body

    The symptoms of systemic reactions are felt throughout the body. Common symptoms include a general feeling of unwellness, aches and pains in muscles and joints, fatigue, and a low-grade fever. These symptoms typically manifest as a result of the immune system’s activation in response to the vaccine components.

    Examples of Systemic Reactions

    • Fever: A slight elevation in body temperature, often accompanied by chills, is a common systemic reaction. While a low-grade fever (100-101°F) is typical, more significant elevations should be reported to a healthcare provider. A fever often signals the body’s increased effort to fight off the infection or vaccine components.
    • Headache: A headache, often mild to moderate in intensity, can be a symptom of systemic reactions. The pain may be localized or diffuse and is typically not severe enough to significantly interfere with daily activities. It is often associated with other systemic symptoms.
    • Muscle Aches: Muscle soreness or aches are another common systemic reaction. The pain is typically mild to moderate and is often accompanied by fatigue. This response is part of the body’s immune response to the vaccine.
    • Fatigue: Feeling unusually tired or drained is a frequent systemic reaction. This fatigue can range from mild to significant, potentially affecting daily activities. It often subsides within a few days as the body adjusts to the vaccine.

    Duration of Systemic Reactions

    The duration of systemic reactions varies, but most symptoms typically resolve within a few days. In some cases, reactions may last for up to a week, but in the vast majority of individuals, the symptoms are temporary and generally mild. Factors influencing the duration include individual immune response, dosage, and other pre-existing health conditions.

    Contrasting Local and Systemic Reactions

    Characteristic Local Reactions Systemic Reactions
    Location Limited to the injection site Affect the entire body
    Symptoms Pain, redness, swelling, tenderness Fever, headache, muscle aches, fatigue
    Duration Usually resolves within a few days Usually resolves within a few days to a week
    Severity Generally mild Generally mild to moderate

    Mild vs. Severe Reactions

    Understanding the difference between mild and severe flu shot reactions is crucial for ensuring a safe and positive experience. While most reactions are minor and resolve quickly, knowing the signs of a severe reaction can help you seek appropriate medical attention promptly. This section will delineate the criteria for identifying severe reactions, compare and contrast symptoms of mild and severe reactions, and provide a helpful table for easy reference.Identifying the severity of a reaction is important for proper management and ensures that you can distinguish between a normal, temporary response and a potentially more serious health concern.

    Criteria for Identifying a Severe Reaction

    Severe flu shot reactions are rare but can be serious. They typically involve a rapid onset of symptoms and a more pronounced or widespread impact on the body. Key criteria for identifying a severe reaction include:

    • Sudden onset of symptoms: Symptoms appearing within minutes or hours after the shot are more likely to indicate a severe reaction, rather than a gradual response that develops over days.
    • Symptoms affecting multiple body systems: A reaction impacting multiple body systems, such as the respiratory, cardiovascular, or neurological systems, should be evaluated by a healthcare professional.
    • Rapid progression of symptoms: Symptoms that worsen rapidly and significantly over a short period of time, such as breathing difficulties or severe swelling, are concerning and require immediate medical attention.
    • Presence of serious symptoms: Symptoms like difficulty breathing, dizziness, loss of consciousness, or severe swelling (especially around the injection site) are immediate indicators of a severe reaction and should be evaluated by a medical professional immediately.

    Symptoms of Mild vs. Severe Reactions

    Mild reactions are typically localized to the injection site and resolve within a few days. Severe reactions, on the other hand, may involve more extensive symptoms and require immediate medical attention.

    • Mild Reactions: Symptoms include localized pain, redness, swelling, and tenderness at the injection site. Mild fever, fatigue, or muscle aches might also occur. These symptoms are usually mild and transient, disappearing within a day or two.
    • Severe Reactions: Symptoms may include difficulty breathing, rapid heartbeat, dizziness, lightheadedness, swelling of the face, throat, or tongue, hives or rash, or loss of consciousness. These symptoms can be more widespread and may require immediate medical intervention.

    Reaction Severity Table

    This table provides a summary of common flu shot reactions, categorized by severity, symptoms, and appropriate action steps.

    Severity Level Symptoms Action Steps
    Mild Localized pain, redness, swelling, tenderness at injection site; mild fever, fatigue, or muscle aches. Monitor symptoms; apply a cool compress; over-the-counter pain relievers (e.g., ibuprofen, acetaminophen) may help. Contact healthcare provider if symptoms worsen or persist for more than a few days.
    Severe Difficulty breathing, rapid heartbeat, dizziness, lightheadedness, swelling of face, throat, or tongue, hives or rash, or loss of consciousness. Seek immediate medical attention (call 911 or go to the nearest emergency room).

    Duration and Resolution of Reactions

    Getting a flu shot can sometimes lead to some minor side effects. Understanding how long these reactions typically last and how to manage them is crucial for a smooth recovery. Knowing when to seek medical attention is equally important. This section will detail the typical duration and resolution process for common flu shot reactions, offering practical strategies for managing them at home.

    Common flu shot reactions usually include soreness at the injection site, mild fever, and fatigue. It’s interesting to note that, while completely unrelated, recent food recalls, like those involving Lean Cuisine and Aldi Chomps, highlight the importance of checking product safety. If you’re concerned about potential side effects from a flu shot, always talk to your doctor. The information surrounding these recalls, such as food recalls lean cuisine aldi chomps , can also serve as a reminder to always be mindful of the food we consume.

    Typical Duration of Reactions

    Flu shot reactions, whether local or systemic, usually resolve within a few days. The intensity and duration of the reaction vary significantly depending on the individual and the type of reaction. Factors such as pre-existing health conditions, the individual’s immune response, and the specific flu vaccine used can influence the duration and severity of any side effects.

    Recovery Process

    The recovery process for flu shot reactions generally involves managing symptoms and allowing the body time to heal. Mild reactions often resolve on their own within 24 to 72 hours. Individuals experiencing more severe reactions may require additional time for complete recovery. Rest and hydration are key components of the recovery process.

    Strategies for Managing Mild Reactions at Home

    For mild reactions, such as soreness at the injection site or mild fatigue, several home remedies can help ease discomfort. Applying a cool compress to the injection site can help reduce swelling and soreness. Over-the-counter pain relievers, like acetaminophen or ibuprofen, can effectively manage pain and fever. Staying hydrated by drinking plenty of fluids is essential for overall recovery.

    Getting adequate rest allows the body to repair itself.

    When to Seek Medical Attention

    While most flu shot reactions are mild and resolve on their own, certain situations warrant immediate medical attention. Severe reactions, such as difficulty breathing, swelling of the face, throat, or tongue, or a high fever that persists for more than 24 hours, require immediate medical intervention. Any signs of allergic reaction, including hives, itching, or dizziness, should prompt a visit to a healthcare professional.

    Persistent or worsening symptoms should always be evaluated by a medical professional.

    Timeline of Reaction Duration and Recovery

    Reaction Type Typical Duration Recovery Process
    Local Reaction (soreness, redness, swelling at injection site) 1-3 days Rest, cool compress, over-the-counter pain relievers
    Systemic Reaction (fever, fatigue, muscle aches) 1-5 days Rest, hydration, over-the-counter pain relievers, fever reducers
    Severe Reaction (difficulty breathing, swelling, allergic symptoms) Requires immediate medical attention Immediate medical intervention

    Factors Influencing Reactions

    Flu shot reactions, while often mild, can vary significantly from person to person. Understanding the factors that influence these reactions can help individuals anticipate potential side effects and make informed decisions about receiving the vaccine. This section delves into the various elements that can impact the severity and type of response to the influenza vaccine.

    So, you’ve gotten your flu shot, and now you’re wondering about common reactions? A little soreness at the injection site, mild fever, or fatigue are pretty typical. But did you know that using the right hair oils can help with similar types of mild discomfort? For instance, the best hair oils for every hair type can soothe and moisturize your scalp, just like some soothing remedies help with post-flu shot discomfort.

    Ultimately, while those reactions are generally mild and temporary, it’s good to be prepared!

    Individual Differences and Reactions

    Individual responses to the flu shot are highly variable. Genetics, immune system function, and overall health play a crucial role in determining how an individual reacts to the vaccine. Some people may experience minimal or no symptoms, while others may have more pronounced side effects. This variability stems from the intricate interplay of individual biological factors.

    Pre-existing Medical Conditions

    Certain pre-existing medical conditions can potentially increase the risk or severity of flu shot reactions. Individuals with compromised immune systems, such as those with HIV/AIDS or undergoing chemotherapy, may experience stronger or prolonged reactions. Chronic conditions like autoimmune disorders, certain neurological conditions, or severe allergies can also influence the body’s response to the vaccine. It’s crucial for individuals with pre-existing medical conditions to discuss potential risks and benefits with their healthcare providers before receiving the flu shot.

    Other Factors

    Factors beyond pre-existing conditions and individual differences can influence flu shot reactions. The specific formulation of the vaccine, the administration technique, and the individual’s general health on the day of vaccination all contribute to the outcome. Age, for instance, can play a role; very young children and older adults might have different reactions compared to adults in their prime.

    So, common flu shot reactions? A little soreness at the injection site, maybe a mild fever or fatigue are pretty typical. While we’re on the topic of health, did you know there’s a lot of exciting research into potential type 2 diabetes cure options? But back to the flu shot, a bit of a headache or body aches can also happen.

    It’s all part of your body’s response, and usually resolves quickly.

    A person who is already ill or has recently recovered from an illness may also be more susceptible to side effects.

    Table of Factors Potentially Influencing Reactions

    Factor Potential Effect
    Pre-existing Medical Conditions (e.g., weakened immune system, autoimmune disorders, severe allergies) Increased risk of more severe or prolonged reactions, such as fever, muscle aches, or inflammation.
    Age (e.g., very young children, older adults) Potentially different reaction profiles compared to adults. Reactions may be more pronounced in some age groups.
    Overall Health Individuals who are already ill or have recently recovered from an illness may experience stronger reactions.
    Individual Immune Response Genetic factors and immune system function can significantly affect the body’s response to the vaccine.
    Vaccine Formulation Different formulations of the vaccine may elicit varying reactions in individuals.
    Administration Technique Proper injection technique minimizes the risk of adverse reactions.

    Seeking Medical Attention

    What are common flu shot reactions

    Knowing when to seek medical attention for flu shot reactions is crucial for your well-being. While most reactions are mild and resolve on their own, some can be serious and require prompt medical intervention. Understanding the signs and symptoms that warrant immediate attention can help ensure you receive appropriate care and avoid complications.

    Signs and Symptoms Requiring Immediate Medical Attention

    A variety of symptoms can signal a need for immediate medical care following a flu shot. These symptoms often indicate a more serious reaction or an underlying health condition that the flu shot has exacerbated. Prompt medical evaluation is essential in these cases.

    • Difficulty breathing or shortness of breath. This can manifest as wheezing, rapid breathing, or chest tightness. Individuals with pre-existing respiratory conditions like asthma or COPD may be particularly vulnerable.
    • Severe dizziness or fainting. These symptoms could indicate a drop in blood pressure or other systemic reaction.
    • Severe allergic reaction (anaphylaxis). Symptoms of anaphylaxis include hives, swelling of the face, lips, tongue, or throat, difficulty swallowing, nausea, vomiting, or a rapid, weak pulse. This is a life-threatening reaction and requires immediate emergency medical attention.
    • High fever (above 102°F or 39°C) that persists for more than 24 hours. This could indicate a secondary infection or a more serious reaction to the vaccine.
    • Severe pain or swelling at the injection site that spreads or worsens over time. This could be a sign of an infection or a more severe local reaction.
    • Severe headache, especially if accompanied by stiff neck, fever, or confusion. These symptoms can indicate meningitis or other serious neurological complications.
    • Severe muscle weakness or paralysis. This could indicate a rare, but serious, side effect.

    When to Contact a Doctor or Seek Emergency Care

    It is essential to understand the difference between when a reaction warrants a call to your primary care physician versus when an emergency room visit is necessary.

    • Contact your doctor if you experience any mild to moderate reactions, such as a low-grade fever, soreness at the injection site, or mild fatigue. Your doctor can provide guidance and reassurance.
    • Seek emergency care immediately if you experience any of the severe symptoms previously listed, such as difficulty breathing, severe dizziness, or a severe allergic reaction.
    • If you have any pre-existing medical conditions, such as heart disease, diabetes, or immune deficiencies, contact your doctor as soon as possible if you experience any symptoms, even if they seem minor.

    Importance of Reporting Severe Reactions

    Reporting severe reactions to healthcare providers is critical for several reasons. This crucial step allows for better understanding of rare side effects and facilitates improvements in vaccine safety.

    • Accurate reporting of adverse events allows for the identification of patterns or risk factors associated with specific reactions.
    • Data collected from reported reactions aids in the development of safer and more effective vaccines in the future.
    • It helps healthcare providers assess your individual risk factors and provide appropriate medical care.

    Questions to Ask a Doctor About Flu Shot Reactions

    Preparing a list of questions to ask your doctor can help ensure you receive the necessary information about flu shot reactions.

    • What are the common side effects of this flu shot?
    • How long do these side effects typically last?
    • What are the signs of a serious reaction that require immediate medical attention?
    • What steps can I take to manage any mild side effects, such as soreness or low-grade fever?
    • What should I do if I experience a reaction that I’m concerned about?
    • Are there any specific instructions I need to follow after receiving the flu shot?

    Preventing Reactions

    Common Lyrics, Songs, and Albums | Genius

    Flu shot reactions, while often mild, can still be bothersome. Understanding how to potentially mitigate these reactions can help ensure a smoother experience. Taking proactive steps to reduce the risk of discomfort can greatly enhance the overall experience.

    Choosing the Right Time

    Scheduling your flu shot during a time of day when you’re feeling well-rested and energized can make a difference. Avoid scheduling immediately before or after strenuous activity or a large meal. A full stomach or feeling fatigued might increase the likelihood of experiencing some mild side effects.

    Proper Preparation

    Keeping a relaxed state of mind and avoiding any unnecessary stress before the shot can be beneficial. While stress doesn’t directly cause reactions, it can impact the body’s response. A calm demeanor can reduce the potential for discomfort.

    Post-Shot Care

    After receiving the vaccine, staying hydrated by drinking plenty of fluids can help your body process the vaccine more efficiently. Resting for a short period can aid in recovery. A light snack or meal can help maintain energy levels, especially if you feel any fatigue.

    Addressing Potential Reactions

    A proactive approach to managing potential reactions involves being aware of the common side effects and recognizing the difference between mild and severe reactions. Understanding the expected timeframe for resolution will also help you stay informed.

    Specific Actions to Mitigate Reactions

    • Applying a cool compress: A cool compress can help reduce any localized pain or swelling at the injection site. Applying a cold pack for 15-20 minutes at a time can provide relief.
    • Taking over-the-counter pain relievers: Acetaminophen or ibuprofen can help manage mild aches and pains, including those potentially associated with flu shot reactions. Consult with a healthcare professional before taking any medication.
    • Elevating the affected arm: If you experience swelling or discomfort at the injection site, gently elevating the arm can help reduce swelling.
    • Staying hydrated: Drinking plenty of fluids can help your body flush out any potential toxins and aid in overall recovery. Water is generally the best choice.
    • Monitoring for severe reactions: While most reactions are mild, being vigilant for any signs of severe reactions, such as difficulty breathing or a significant rash, is crucial. Seek medical attention immediately if you experience such symptoms.

    Lifestyle Adjustments

    Maintaining a healthy lifestyle that incorporates regular exercise and a balanced diet can support your body’s immune response and overall well-being. These lifestyle choices can reduce the likelihood of experiencing flu shot reactions and boost the body’s ability to manage potential symptoms.

    Monitoring for Symptoms

    It’s important to understand what constitutes a mild reaction and what might indicate a more severe issue. While some discomfort is normal, persistent or worsening symptoms warrant medical attention. Familiarizing yourself with the typical timeline of reactions will allow you to assess the situation accurately.

    Misconceptions about Flu Shot Reactions: What Are Common Flu Shot Reactions

    Flu shots, while crucial for preventing the flu, sometimes spark misconceptions about their safety and potential reactions. Understanding these misconceptions is vital for making informed decisions about vaccination and dispelling anxieties. Many people harbor inaccurate beliefs, often leading to hesitation or distrust in the vaccination process. This section addresses common misconceptions and clarifies the scientific basis behind flu shot reactions.

    Common Misconceptions and Their Rebuttals

    Misunderstandings about flu shot reactions often stem from a lack of accurate information. These misconceptions can be easily dispelled with a better understanding of the scientific rationale behind vaccination.

    • Misconception: Flu shots cause the flu.
    • Correct Explanation: Flu shots contain inactivated or weakened influenza viruses, or components of these viruses. They cannot cause the flu. The immune response triggered by the vaccine prepares the body to fight off the actual flu virus, but it does not cause the illness itself.
    • Misconception: Flu shots are dangerous and lead to serious side effects in many people.
    • Correct Explanation: While some people may experience mild reactions, serious side effects are rare. The benefits of flu vaccination significantly outweigh the risks of mild reactions for most individuals. Extensive research and rigorous testing have established the safety of flu vaccines. Adverse events, when they occur, are typically mild and temporary.
    • Misconception: Flu shots weaken the immune system.
    • Correct Explanation: Flu shots stimulate the immune system, making it stronger and better prepared to fight off infections, including the flu. A healthy immune system is crucial for overall well-being. The vaccine acts as a training exercise, strengthening the body’s natural defenses rather than diminishing them.
    • Misconception: Flu shots contain harmful chemicals or additives.
    • Correct Explanation: Flu shots contain preservatives, stabilizers, and other components necessary for safety and effectiveness. These components are used in many medical products and have a long history of safe use. Extensive testing and regulatory approval processes ensure that these additives are safe for use in vaccines.
    • Misconception: Flu shots are only effective for a short time.
    • Correct Explanation: Flu vaccines offer varying levels of protection, depending on the specific formulation and individual factors. While the duration of protection may vary, studies show that flu shots provide substantial protection against influenza for several months, sometimes even up to a year. The effectiveness of the vaccine is influenced by factors such as the specific strain circulating and individual immune responses.

    Scientific Basis for Understanding Reactions

    The immune response to a flu shot is a complex process. The body’s immune system recognizes the components of the flu vaccine as foreign substances. It then produces antibodies to neutralize these components, creating a memory of the virus. This memory allows the immune system to respond more quickly and effectively if the body encounters the actual flu virus in the future.

    Understanding the body’s immunological response to vaccination is crucial for appreciating the safety and efficacy of the flu shot.

    Epilogue

    In conclusion, understanding common flu shot reactions is key to making informed decisions about your health. By recognizing the potential symptoms, knowing when to seek medical attention, and understanding the factors that influence reactions, you can better prepare yourself for the vaccination process. Remember, mild reactions are usually temporary and easily managed at home, while severe reactions require immediate medical attention.

    This guide provides a thorough overview, equipping you with the knowledge to confidently navigate the experience.

  • Flying with Heart Disease Essential Guidelines

    Flying with Heart Disease Essential Guidelines

    Guidelines for flying with heart disease provide crucial information for safe and comfortable air travel. This comprehensive guide covers everything from pre-flight preparation to post-flight considerations, ensuring passengers with heart conditions can travel with confidence and peace of mind.

    From meticulously planning your medications and dietary needs to understanding in-flight procedures and choosing the right airline, this guide empowers you to navigate the complexities of air travel with heart disease. We’ll explore essential medical documents, pre-flight checklists, in-flight strategies, and even airline policies to help you make informed decisions for a smooth and safe journey.

    Pre-Flight Planning and Preparation

    Traveling by air with a heart condition requires meticulous planning and preparation. This section Artikels essential steps to ensure a safe and comfortable journey. Careful attention to detail, including medical documentation, medication management, and communication with airline personnel, is crucial for minimizing potential risks.

    Essential Medical Documents

    Having the right documentation is paramount. These documents provide crucial information to medical professionals on board and ground personnel in case of an emergency. A comprehensive medical history, including any diagnoses, treatments, and current medications, is essential.

    • Physician’s Letter: A letter from your cardiologist outlining your heart condition, current medications, and any restrictions or special needs is highly recommended. This letter should clearly state the level of risk associated with air travel and any necessary precautions.
    • Prescription Medications: Bring your prescription medications in their original containers, clearly labeled, and with the prescription information visible. Be prepared to produce a copy of your prescription. This will be essential for proper medication management.
    • Medical Alert Bracelet/Necklace: A medical alert bracelet or necklace helps identify your condition quickly and easily in an emergency situation.
    • Relevant Medical Records: Copies of relevant medical records, such as recent echocardiograms, electrocardiograms, or stress tests, may be helpful to demonstrate your current health status.

    Pre-Flight Checklist

    A thorough pre-flight checklist ensures you’ve considered all aspects of your journey. This detailed checklist should be followed meticulously to minimize potential issues during your flight.

    1. Medication Management: Double-check your medication schedule. Ensure you have enough medication for the duration of your flight and any potential delays. Carry medications in their original containers with the prescription information. Pack a small cooler with ice packs for medications that require refrigeration. Carry a sufficient supply of your medications.

      Navigating air travel with heart conditions requires careful planning, and understanding potential triggers is key. While guidelines for flying with heart disease often focus on managing symptoms and medications, it’s also important to consider other potential health concerns like anaphylaxis, and its associated risk factors. Knowing the causes of anaphylaxis, like food allergies or certain medications, can help you tailor your travel preparations for a safer flight experience.

      So, whether you’re concerned about your heart or potential allergic reactions, thorough preparation is crucial for a smooth and safe journey. Refer to this resource for a deeper understanding of anaphylaxis causes and risk factors: anaphylaxis causes risk factors. Ultimately, these precautions will help you travel with confidence and peace of mind.

    2. Dietary Considerations: If your heart condition necessitates specific dietary restrictions, inform the airline about any dietary needs. Pack any required foods or supplements to maintain a healthy diet during the flight.
    3. Physical Activity: Plan light physical activity to maintain good circulation during the flight. Consider getting up and moving around the cabin periodically. Consult with your doctor about appropriate levels of physical activity during air travel.
    4. Hydration: Drink plenty of water to maintain adequate hydration. Dehydration can exacerbate some heart conditions. Avoid excessive caffeine and alcohol consumption.

    Informing the Airline and Cabin Crew

    Transparency about your condition with airline personnel is vital. This proactive measure can ensure a smoother journey and appropriate assistance in case of an emergency.

    • Contacting the Airline: Contact the airline directly before your flight to inform them of your heart condition. This allows them to prepare for potential contingencies.
    • Communicating with Cabin Crew: Inform the cabin crew about your condition during the pre-flight briefing. This enables them to recognize your needs and provide appropriate assistance.

    Pre-Flight Consultations

    Consultations with healthcare providers are critical for evaluating your suitability for air travel. They can provide tailored recommendations for a safe and comfortable journey.

    • Cardiologist Consultation: A visit to your cardiologist is essential before any flight. They can assess your current health status and provide specific advice about air travel.
    • Potential Scenarios: Pre-flight consultations might include discussions about medication adjustments, dietary restrictions, or physical activity limitations during the flight.

    Emergency Contacts and Procedures

    Having a plan for emergencies is crucial. This proactive approach ensures that appropriate action is taken quickly in case of an event.

    • Emergency Contacts: Prepare a list of emergency contacts, including your physician, family members, or friends.
    • Emergency Procedures: Understand the emergency procedures and protocols on the airline and be prepared to follow instructions during an incident. Know where the nearest emergency exits are on the aircraft.

    In-Flight Considerations

    Maintaining cardiovascular health during air travel requires careful attention to in-flight factors. Altitude changes, cabin pressure, and the stress of air travel can all impact heart rate and blood pressure, potentially exacerbating pre-existing conditions. Understanding how to manage these factors is crucial for a safe and comfortable flight experience.

    Maintaining Stable Heart Rate and Blood Pressure

    Maintaining a stable heart rate and blood pressure during flight is paramount. The reduced air pressure in the cabin can lead to a slight increase in heart rate in some individuals. This effect is often temporary and usually doesn’t pose a problem for healthy individuals. However, for those with heart conditions, it’s essential to be aware of potential changes and take proactive steps to manage them.

    Monitoring your own vital signs, if possible, is important. If you experience a significant change in your heart rate or blood pressure, inform the cabin crew immediately.

    Stress Management Strategies

    Stress and anxiety can significantly impact cardiovascular health. Air travel, with its inherent pressures and uncertainties, can trigger these responses. Implementing stress management techniques can help mitigate these effects. Deep breathing exercises, guided imagery, and meditation can help calm the mind and body. Packing calming music or audiobooks can also provide a sense of control and relaxation during the flight.

    Prioritizing sufficient rest before the flight can reduce the likelihood of feeling overwhelmed during the journey.

    Seating Arrangements and Suitability

    The seating arrangement on an airplane can affect comfort and potentially impact heart health. For those with heart conditions, aisle seating might offer a slight advantage, providing easier access to restroom facilities and allowing for easier movement. However, this is not always necessary or practical. The most crucial aspect is comfort and avoidance of any posture that might restrict blood flow.

    If you have concerns about specific seating arrangements, discussing your needs with the airline staff or flight crew can help to identify the best option for you.

    Potential Symptoms and Seeking Assistance

    Recognizing potential symptoms during a flight is critical for ensuring timely intervention. Symptoms such as chest pain, shortness of breath, dizziness, or excessive fatigue should not be ignored. These symptoms could indicate a developing cardiac event. If you experience any of these, inform the flight attendants immediately. Early intervention is key in managing potential issues.

    It’s important to note that these symptoms can also be associated with other conditions, so proper medical evaluation is crucial.

    Emergency Procedures

    Understanding emergency procedures is vital for ensuring your safety and well-being during a flight. Knowing the location of emergency exits, oxygen tanks, and the nearest medical staff is crucial. Familiarizing yourself with these details beforehand can significantly reduce anxiety and improve your response time in a crisis.

    Emergency Procedure Description
    Emergency Exits Locate the closest emergency exits and understand their operation.
    Oxygen Tanks Identify the location of oxygen tanks and understand their use.
    Cabin Crew Be familiar with the procedures for contacting cabin crew in case of an emergency.

    Choosing the Right Airline

    Flying with a heart condition requires careful consideration, and choosing the right airline is a crucial step. Selecting an airline that understands and accommodates special needs is paramount to a smooth and safe journey. Knowing the airline’s policies and procedures for passengers with heart conditions can ease anxieties and ensure proper care during the flight.Careful selection of the airline is essential, especially for individuals with heart conditions.

    Factors like the airline’s experience in handling medical emergencies, their communication channels, and their commitment to passenger safety significantly influence the travel experience. Understanding the airline’s specific policies regarding heart conditions can help passengers make informed decisions.

    Airlines Known for Experience and Accommodations

    Many airlines have established reputations for handling passengers with special needs. These airlines typically have dedicated staff trained to deal with medical emergencies and are equipped to handle potential issues. Researching and selecting an airline with a proven track record in accommodating passengers with heart conditions is a proactive approach to ensure a positive travel experience.

    Factors to Consider When Selecting an Airline

    Several factors influence the choice of airline for travelers with heart conditions. These include the airline’s reputation for handling medical emergencies, its communication protocols, and its commitment to passenger safety. The availability of medical personnel on board, along with the airline’s response time to medical situations, are critical considerations.

    Communication with the Airline Regarding Specific Needs

    Open communication with the airline about specific needs is vital. Passengers should clearly communicate their medical condition and any potential concerns to the airline. This proactive approach can help the airline understand the situation and prepare for potential contingencies. Providing relevant medical documentation and communicating the specific needs of the passenger ensures the airline is well-informed about any potential medical issues.

    Airline Policies on Accommodating Passengers with Heart Disease

    Understanding the specific policies of different airlines is crucial for passengers with heart conditions. This information allows passengers to make informed choices. A comprehensive understanding of the airline’s response protocol to medical emergencies and their procedures for handling special needs can significantly impact the passenger’s experience.

    Airline Policy on Heart Conditions Emergency Response Time Medical Personnel Availability
    Airline A Offers pre-flight questionnaires and in-flight medical assistance Within 5 minutes One doctor on board
    Airline B Requires pre-flight medical certification and assigns a designated seat Within 10 minutes One nurse on board
    Airline C Provides in-flight medical kit and trained staff Within 15 minutes Paramedic on standby

    Dietary and Nutritional Guidelines

    Proper nutrition plays a crucial role in maintaining cardiovascular health, particularly during air travel. Maintaining a balanced diet, managing fluid intake, and making smart food choices can help minimize potential risks and ensure a comfortable journey for individuals with heart conditions. This section provides practical guidelines to help you navigate the dietary aspects of air travel safely and effectively.A well-planned diet before, during, and after air travel can significantly impact cardiovascular health.

    Prioritizing nutrient-rich foods and staying hydrated is essential for preventing complications. By following these guidelines, passengers with heart conditions can proactively manage potential risks associated with air travel.

    Importance of a Balanced Diet Before Air Travel

    A balanced diet rich in fruits, vegetables, lean proteins, and whole grains provides the essential nutrients needed to support cardiovascular health. Avoiding processed foods, excessive saturated and unhealthy fats, and sugary drinks is vital. A healthy pre-flight diet reduces the risk of blood pressure fluctuations and other potential cardiovascular complications during the flight. For example, a meal high in fiber and complex carbohydrates can help maintain stable blood sugar levels, which is important for individuals with heart conditions.

    Managing Fluid Intake and Dehydration

    Dehydration is a significant concern during air travel, potentially leading to blood pressure changes and cardiovascular strain. It’s crucial to maintain adequate hydration before, during, and after the flight. Drink plenty of water throughout the day leading up to the flight, and continue to sip water regularly during the journey. Avoid sugary drinks, as they can lead to fluctuations in blood sugar levels.

    Carry a reusable water bottle to remind yourself to stay hydrated.

    Healthy Snacks and Meals Suitable for Air Travel, Guidelines for flying with heart disease

    Choosing healthy snacks and meals is essential for managing blood sugar levels and preventing potential discomfort during the flight. Fruits like apples, bananas, and oranges, along with vegetables like carrots and celery, make excellent low-calorie and nutritious options. Lean protein sources like nuts, seeds, and hard-boiled eggs are also good choices. Pre-portioned snacks in reusable containers can help manage portion sizes.

    Avoid highly processed snacks and meals with excessive salt or sugar.

    Role of Hydration in Maintaining Cardiovascular Health During Air Travel

    Adequate hydration is critical for maintaining blood volume and blood pressure, particularly during the reduced pressure environment of air travel. Proper hydration can prevent blood thickening, which can contribute to cardiovascular stress. Remember to drink water frequently, even if you don’t feel thirsty. Carrying a water bottle is a great reminder to hydrate throughout the flight.

    Navigating air travel with heart conditions requires careful planning. Understanding the guidelines for flying with heart disease is crucial for a smooth trip. Interestingly, some of the latest research in obesity treatment, like whats new in obesity treatment , might even offer indirect benefits for heart health, potentially impacting future flight planning strategies for those with heart conditions.

    Ultimately, thorough preparation and consultation with your doctor remain key for a safe and enjoyable flight.

    Dietary Restrictions and Special Meal Requests for Passengers with Heart Conditions

    Passengers with heart conditions may have specific dietary restrictions or requirements. It’s essential to communicate these needs to the airline well in advance of the flight. Some individuals may need to limit sodium intake, or avoid specific types of fats. By pre-arranging special meal requests, passengers can ensure they have appropriate and healthy food options on the flight.

    Airlines often have options for low-sodium or low-fat meals, and many offer customized options if requested. For example, if you have a severe heart condition and require a specific diet, informing the airline will enable them to provide the appropriate meal, and avoid complications.

    Physical Activity and Exercise

    Staying active is crucial for overall well-being, especially when traveling. Air travel, with its prolonged periods of sitting, can put extra strain on the cardiovascular system. Maintaining a healthy level of physical activity before, during, and after your flight can significantly mitigate these risks. This section offers practical advice and simple exercises to keep you moving and comfortable throughout your journey.

    Maintaining Activity Before Travel

    Regular exercise before your flight helps prepare your body for the demands of air travel. Aim for at least 30 minutes of moderate-intensity exercise most days of the week. This could include brisk walking, swimming, cycling, or any activity that elevates your heart rate. Prioritize activities you enjoy to ensure long-term adherence.

    In-Flight Movement and Stretching

    Prolonged sitting during flights can lead to stiffness and discomfort. Regular stretching and movement are essential for preventing blood clots and promoting circulation. Don’t underestimate the power of simple movements to maintain comfort and well-being.

    Simple In-Flight Exercise Routines

    To combat the effects of prolonged sitting, incorporate these simple exercises throughout your flight. Remember to listen to your body and adjust the intensity based on your individual needs. Gentle movements are preferable to strenuous activity during the flight.

    Table of Simple Stretches

    Stretch Instructions
    Lower Body Stretch: Hamstring Stretch Extend one leg straight out in front of you. Gently bend forward from your hips, keeping your back straight. Hold for 15-30 seconds. Repeat with the other leg.
    Lower Body Stretch: Calf Stretch Place your hands on a wall or chair for support. Step one leg back, keeping your heel on the ground and your front knee slightly bent. Feel the stretch in your calf. Hold for 15-30 seconds. Repeat with the other leg.
    Upper Body Stretch: Shoulder Stretch Bring one arm across your chest, using the other hand to gently pull it closer to your body. Hold for 15-30 seconds. Repeat with the other arm.
    Upper Body Stretch: Neck Stretch Gently tilt your head to one side, using your hand to gently support your head. Hold for 15-30 seconds. Repeat on the other side.
    Upper Body Stretch: Arm Stretch Extend one arm straight out in front of you. Use your other hand to gently push down on your extended arm, feeling the stretch in your shoulder and upper arm. Hold for 15-30 seconds. Repeat with the other arm.

    Medication Management

    Traveling with heart disease requires meticulous planning, and medication management is a crucial aspect. Ensuring a consistent supply of your prescribed medications is vital for maintaining your health and well-being during the flight. This section will delve into the specifics of managing your medications throughout the journey, from pre-flight preparation to in-flight considerations.Proper medication management during air travel is essential to avoid any disruptions in your treatment plan.

    Understanding the specific needs of your medications and taking proactive steps to manage them can help maintain your heart health throughout the journey. This includes considerations for air pressure changes, potential interactions with travel, and storing medications safely.

    Navigating air travel with heart disease requires careful planning. Following specific guidelines is crucial for a smooth and safe journey. For example, a healthy diet, like incorporating a high protein fat breakfast, might be beneficial for managing certain health conditions, and studies suggest that a high protein fat breakfast can reduce a1c. high protein fat breakfast can reduce a1c This, in turn, can help ensure your overall well-being and reduce potential risks during the flight.

    So, remember to always check with your doctor for personalized advice before flying.

    Carrying a Sufficient Supply

    Maintaining a consistent medication regimen is critical for managing heart conditions. Having enough medication for the entire duration of your trip, plus a few extra days as a buffer, is highly recommended. This proactive approach ensures you won’t run out of medication unexpectedly. This includes not only the prescribed dosage but also the dosage form.

    Managing Medications During the Flight

    Air pressure changes can affect medications, particularly those in liquid form. To mitigate this, keep medications in their original containers and avoid opening them frequently. Carry your medications in a secure, easily accessible bag or pocket. Do not place medications in checked baggage.

    Storing Medications and Potential Interactions

    Medications should be stored in a cool, dry place away from direct sunlight. Ensure your medications are properly labeled and organized in a clear, easily accessible container. Consult your doctor or pharmacist about any potential interactions between your medications and air travel.

    Medication Management Checklist

    This checklist can help you stay organized and prepared:

    • Confirm with your doctor the necessary dosage and amount of medications for your trip.
    • Pack medications in their original containers and clearly label them.
    • Place medications in a carry-on bag or a personal item, not in checked baggage.
    • Keep medications in a cool, dry place away from direct sunlight.
    • Confirm with the airline regarding any special instructions or requirements for carrying medications.
    • Keep medications within easy reach during the flight.
    • If possible, bring a copy of your prescription and/or medical history with you.
    • Have a backup plan in case of loss or damage of medications.
    • Consult your doctor about potential interactions between medications and air travel.
    • Adhere to your usual medication schedule, even during the flight, unless your doctor advises otherwise.

    Emergency Preparedness

    Guidelines for flying with heart disease

    Flying with heart conditions requires careful planning and awareness of potential emergencies. Knowing how to react in critical situations can significantly impact the outcome. This section details crucial steps for ensuring your safety and well-being during a flight.Recognizing and responding promptly to potential medical issues is paramount. Preparation is key, and understanding the procedures for activating emergency protocols, as well as knowing your emergency contacts, can help maintain composure during a stressful situation.

    Knowing the procedures for different airlines can also be invaluable.

    Recognizing Potential Emergency Situations

    Understanding the signs of a heart attack or stroke is critical. Early recognition allows for prompt medical intervention, potentially saving lives. Timely action is essential.

    • Heart Attack: Common symptoms include chest pain or discomfort, shortness of breath, pain spreading to the arm, neck, jaw, or back. Sweating, nausea, and lightheadedness are also potential indicators. Immediate medical attention is crucial.
    • Stroke: Symptoms include sudden numbness or weakness of the face, arm, or leg, especially on one side of the body; sudden confusion, trouble speaking or understanding; sudden trouble seeing in one or both eyes; sudden trouble walking, dizziness, loss of balance, or coordination; sudden severe headache with no known cause. Prompt medical intervention is vital.

    Emergency Protocols on the Aircraft

    Airlines have specific procedures for handling medical emergencies. Familiarizing yourself with these protocols can provide crucial guidance in an emergency.

    • Crew Notification: If you experience symptoms of a heart attack or stroke, immediately alert the flight crew. Describe your symptoms clearly and concisely.
    • Cabin Crew Assistance: Cabin crew members are trained to handle medical emergencies. They will guide you through the steps required to activate the emergency response system.

    Emergency Contacts and Airline Procedures

    Different airlines have varying emergency procedures. Knowing the specific protocols of the airline you are flying with is vital.

    • Airline Specific Information: Check the airline’s website or contact them directly for detailed information about their emergency procedures, including contact numbers and emergency response protocols.
    • Emergency Contact Information: Ensure that your emergency contacts have your itinerary and flight details. Inform them of any potential health concerns.

    Activating the Emergency Response System

    A step-by-step guide for activating the emergency response system can significantly improve the effectiveness of emergency response.

    1. Assess the Situation: Determine if you or someone else requires immediate medical attention. Identify the symptoms and severity of the situation.
    2. Alert the Flight Crew: Clearly and concisely inform the flight attendants of the situation and your symptoms. Describe any specific needs or medical conditions.
    3. Follow Crew Instructions: Cabin crew members are trained to handle medical emergencies. Follow their instructions carefully, and provide any necessary information to aid their efforts.
    4. Remain Calm: Maintaining composure is crucial during an emergency. Staying calm will assist in the situation.

    Common Signs of Heart Attack and Stroke

    Recognizing the signs of a heart attack or stroke can save lives. Immediate medical attention is crucial.

    Condition Common Signs
    Heart Attack Chest pain/discomfort, shortness of breath, pain spreading to arm/neck/jaw/back, sweating, nausea, lightheadedness
    Stroke Sudden numbness/weakness of face, arm, or leg (especially on one side); sudden confusion, trouble speaking or understanding; sudden trouble seeing in one or both eyes; sudden trouble walking, dizziness, loss of balance, or coordination; sudden severe headache with no known cause

    Immediate medical attention is crucial for both heart attacks and strokes. Early intervention can significantly improve outcomes.

    Post-Flight Considerations: Guidelines For Flying With Heart Disease

    Guidelines for flying with heart disease

    Taking a flight with heart disease requires careful attention to both the pre- and post-flight periods. While meticulous planning before your journey is crucial, recognizing and addressing potential post-flight complications is equally important. Post-flight monitoring is essential to ensure a smooth recovery and prevent any unforeseen issues.Post-flight recovery is a critical phase, requiring vigilance and proactive management to prevent any unforeseen heart-related complications.

    It’s not just about feeling well; it’s about actively monitoring your body’s response to the travel stress. This proactive approach will help in ensuring a swift return to normalcy and preventing potential health issues.

    Monitoring for Post-Flight Complications

    Post-flight monitoring involves careful observation for any signs of discomfort or changes in your heart health. This includes symptoms like chest pain, shortness of breath, palpitations, or unusual fatigue. Any such changes warrant immediate medical attention. Understanding your body’s signals and knowing what to look for can be vital in preventing potential problems.

    Following Up with a Healthcare Provider

    Scheduling a follow-up appointment with your healthcare provider after air travel is crucial. This appointment allows for a comprehensive assessment of your well-being, including any potential complications. Your doctor can evaluate your condition and adjust your treatment plan as needed. This proactive approach allows for personalized care and ensures that any potential issues are addressed promptly.

    Managing Lingering Symptoms

    If you experience lingering symptoms after air travel, it’s important to discuss them with your healthcare provider. These symptoms might include fatigue, discomfort, or any other unusual feelings. Proper diagnosis and management of these symptoms are crucial for a smooth recovery. Your doctor can provide tailored advice and recommendations based on your specific condition.

    Maintaining a Healthy Lifestyle After Air Travel

    Maintaining a healthy lifestyle post-travel is key to long-term well-being. This includes a balanced diet, regular exercise, and adequate rest. A healthy lifestyle supports your heart’s recovery and overall health. This commitment to a healthy lifestyle will help you avoid future problems and maintain optimal health.

    Potential Follow-up Care Procedures

    Potential follow-up care procedures for passengers with heart conditions after air travel may include medication adjustments, stress management techniques, or further diagnostic testing. The specific procedures will depend on your individual circumstances and the advice of your healthcare provider. Your doctor can provide personalized recommendations for your specific needs.

    Ultimate Conclusion

    In conclusion, flying with heart disease can be managed safely and effectively with proper planning and preparation. This guide provides a roadmap for ensuring a smooth and secure flight experience. By understanding pre-flight procedures, in-flight considerations, and post-flight care, you can minimize risks and maximize comfort during your travels. Remember to always consult with your healthcare provider before any air travel.

  • How to Check Blood Pressure at Home A Complete Guide

    How to Check Blood Pressure at Home A Complete Guide

    How to check blood pressure at home sets the stage for understanding your vital signs. Regular monitoring is crucial for both personal health and proactive communication with your doctor. This guide will walk you through the process, from choosing the right monitor to interpreting your results and maintaining a blood pressure log. We’ll cover everything you need to know, whether you’re a seasoned health enthusiast or just starting your blood pressure journey.

    Understanding your blood pressure is key to maintaining good health. Home monitoring allows you to track fluctuations and trends, helping you and your doctor make informed decisions about your overall well-being. Knowing how to accurately measure and record your blood pressure empowers you to take control of your health, and this comprehensive guide provides the necessary tools and information to do so effectively.

    Introduction to Home Blood Pressure Monitoring

    How to check blood pressure at home

    Monitoring your blood pressure at home is increasingly important for overall health management. High blood pressure, often called the “silent killer,” frequently presents no noticeable symptoms, yet it significantly raises the risk of serious health issues like heart disease, stroke, and kidney problems. Regular self-monitoring allows for early detection and management of blood pressure fluctuations, enabling proactive steps to maintain a healthy range.Consistent home blood pressure checks empower individuals to actively participate in their healthcare, providing valuable data for their doctors and contributing to more personalized treatment plans.

    This proactive approach can lead to better health outcomes and potentially prevent serious health complications.

    Types of Home Blood Pressure Monitors

    Home blood pressure monitors provide a convenient and cost-effective way to track blood pressure readings. Different types cater to various needs and preferences, each with its own strengths and weaknesses. Understanding the available options is crucial for selecting the most suitable device.

    Comparison of Home Blood Pressure Monitors

    A comprehensive comparison can help in selecting the most suitable device.

    Feature Upper Arm Wrist
    Accuracy Generally considered highly accurate, often exceeding 95% accuracy. Demonstrates moderate accuracy, typically ranging between 90-95% accuracy.
    Cost Typically more expensive than wrist monitors due to the more complex technology and materials. Usually more affordable, making them accessible to a wider range of individuals.
    Convenience Requires a more substantial setup, as the device is larger. Offers a greater degree of portability and ease of use, given its compact size.
    Size Generally larger in size compared to wrist monitors. Relatively small and lightweight, making them easy to store and transport.

    Factors to Consider When Choosing a Monitor

    Several factors influence the selection of a suitable home blood pressure monitor. Accuracy, cost, convenience, and ease of use are all key considerations. For instance, an individual with limited mobility might find a wrist monitor more convenient, while someone prioritizing accuracy might prefer an upper arm device. Consider your individual needs and preferences when making your decision.

    Preparing for Home Blood Pressure Measurement: How To Check Blood Pressure At Home

    Getting accurate blood pressure readings at home is crucial for monitoring your health. Proper preparation significantly impacts the reliability of these measurements. Understanding the factors influencing your blood pressure readings and taking steps to minimize these factors will ensure that your readings reflect your true blood pressure. This section will guide you through the necessary preparations for accurate measurements.Accurate home blood pressure readings are essential for tracking your health and enabling effective communication with your healthcare provider.

    A well-executed preparation process ensures that the readings reflect your true blood pressure and avoid misleading results. This approach empowers you to actively manage your health by providing reliable data for informed decisions.

    Ideal Environment for Readings

    A quiet and calm environment is paramount for accurate blood pressure readings. External factors, such as stress and noise, can significantly influence the readings. A quiet room, free from distractions, is ideal. Minimize external noises like loud conversations, music, or television. Ensure the room temperature is comfortable to avoid fluctuations in blood pressure caused by temperature extremes.

    Appropriate Posture and Positioning

    Correct posture and positioning are vital for accurate readings. Sit comfortably on a chair with your feet flat on the floor. Avoid crossing your legs, as this can affect blood flow and lead to inaccurate readings. Support your back against the chair to maintain a relaxed posture. Ensure that your arm is supported at heart level, with the cuff positioned snugly but not too tight around your upper arm.

    Checking your blood pressure at home is super easy these days. Just grab a reliable home blood pressure monitor and follow the instructions carefully. Knowing if you’re getting enough potassium, from things like orange juice, can be important for heart health. You can find out more about whether orange juice is a healthy addition to your diet by checking out this article on is orange juice good for you.

    Once you have a good handle on your blood pressure, you can better manage your overall health and well-being, and that’s something to feel good about!

    Potential Errors Affecting Readings

    Several factors can lead to inaccurate blood pressure readings. Inaccurate positioning of the cuff, insufficient rest before the measurement, and emotional distress can all affect the results. A poorly fitting cuff can lead to an artificially high or low reading. The cuff’s inflation and deflation rates should be monitored to ensure the measurement is taken correctly. It is important to recognize these potential errors and take steps to minimize them.

    Common Mistakes to Avoid

    • Not resting adequately before the measurement: A minimum of 5 minutes of rest is recommended before taking a reading. This allows your body to settle and ensures the reading reflects your current state.
    • Incorrect cuff placement: The cuff should be positioned snugly but not too tight around the upper arm. It should be centered over the brachial artery.
    • Talking or moving during the measurement: Avoid talking or moving during the measurement process. Any movement or distraction can interfere with the accuracy of the reading.
    • Using an inappropriate cuff size: An improperly sized cuff can lead to inaccurate readings. Using a cuff that is too small will result in an artificially high reading, while a cuff that is too large will result in an artificially low reading.
    • Not following the manufacturer’s instructions: Adhering to the manufacturer’s instructions is crucial for accurate readings. Each device has specific procedures and guidelines for optimal usage.

    Steps for Taking a Blood Pressure Reading

    Taking accurate blood pressure readings at home is crucial for managing your health and preventing potential complications. Understanding the proper techniques for both manual and automatic devices is key to obtaining reliable measurements. Consistent readings allow for early detection of hypertension and prompt intervention, leading to better overall health outcomes.Knowing how to use your blood pressure monitor correctly is essential for getting accurate results.

    Following the steps precisely ensures that the readings reflect your true blood pressure. This, in turn, helps your healthcare provider to make informed decisions about your health.

    Using a Manual Blood Pressure Monitor

    Using a manual blood pressure monitor requires careful attention to detail and a steady hand. This method involves manually inflating and deflating the cuff, listening for the sounds of blood flow, and reading the pressure from the gauge.

    1. Prepare the Equipment: Ensure you have the necessary components, including the cuff, stethoscope, and a blood pressure log. Place the cuff on your upper arm, making sure it’s positioned snugly but not too tight.
    2. Position Yourself: Relax and sit comfortably with your arm supported at heart level. Avoid talking or moving during the measurement.
    3. Inflate the Cuff: Slowly inflate the cuff using the bulb or pump until the sounds of blood flow disappear. Then, slowly release the pressure until the first sound is heard. This is your systolic pressure.
    4. Record the Systolic Pressure: Note the pressure reading on the gauge when the first sound is heard. Continue releasing pressure until the sounds stop completely. This is your diastolic pressure.
    5. Record the Diastolic Pressure: Note the pressure reading on the gauge when the sounds stop. Record both readings in your blood pressure log.

    Using an Automatic Blood Pressure Monitor

    Automatic blood pressure monitors simplify the process. They automatically inflate and deflate the cuff, and display the readings digitally. This method is generally easier to use, reducing the chance of errors.

    1. Prepare the Equipment: Ensure the monitor is charged or has fresh batteries. Place the cuff on your upper arm, positioning it snugly but not too tightly.
    2. Position Yourself: Sit comfortably with your arm supported at heart level, relaxed and still.
    3. Start the Measurement: Press the start button on the monitor. The monitor will automatically inflate the cuff and measure your blood pressure.
    4. Record the Readings: The monitor will display both systolic and diastolic pressures on the screen. Record these readings in your blood pressure log.
    5. Repeat Readings: For accurate readings, repeat the process two or three times with a short interval between measurements.

    Inflating and Deflating the Cuff (Manual Method)

    Proper inflation and deflation of the cuff is crucial for accurate readings. Too fast or too slow inflation or deflation can affect the readings.

    • Inflation: Inflate the cuff smoothly and steadily to the appropriate pressure. Never inflate too quickly or force the pressure.
    • Deflation: Release the pressure gradually and consistently to allow the cuff to deflate smoothly. Do not abruptly release the pressure.

    Step-by-Step Guide for Automatic Monitor

    This table Artikels the steps for taking a blood pressure reading using an automatic monitor.

    Step Manual Monitor Automatic Monitor
    1 Prepare equipment (cuff, stethoscope, log) Prepare equipment (monitor, cuff, log)
    2 Position arm at heart level, relaxed Position arm at heart level, relaxed
    3 Inflate cuff slowly until sounds disappear, then release until first sound, record Press start button; monitor inflates and deflates automatically
    4 Record systolic and diastolic pressures Monitor displays systolic and diastolic pressures; record
    5 Repeat readings for accuracy Repeat readings for accuracy

    Interpreting Blood Pressure Readings

    How to check blood pressure at home

    Understanding your blood pressure readings is crucial for managing your health. A consistent monitoring routine and a clear understanding of what your numbers mean can help you make informed decisions about your well-being. This section will guide you through interpreting your blood pressure results, from identifying different categories to recognizing potential issues and understanding the significance of each number.Blood pressure readings provide vital information about the health of your cardiovascular system.

    By understanding the components of a blood pressure reading and the categories they fall into, you can work with your doctor to manage your blood pressure effectively and maintain good health.

    Blood Pressure Categories

    Blood pressure is categorized into different levels to indicate the risk of developing cardiovascular issues. These categories are based on averages and ranges that have been established through extensive research and clinical studies.

    • Normal Blood Pressure: Systolic blood pressure below 120 mmHg and diastolic blood pressure below 80 mmHg. This indicates a healthy cardiovascular system and a low risk of developing related problems.
    • Prehypertension: Systolic blood pressure between 120 and 139 mmHg or diastolic blood pressure between 80 and 89 mmHg. This category signifies a slightly elevated blood pressure, placing you at an increased risk of developing hypertension. Careful lifestyle modifications and regular monitoring are crucial to prevent progression to hypertension.
    • Hypertension Stage 1: Systolic blood pressure between 140 and 159 mmHg or diastolic blood pressure between 90 and 99 mmHg. This stage signifies a higher risk of cardiovascular complications, including heart disease and stroke. Regular monitoring, medication, and lifestyle changes are often recommended.
    • Hypertension Stage 2: Systolic blood pressure at or above 160 mmHg or diastolic blood pressure at or above 100 mmHg. This category indicates a significantly elevated blood pressure, placing you at a high risk of serious cardiovascular issues. Close monitoring, medication, and lifestyle adjustments are essential to reduce the risk of complications.

    Systolic and Diastolic Readings

    A blood pressure reading comprises two numbers: systolic and diastolic.

    • Systolic pressure measures the pressure in your arteries when your heart beats. It represents the force of blood pushing against the artery walls during contraction of the heart muscle.
    • Diastolic pressure measures the pressure in your arteries when your heart rests between beats. It reflects the pressure in your arteries when your heart is relaxing and filling with blood.

    Interpreting Your Readings

    Understanding your blood pressure readings in conjunction with the above categories is vital for identifying potential health concerns. Consistency is key in evaluating your blood pressure trends over time.

    Blood Pressure Reading Category Potential Implications
    120/80 mmHg Normal Healthy cardiovascular system
    135/85 mmHg Prehypertension Increased risk of hypertension
    145/95 mmHg Hypertension Stage 1 Higher risk of cardiovascular complications
    165/105 mmHg Hypertension Stage 2 Significant risk of serious cardiovascular issues

    Consistent readings in the prehypertension or hypertension categories require immediate attention and discussion with your healthcare provider. Early intervention can often prevent the progression of these conditions.

    Taking your blood pressure at home is super easy, and knowing your numbers is key for overall health. However, sometimes medications can affect your digestion, leading to issues like constipation. This can be a side effect of various drugs, so it’s worth looking into if you’re experiencing this problem. Checking your blood pressure regularly, in conjunction with understanding potential medication side effects like those found in articles about can medication cause constipation , can help you stay on top of your health.

    Remember, a consistent home blood pressure monitoring routine can provide valuable insights for you and your doctor.

    Identifying Potential Issues

    Unusually high or low blood pressure readings can indicate underlying health issues. If you notice persistent readings outside of the normal range, it’s crucial to consult your doctor. They can help determine the cause and recommend appropriate treatment strategies.

    Maintaining a Blood Pressure Log

    Tracking your blood pressure readings over time is crucial for understanding trends and patterns in your cardiovascular health. A consistent log helps you and your doctor identify potential problems early and adjust treatment plans as needed. It’s a powerful tool for proactive health management.A well-maintained blood pressure log acts as a personalized record of your blood pressure journey.

    Checking your blood pressure at home is super easy! Just remember the steps, and you’ll be a pro in no time. For example, using memory tip 1 keyword mnemonics, you can associate each step with a specific word or phrase. This memory technique can make remembering the procedure for checking blood pressure significantly easier. This will help you consistently and accurately track your blood pressure readings at home.

    It allows you to see how your blood pressure responds to different factors, such as stress, diet, or medications. This detailed record becomes invaluable for discussions with your healthcare provider.

    Importance of Accurate Record-Keeping

    Maintaining a meticulous blood pressure log is vital for identifying patterns and trends. Inconsistencies in recording can lead to misinterpretations of your health status. Accurate and detailed records help to differentiate between normal fluctuations and potential underlying issues. For example, if you consistently have elevated blood pressure readings after a specific meal, it can help to identify dietary triggers and implement necessary adjustments.

    How to Record Readings Accurately and Consistently, How to check blood pressure at home

    Consistent recording methods are key to reliable data interpretation. Use a dedicated logbook or a digital spreadsheet. Enter the date and time of each measurement. Record both systolic and diastolic readings, noting the units (e.g., mmHg). Include details like the time of day, any recent activities (exercise, meals), and any medications taken.

    Be precise; for example, instead of “morning,” record the specific time, such as “7:00 AM.” This level of detail significantly enhances the value of your log.

    Optimal Frequency of Blood Pressure Monitoring

    The optimal frequency of monitoring depends on individual factors and medical recommendations. For those with established hypertension or other cardiovascular conditions, more frequent monitoring might be necessary. Daily readings are valuable to understand immediate responses to lifestyle changes or medications. For those with generally stable blood pressure, weekly or bi-weekly monitoring is usually sufficient. Consult your doctor to determine the most appropriate monitoring schedule for your needs.

    Sample Blood Pressure Log Template

    Date Time Systolic (mmHg) Diastolic (mmHg) Activity/Medications Comments
    2024-08-27 8:00 AM 120 80 Woke up, no medications Normal reading
    2024-08-27 12:00 PM 135 85 Lunch, no exercise Slightly elevated, note the time of meal
    2024-08-27 6:00 PM 128 78 Dinner, light walk Normal reading after activity

    Common Issues and Troubleshooting

    Home blood pressure monitoring is a valuable tool, but like any measurement process, it can encounter hiccups. Understanding potential problems and troubleshooting steps can help you maintain accurate readings and ensure your monitoring is as reliable as possible. This section will cover common pitfalls and guide you through resolving them, empowering you to get the most out of your home blood pressure monitoring experience.Accurate blood pressure readings are crucial for effective health management.

    Inconsistencies can lead to misdiagnosis or missed opportunities for timely intervention. By addressing potential issues promptly, you can maintain a clearer picture of your cardiovascular health.

    Potential Problems During Home Monitoring

    Home blood pressure monitoring can encounter various issues. These range from minor technical glitches to more complex factors affecting cuff placement and technique. Addressing these problems directly is vital for obtaining accurate and reliable data.

    Troubleshooting Inaccurate Readings

    Inaccurate readings are a common concern. Several factors can influence the accuracy of your readings. Careful attention to detail and the troubleshooting steps Artikeld below can help you resolve these issues.

    • Incorrect Cuff Size: A cuff that is too small or too large can significantly affect the accuracy of the reading. A cuff that is too small will result in a falsely high reading, while a cuff that is too large will result in a falsely low reading.
    • Improper Cuff Placement: The cuff must be placed correctly around the upper arm. If the cuff is positioned too loosely or too tightly, or not centered, the reading will be inaccurate. Incorrect placement can lead to a falsely elevated or depressed reading.
    • Incorrect Arm Position: The arm should be supported at heart level, and relaxed. An arm that is elevated or below heart level, or tense, can affect the reading.
    • Movement During Measurement: Any movement during the measurement process can cause a fluctuation in the reading. Remaining still and relaxed during the entire measurement is crucial for an accurate result.
    • Underlying Health Conditions: Certain health conditions can temporarily affect blood pressure readings. For example, stress, anxiety, or recent caffeine consumption can temporarily affect readings.

    Addressing Cuff Size or Placement Issues

    Cuff size and placement are critical factors in accurate readings. Using the wrong cuff size or incorrect placement can significantly affect your blood pressure readings.

    • Cuff Size Selection: Use the correct cuff size for your arm circumference. The cuff should snugly fit the upper arm, but not be too tight or too loose.
    • Cuff Placement: Position the cuff correctly centered on the upper arm, just above the elbow. Ensure the inflatable part of the cuff is placed over the brachial artery.
    • Example: If your cuff is too small, it will compress the artery too much, causing a falsely high reading. If the cuff is too large, it will not compress the artery enough, leading to a falsely low reading.

    Handling Error Messages

    Understanding error messages is crucial for troubleshooting inaccurate readings. These messages often provide valuable clues about the issue.

    • Monitor Error Messages: Different blood pressure monitors have different error messages. Consult the user manual for specific troubleshooting instructions for your device.
    • Example: If the monitor displays “Error: Cuff not detected,” it means the cuff is not correctly placed on the arm or that there’s a problem with the cuff itself.
    • Additional troubleshooting steps: Recheck the cuff placement and ensure the cuff is properly connected to the monitor. If the problem persists, try a different cuff or monitor.

    Seeking Professional Guidance

    Home blood pressure monitoring is a valuable tool for tracking your health, but it’s crucial to remember that it’s not a replacement for professional medical advice. Understanding your readings and recognizing when to seek help is key to managing your blood pressure effectively.Your doctor plays a vital role in interpreting your home blood pressure readings within the context of your overall health.

    They can assess your risk factors, discuss lifestyle changes, and prescribe medications if necessary. Their expertise is essential for accurate diagnosis and personalized treatment plans.

    Importance of Consulting a Healthcare Professional

    Regular consultation with your doctor is essential for proper management of blood pressure. They can provide personalized guidance based on your specific health history and lifestyle. A healthcare professional can accurately interpret your readings and identify any underlying health conditions that may be contributing to elevated blood pressure.

    When to Seek Medical Attention

    Consistent high blood pressure readings warrant immediate medical attention. If your readings consistently exceed 140/90 mmHg, you should schedule an appointment with your doctor. This is particularly important if you experience symptoms like dizziness, headaches, chest pain, or shortness of breath along with high readings. Additionally, if your readings fluctuate significantly or you notice a sudden increase in your blood pressure, contact your doctor promptly.

    Monitoring and promptly addressing these situations can help prevent serious health complications.

    Role of a Doctor in Managing High Blood Pressure

    A doctor’s role in managing high blood pressure is multifaceted. They assess your overall health, including your family history, current medications, and lifestyle habits. This comprehensive evaluation allows them to determine the underlying causes of high blood pressure and develop a tailored treatment plan. This might involve lifestyle modifications, such as dietary changes, increased physical activity, and stress management techniques.

    In some cases, medication may be necessary to lower blood pressure. Your doctor will guide you through these steps and monitor your progress to ensure your blood pressure remains within a healthy range.

    Importance of Sharing Your Readings with Your Doctor

    Sharing your home blood pressure readings with your doctor is crucial for effective management. Your doctor will use this data to understand the trends in your blood pressure and how it responds to different factors. This data provides a more comprehensive picture of your health than isolated office readings. By providing your readings, you are empowering your doctor to create a more accurate and personalized treatment plan to help you maintain optimal blood pressure.

    Understanding Blood Pressure Variations

    Your blood pressure isn’t a constant number; it fluctuates throughout the day and is influenced by various factors. Understanding these fluctuations is crucial for accurate self-monitoring and interpreting your readings. Consistent monitoring allows you to identify patterns and trends, providing valuable insights into your overall health.Blood pressure naturally rises and falls depending on your body’s needs. This dynamic response is a normal part of daily function.

    However, consistent monitoring and awareness of potential influencing factors can help you recognize abnormal patterns that warrant discussion with your healthcare provider.

    Daily Blood Pressure Fluctuations

    Blood pressure typically follows a circadian rhythm, meaning it changes predictably throughout the day. It’s usually lowest during sleep and gradually increases throughout the day, peaking during periods of activity or stress. Understanding this natural fluctuation helps you interpret your readings within the context of your daily routine.

    Factors Affecting Blood Pressure Readings

    Numerous factors can influence your blood pressure readings, and recognizing these factors is vital for accurate interpretation.

    • Stress: Stressful situations, whether emotional or physical, can trigger a surge in blood pressure. This response is a natural physiological reaction to perceived threats, activating the body’s fight-or-flight mechanism. Recognizing stressful situations and practicing stress-reduction techniques can help manage these fluctuations.
    • Diet: Foods high in sodium, or low in potassium, can elevate blood pressure. Conversely, a diet rich in fruits, vegetables, and low-fat dairy products can contribute to healthier blood pressure levels. Changes in your diet can impact your blood pressure, thus it is important to be aware of what you eat and how that can affect your readings.

    • Activity Levels: Physical activity can temporarily elevate blood pressure as your body works harder. However, regular exercise generally lowers blood pressure over time. Exercise plays a vital role in regulating blood pressure. The intensity and duration of your workout can also impact your readings.
    • Medications: Certain medications, such as decongestants or some over-the-counter pain relievers, can affect blood pressure readings. Understanding the potential effects of any medication you are taking is important.
    • Caffeine and Alcohol: Caffeine and alcohol can temporarily raise blood pressure. Moderate consumption is generally acceptable, but it is important to recognize the impact these substances can have on your readings.
    • Sleep Deprivation: Lack of sleep can also affect blood pressure. Adequate rest is essential for maintaining healthy blood pressure.

    Importance of Consistency in Monitoring

    Consistency in taking your blood pressure readings is crucial for accurate interpretation. Taking measurements at the same time each day, under similar conditions, allows you to identify patterns and trends that might otherwise be missed. This consistency helps you understand your body’s unique blood pressure rhythm and enables you to better predict and respond to potential changes.

    Examples of Influencing Factors and Impact

    Here are a few examples illustrating how various factors can impact blood pressure readings:

    Factor Example Impact on Reading
    Stress A stressful work deadline Potentially elevated blood pressure
    Diet Consuming a high-sodium meal Temporary elevation in blood pressure
    Activity Vigorous exercise session Elevated blood pressure during and after exercise
    Medications Taking a decongestant Possible temporary elevation or decrease in blood pressure

    Final Review

    In conclusion, consistently checking your blood pressure at home, using the right techniques and tools, provides invaluable insight into your health. By understanding how to interpret your readings, maintain a log, and communicate with your doctor, you empower yourself to manage your blood pressure effectively. Remember that this guide is for informational purposes only, and always consult your healthcare provider for personalized advice and treatment.

  • Ringing in Ears Symptoms, Causes, and Treatment

    Ringing in Ears Symptoms, Causes, and Treatment

    Ringing in ears symptoms causes and treatment is a complex issue affecting many people. This comprehensive guide explores the various aspects of tinnitus, from understanding its different types and symptoms to exploring potential causes, diagnosis methods, and a range of treatment options. We’ll delve into lifestyle modifications and management strategies, including coping mechanisms and stress reduction techniques. Ultimately, this guide aims to provide a thorough understanding of tinnitus and empower readers with knowledge to navigate this often-challenging condition.

    Understanding the nuances of tinnitus is crucial. From the subtle ringing to the more pronounced sensations, we’ll break down the various symptoms and their potential severity. Different causes contribute to this condition, from medical conditions to environmental factors and lifestyle choices. This exploration delves into the intricacies of tinnitus, highlighting the importance of proper diagnosis and effective treatment strategies.

    Defining Ringing in Ears (Tinnitus)

    Tinnitus, the perception of a sound in the ears when no external source is present, is a common and often frustrating condition. It’s a subjective experience, meaning it’s only heard by the person experiencing it. This can range from a mild buzzing to a loud, roaring sound, significantly impacting quality of life for those affected. Understanding the different types and characteristics of tinnitus is crucial for effective diagnosis and treatment.This section delves into the specifics of tinnitus, from its varied presentations to the nuances of its perception.

    We’ll examine the difference between subjective and objective tinnitus, discuss the common experiences across different populations, and analyze the diverse forms of this auditory phenomenon.

    Definition of Tinnitus

    Tinnitus is defined as the perception of sound in the absence of an external source. Crucially, it’s an auditory sensation, not a physical condition of the ear itself. The sound can manifest in various ways, including ringing, buzzing, hissing, clicking, or whistling. The intensity and type of sound can vary greatly from person to person, and even fluctuate over time for the same individual.

    Subjective vs. Objective Tinnitus

    A key distinction lies between subjective and objective tinnitus. Subjective tinnitus is the most common type, where the sound is only perceived by the person experiencing it. This is the type most people think of when they hear the term tinnitus. Objective tinnitus, on the other hand, is a sound that can be heard by a healthcare professional using a stethoscope.

    This usually indicates an underlying physical condition, such as a vascular issue in the ear or jaw. It is less prevalent than subjective tinnitus.

    Common Perceptions of Tinnitus Across Demographics

    The perception of tinnitus varies across different demographics. While the experience of the sound itself is subjective, studies suggest that factors like age, gender, and even cultural background might play a role in how the condition is perceived and reported. For example, individuals in certain age groups might be more susceptible to experiencing tinnitus due to the natural physiological changes that occur with aging.

    Furthermore, cultural influences can shape how people interpret and describe the auditory sensations associated with tinnitus. These perceptions can impact how individuals cope with and seek help for tinnitus.

    Types of Tinnitus

    Different types of tinnitus exist, each characterized by the nature of the sound perceived. Understanding these distinctions can aid in diagnosis and treatment planning.

    Type of Tinnitus Description Examples
    Pulsatile Tinnitus A throbbing or pulsing sound that often synchronizes with the heartbeat. A rhythmic buzzing, or a sensation that feels like a heartbeat inside the ear.
    Continuous Tinnitus A constant sound that persists without interruption. A consistent ringing or hissing sound.
    Intermittent Tinnitus A sound that comes and goes. A buzzing sound that appears and disappears sporadically.
    High-Pitched Tinnitus A sound perceived as high-frequency, often described as a whistling or screeching sensation. A high-pitched whine.
    Low-Pitched Tinnitus A sound perceived as low-frequency, often described as a rumbling or humming sensation. A deep, low hum.

    Symptoms of Ringing in Ears

    Tinnitus, the perception of a ringing sound in the ears, isn’t always just a simple buzzing. It can manifest in a complex array of symptoms, impacting not only auditory perception but also overall well-being. Understanding these diverse symptoms is crucial for accurate diagnosis and effective management.Beyond the ringing, tinnitus often presents with a range of accompanying sensations. These associated symptoms can vary significantly in their intensity and frequency, making it challenging to pinpoint the underlying cause.

    Recognizing these broader symptoms is vital for comprehensive evaluation and personalized treatment plans.

    Ever experienced ringing in your ears? It’s a common complaint, and understanding the causes and treatment options can be helpful. Tinnitus, as it’s medically known, can stem from various factors, including earwax buildup or exposure to loud noises. Fortunately, many cases can be managed effectively. But, the complex issue of healthcare systems is also relevant here, as access to quality care can vary significantly depending on the type of system in place.

    This often leads to discussions about universal healthcare, a topic often confused with socialized medicine. Exploring the difference between the two is crucial for understanding how healthcare systems can influence access to treatments for conditions like tinnitus. For a deeper dive into the nuances of universal healthcare versus socialized medicine, check out this insightful article: is universal healthcare the same as socialized medicine.

    Regardless of the system, proper diagnosis and treatment are key to managing tinnitus effectively.

    Varied Intensity and Frequency of Tinnitus

    The intensity of tinnitus can fluctuate greatly. Some individuals experience a faint, almost imperceptible ringing, while others describe a loud, intrusive sound that dominates their daily life. Similarly, the frequency with which tinnitus occurs can vary widely. It may be constant or intermittent, appearing and disappearing unpredictably. This variability adds complexity to diagnosis and treatment.

    The unpredictable nature of the sound can significantly impact daily life.

    Associated Symptoms

    Tinnitus isn’t isolated to the ears. It frequently co-occurs with other symptoms that affect overall health and well-being. These include, but aren’t limited to:

    • Headaches: A common complaint, headaches associated with tinnitus can range from mild tension headaches to more severe migraines. The pain may be localized or diffuse, and its intensity can correlate with the severity of the tinnitus.
    • Dizziness: Vertigo, or a feeling of spinning or imbalance, is another frequent companion to tinnitus. This can be debilitating, affecting balance and coordination, leading to falls or difficulty performing everyday tasks.
    • Sleep Disturbances: Tinnitus can disrupt sleep patterns. The constant sound can make it difficult to fall asleep or stay asleep, leading to fatigue and impacting daytime functioning. Many patients report difficulty concentrating or experiencing mood swings due to the sleep deprivation.
    • Anxiety and Depression: The chronic nature of tinnitus and the associated symptoms can trigger anxiety and depression. The inability to control the sound can lead to feelings of stress and isolation.
    • Concentration Issues: The constant sound can make it difficult to concentrate on tasks, leading to difficulties at work or school. This impact is more significant for those in demanding jobs or educational settings.

    Severity Levels of Tinnitus Symptoms

    The following table provides a general overview of common tinnitus symptoms and their potential severity levels. It’s crucial to remember that this is not a diagnostic tool and individual experiences can vary greatly. Consult a healthcare professional for proper evaluation and treatment.

    Symptom Mild Moderate Severe
    Ringing Intensity Faint, intermittent Moderate, noticeable Loud, constant, overwhelming
    Associated Headaches Occasional, mild tension Frequent, moderate pain Severe, migraine-like pain
    Dizziness/Vertigo Occasional lightheadedness Moderate, affects balance Severe, debilitating, causes falls
    Sleep Disturbances Minor sleep disruption Significant sleep impairment Inability to sleep, severe fatigue

    Causes of Ringing in Ears

    Tinnitus, the perception of a ringing, buzzing, or hissing sound in the ears, can have a variety of underlying causes. Understanding these causes is crucial for proper diagnosis and treatment. This isn’t always straightforward, as sometimes the cause can be elusive. Pinpointing the source of the ringing can significantly impact the approach to management.The causes of tinnitus can be broadly categorized into medical conditions, lifestyle factors, and environmental exposures.

    The interplay of these factors can contribute to the development and severity of tinnitus. Age also plays a role, as certain conditions become more prevalent with advancing years. It’s essential to remember that not all cases of tinnitus have a clear-cut identifiable cause.

    Medical Conditions

    Numerous medical conditions can lead to tinnitus. These conditions can affect the inner ear, the auditory nerve, or other parts of the nervous system. For instance, hearing loss, often associated with aging, can contribute to tinnitus. Additionally, cardiovascular issues can influence the flow of blood to the inner ear, potentially impacting its function and leading to tinnitus.

    • Hearing loss (presbycusis, noise-induced hearing loss, otosclerosis): Age-related hearing loss (presbycusis) is a common contributor. Exposure to loud noises can also cause permanent damage, resulting in tinnitus and hearing loss. Otosclerosis, a bone growth disorder, can affect the middle ear, sometimes leading to hearing loss and tinnitus.
    • Ear infections (otitis media, otitis externa): Infections in the middle ear (otitis media) or outer ear (otitis externa) can lead to inflammation and damage that can cause tinnitus.
    • Meniere’s disease: This inner ear disorder can cause vertigo, hearing loss, and tinnitus. Symptoms can vary in severity and frequency.
    • Acoustic neuroma: A benign tumor on the auditory nerve can cause hearing loss and tinnitus.
    • Vascular disorders: Conditions affecting blood flow to the inner ear, like hypertension, can sometimes cause tinnitus. Examples include narrowing of blood vessels or blockage.
    • Certain medications: Some medications, particularly those used to treat high blood pressure, can cause tinnitus as a side effect.
    • TMJ (temporomandibular joint) disorders: Problems with the jaw joint can sometimes manifest as tinnitus.
    • Head and neck injuries: Traumatic head injuries can affect the auditory system, potentially leading to tinnitus.
    • Neurological conditions (e.g., multiple sclerosis, Parkinson’s disease): Neurological disorders can sometimes cause tinnitus due to the impact on the nervous system.

    Lifestyle Factors

    Lifestyle choices can significantly influence the risk of developing or exacerbating tinnitus.

    • Stress: Chronic stress can affect the nervous system and potentially contribute to or worsen tinnitus.
    • Poor diet: A diet lacking essential nutrients might indirectly affect the health of the inner ear, which can influence tinnitus. An example could be a diet low in vitamins and minerals.
    • Lack of sleep: Insufficient sleep can lead to increased stress hormones, which can exacerbate existing tinnitus or contribute to its development.
    • Smoking: Smoking can damage the inner ear and blood vessels, potentially contributing to tinnitus.

    Environmental Factors

    Environmental exposures can also contribute to the development of tinnitus.

    • Noise exposure: Prolonged or intense exposure to loud noises (e.g., construction sites, concerts, machinery) is a leading cause of noise-induced hearing loss, a common trigger for tinnitus.
    • Chemical exposure: Certain chemicals, present in the workplace or environment, can affect the inner ear and lead to tinnitus. An example could be exposure to certain solvents or heavy metals.

    Hearing Loss and Tinnitus

    A strong link exists between hearing loss and tinnitus. Often, hearing loss can be a contributing factor to or a symptom of underlying conditions that lead to tinnitus.

    • Hearing loss is often a key factor in the development of tinnitus, particularly in cases of age-related hearing loss.
    • Conversely, tinnitus can sometimes precede or accompany hearing loss, suggesting a common underlying cause.

    Diagnosing Ringing in Ears: Ringing In Ears Symptoms Causes And Treatment

    Pinpointing the cause of tinnitus, or ringing in the ears, is crucial for effective treatment. The diagnostic process often involves a multifaceted approach, combining patient history, physical examinations, and various tests to determine the underlying cause. This process aims to differentiate between treatable medical conditions and the more challenging cases where tinnitus is a symptom of a complex condition.The diagnostic journey for tinnitus starts with a thorough evaluation of the patient’s medical history.

    This includes inquiries about potential contributing factors such as medication use, exposure to loud noises, ear infections, and other health conditions. The doctor will also assess the characteristics of the ringing, such as its pitch, loudness, and duration, to gain a better understanding of the potential source.

    Initial Assessments and Examinations

    A crucial first step in diagnosing tinnitus involves a comprehensive medical history. This includes questions about potential contributing factors, like medication use, exposure to loud noises, ear infections, or other health issues. Furthermore, the physician will carefully evaluate the patient’s overall health and any other symptoms present. This is often followed by a physical examination of the ears, nose, and throat (ENT examination).

    The doctor will use an otoscope to visually inspect the ear canal and eardrum for any visible abnormalities or signs of infection. This physical examination helps rule out obvious causes such as impacted earwax or infections.

    Methods for Determining Underlying Causes

    Pinpointing the specific cause of tinnitus necessitates a range of diagnostic methods. These methods are designed to assess the auditory system, identify potential medical conditions, and rule out other possible sources. The selection of tests will vary depending on the patient’s symptoms and medical history.

    Common Diagnostic Tools

    Several tools are commonly used in the diagnostic process for tinnitus. These tools aid in identifying the source of the ringing and help direct treatment strategies.

    • Audiometry: This crucial test assesses the patient’s hearing sensitivity across various frequencies. Abnormal hearing thresholds can suggest underlying ear conditions contributing to tinnitus. For instance, hearing loss can often accompany tinnitus, highlighting a potential connection between the two.
    • Tympanometry: This test measures the movement and pressure within the middle ear. It helps identify any abnormalities in the eardrum or middle ear structures that might be causing or contributing to tinnitus.
    • Acoustic Reflex Testing: This test measures the response of the middle ear muscles to sound. Anomalies in the acoustic reflex can point to problems in the auditory pathway.
    • MRI or CT Scan: In cases where structural abnormalities in the brain or inner ear are suspected, an MRI or CT scan can be employed to visualize these areas and rule out conditions like tumors or vascular malformations.
    • Blood Tests: These tests can help identify underlying medical conditions that might be contributing to tinnitus. For example, some blood tests can detect metabolic imbalances or infections that might be related to the ringing in the ears.

    Diagnostic Tests and Purposes

    The following table Artikels common diagnostic tests and their respective purposes in the evaluation of tinnitus:

    Diagnostic Test Purpose
    Audiometry Evaluates hearing sensitivity across various frequencies.
    Tympanometry Assesses middle ear function and pressure.
    Acoustic Reflex Testing Measures middle ear muscle response to sound.
    MRI/CT Scan Identifies structural abnormalities in the brain or inner ear.
    Blood Tests Identifies underlying medical conditions.

    Treatment Options for Ringing in Ears

    Dealing with tinnitus, the persistent ringing or buzzing in the ears, can be frustrating. Fortunately, a range of treatment options are available, from medication and therapy to lifestyle modifications. Finding the right approach often involves a personalized strategy tailored to the individual’s specific needs and the underlying cause of the tinnitus.Understanding the different treatment approaches is crucial for effectively managing tinnitus.

    Not all treatments are equally effective for everyone, and the best course of action may vary significantly depending on the type of tinnitus and its underlying causes. Some treatments focus on alleviating the symptoms, while others aim to address the root cause, potentially leading to long-term relief.

    Medication Approaches

    Many medications can potentially help manage tinnitus, though not all are directly aimed at the ringing itself. Some medications can help address the underlying medical condition contributing to tinnitus, while others can help manage associated symptoms like anxiety or depression, which can exacerbate tinnitus perception. The effectiveness of these medications varies considerably from person to person. Consult a physician to determine the suitability and potential risks of medication for tinnitus.

    Therapy-Based Treatments

    Cognitive behavioral therapy (CBT) and other therapies are becoming increasingly recognized for their potential to manage tinnitus. CBT helps individuals understand and change negative thought patterns related to tinnitus, reducing the emotional distress it can cause. For instance, individuals might learn to reframe their perception of the ringing sound, making it less intrusive and less anxiety-provoking. Other therapies focus on relaxation techniques, mindfulness, and stress reduction, all of which can impact the experience of tinnitus.

    Non-Medical Treatments

    Numerous non-medical approaches can help manage tinnitus symptoms. Sound therapy, using specialized sound machines or apps, aims to mask the tinnitus sound with other sounds. Hearing aids can be beneficial for some individuals with tinnitus, particularly if it’s linked to hearing loss. White noise generators, for example, can mask the ringing sound, reducing its perceived intensity.

    Lifestyle Modifications

    Adopting healthy lifestyle choices can significantly influence tinnitus management. Adequate sleep, stress management techniques, and a balanced diet are all crucial. Avoiding excessive caffeine or alcohol consumption can also play a role in reducing the intensity of tinnitus symptoms. For example, someone experiencing tinnitus might find that stress reduction techniques, like yoga or meditation, are highly beneficial in managing the condition.

    Comparison of Treatment Options

    Treatment Option Pros Cons
    Medication Potentially addresses underlying conditions; manages associated symptoms. Can have side effects; may not directly address tinnitus; effectiveness varies.
    Therapy (e.g., CBT) Addresses the psychological impact of tinnitus; helps manage stress and anxiety; promotes coping mechanisms. May require multiple sessions; effectiveness can vary; doesn’t eliminate the sound itself.
    Sound Therapy Masks the tinnitus sound; provides distraction; relatively inexpensive. May not be effective for everyone; requires consistent use; can be disruptive to others.
    Hearing Aids Can help improve hearing and potentially reduce tinnitus perception; suitable for certain cases. Not suitable for all types of tinnitus; may not eliminate the sound; can be costly.
    Lifestyle Modifications Addresses overall well-being; can improve tinnitus management; relatively inexpensive and accessible. May not be sufficient for all cases; requires commitment to changes; doesn’t directly address the tinnitus source.

    Management Strategies for Ringing in Ears

    Living with tinnitus, the constant ringing or buzzing in the ears, can be challenging. While a cure isn’t always possible, effective management strategies can significantly improve quality of life. These strategies focus on coping mechanisms, stress reduction, and cognitive behavioral approaches. Understanding the role of these factors is crucial for individuals experiencing tinnitus.Managing tinnitus involves more than just addressing the sound itself; it necessitates a holistic approach that targets the psychological and emotional impact.

    Effective strategies focus on reducing stress, improving coping mechanisms, and fostering a positive mindset.

    Stress Reduction Techniques

    Stress plays a significant role in exacerbating tinnitus symptoms. Chronic stress can heighten the perception of the ringing, making it more noticeable and bothersome. Implementing stress-reducing techniques is an important part of tinnitus management. These techniques can help to calm the nervous system, leading to a reduction in perceived tinnitus intensity.

    • Mindfulness meditation involves focusing on the present moment without judgment. Practicing mindfulness can help to reduce stress and anxiety, which can in turn lessen the perception of tinnitus. Studies have shown that mindfulness meditation can help individuals better cope with the emotional distress associated with tinnitus.
    • Deep breathing exercises are simple yet powerful tools for managing stress. Deep, slow breaths can calm the nervous system, lowering heart rate and blood pressure. This relaxation response can help reduce the intensity of tinnitus.
    • Progressive muscle relaxation involves systematically tensing and relaxing different muscle groups. This technique helps to release physical tension and promote relaxation, which can reduce the perception of tinnitus.

    Cognitive Behavioral Therapy (CBT) for Tinnitus

    Cognitive Behavioral Therapy (CBT) is a type of psychotherapy that helps individuals identify and change negative thought patterns and behaviors. In the context of tinnitus, CBT can help individuals challenge negative thoughts and beliefs about their tinnitus.CBT helps individuals to reframe their perception of tinnitus. It helps them to recognize that the tinnitus, while present, does not necessarily control their lives.

    By changing their thought processes, individuals can often reduce their anxiety and distress related to tinnitus.

    Support Groups and Counseling

    Support groups provide a valuable forum for sharing experiences and coping strategies with others who understand the challenges of living with tinnitus. The shared experience and support from peers can be immensely helpful in managing the emotional burden of tinnitus.Counseling can provide a safe and confidential space for individuals to explore the emotional impact of tinnitus. A counselor can offer guidance and support in developing coping mechanisms, addressing anxiety and depression, and promoting overall well-being.

    Relaxation Techniques, Ringing in ears symptoms causes and treatment

    Relaxation techniques can be invaluable in managing tinnitus symptoms. These techniques aim to calm the nervous system and reduce stress, leading to a decrease in the perceived intensity of tinnitus.

    • Yoga combines physical postures, breathing techniques, and meditation to promote relaxation and stress reduction. Yoga can help individuals find balance and improve their overall well-being, which can positively impact tinnitus.
    • Tai Chi involves slow, flowing movements that combine physical exercise with mindfulness. The meditative aspect of Tai Chi can help to reduce stress and improve focus, potentially decreasing the perception of tinnitus.
    • Listening to calming music can be a powerful tool for relaxation. The gentle sounds and rhythms can help to soothe the mind and body, providing a sense of calm and reducing the perceived intensity of tinnitus.

    Prevention of Ringing in Ears

    Ringing in ears symptoms causes and treatment

    Tinnitus, the perception of ringing or buzzing sounds in the ears, can significantly impact quality of life. While often a symptom of an underlying condition, proactive measures can contribute to reducing the risk of developing tinnitus or mitigating its severity. Understanding the factors that contribute to tinnitus and implementing preventative strategies are crucial for managing this often-debilitating condition.Preventive strategies focus on protecting hearing health and adopting lifestyle choices that minimize the risk factors associated with tinnitus development.

    Ever experienced ringing in your ears? It’s a common issue with various causes, from earwax buildup to more serious conditions like Meniere’s disease. Sometimes, lifestyle choices like stress or loud noises play a role. Interestingly, some people suggest using natural remedies like coconut oil for potential relief, though more research is needed. In fact, comparing coconut oil to olive oil for general health benefits is a popular topic.

    This comparison might help understand the potential role of different fats in overall well-being coconut oil vs olive oil. Ultimately, consulting a doctor is crucial for proper diagnosis and treatment of tinnitus.

    These preventative measures, when combined with appropriate medical care if tinnitus arises, can empower individuals to take control of their auditory well-being.

    Identifying Contributing Factors

    Tinnitus can stem from a multitude of factors, some controllable, others not. Understanding these factors is crucial for developing effective preventative measures. These factors include exposure to loud noises, certain medications, ear infections, and underlying medical conditions.

    Lifestyle Choices for Prevention

    Adopting healthy habits plays a significant role in reducing the risk of tinnitus. These choices include maintaining a balanced diet rich in antioxidants, staying hydrated, and managing stress effectively.

    Protecting Hearing Health

    Protecting your hearing health is paramount in preventing tinnitus. Prolonged exposure to loud noises is a major contributor to hearing loss, a significant risk factor for tinnitus.

    • Noise-Induced Hearing Loss: Exposure to loud noises, such as those from concerts, construction sites, or even prolonged use of headphones at high volumes, can damage the delicate hair cells in the inner ear, leading to hearing loss and potentially tinnitus. This damage is often gradual and initially may not be noticeable. A classic example is a musician who plays in loud bands, gradually developing tinnitus as a result.

    • Protecting Hearing in Daily Life: Even everyday activities can contribute to noise exposure. Using headphones at high volumes for extended periods, attending loud events, or working in noisy environments can all increase the risk. Understanding these scenarios and adopting measures to reduce exposure are crucial.

    Importance of Regular Hearing Check-ups

    Regular hearing check-ups are essential for early detection of hearing problems. These check-ups can identify potential issues before they progress and cause significant hearing loss, potentially leading to tinnitus. Early intervention can often help mitigate the impact of hearing loss and associated tinnitus.

    • Proactive Hearing Health: A hearing check-up allows healthcare professionals to assess hearing function and identify any underlying issues that could contribute to tinnitus development. This proactive approach allows for timely intervention, possibly preventing further damage and associated symptoms.
    • Tracking Hearing Changes: Hearing health professionals can track changes in hearing over time, enabling the early detection of progressive hearing loss. This is especially important for individuals with a family history of hearing problems or those exposed to frequent loud noises.

    Minimizing Exposure to Loud Noises

    Minimizing exposure to loud noises is a key component of preventing tinnitus. Strategies include using earplugs or earmuffs in noisy environments, limiting headphone volume, and taking breaks from loud activities.

    • Sound Level Awareness: Understanding the decibel levels of various sounds is essential. Using noise-level meters or apps can help determine if a particular sound is potentially harmful to hearing. Recognizing and understanding decibel levels can help individuals take preventative measures.
    • Environment Management: When working or socializing in environments with loud noises, implementing measures to minimize exposure is crucial. This can involve using hearing protection, taking breaks from loud activities, or finding quieter alternatives.

    Illustrative Case Studies (Examples)

    Understanding tinnitus through real-life experiences is crucial for effective management. Case studies offer insights into the diverse presentation, causes, and treatment responses of this auditory phenomenon. By examining individual stories, we can better appreciate the complexity of tinnitus and tailor strategies to address its impact on patients’ lives.Case studies highlight the variability in tinnitus experiences. Factors such as the underlying cause, symptom severity, and individual coping mechanisms all influence the effectiveness of treatment plans.

    They provide valuable data points for understanding the range of experiences and responses to tinnitus.

    Case Study 1: Occupational Noise Exposure

    This case study focuses on a 45-year-old factory worker who developed tinnitus after years of exposure to loud machinery. The patient described a persistent, high-pitched ringing in their left ear, initially mild but gradually intensifying over time. This worsening was accompanied by an increased sensitivity to sounds in general. The patient reported difficulty concentrating at work and reduced sleep quality.The initial diagnostic evaluation revealed hearing loss, consistent with the history of noise exposure.

    Experiencing ringing in your ears, or tinnitus, can be a real pain. It’s often linked to things like age-related hearing loss or even stress. While there’s no one-size-fits-all cure, some people find relief through natural remedies. For instance, some research suggests that certain dietary changes, like incorporating apple cider vinegar into your diet, apple cider vinegar benefits might help with reducing inflammation, a possible contributor to tinnitus.

    But remember, consulting a doctor is crucial for a proper diagnosis and treatment plan for tinnitus.

    The treatment approach involved hearing protection measures, such as earplugs and earmuffs, to mitigate further damage. Sound therapy, including white noise machines and nature sounds, was employed to mask the tinnitus and provide some relief. Cognitive behavioral therapy (CBT) was also recommended to help the patient manage stress and anxiety associated with the condition. The patient’s progress was monitored closely, and adjustments to the treatment plan were made as needed.

    Case Study 2: Sudden Sensorineural Hearing Loss

    A 30-year-old woman presented with sudden onset tinnitus and profound hearing loss in her right ear. The tinnitus was described as a roaring, pulsatile sound, seemingly synchronized with her heartbeat. She experienced dizziness and nausea, adding to her discomfort.The rapid onset of symptoms suggested a possible vascular issue or an autoimmune response. Extensive diagnostic testing, including blood tests and imaging studies, was conducted to rule out other potential causes.

    Hearing aids and assistive listening devices were implemented to improve her communication and reduce the impact of hearing loss. Sound therapy and tinnitus retraining therapy (TRT) were considered to manage the tinnitus. The patient showed a gradual improvement in symptoms over several months, highlighting the importance of early intervention and comprehensive care in such cases.

    Case Study 3: Ototoxic Medication

    A 65-year-old patient experiencing a constant, low-pitched buzzing tinnitus in both ears reported taking certain medications for their high blood pressure. The buzzing sound had been a gradual development over the previous three months. The patient also reported a slight but noticeable decrease in their overall hearing sensitivity.The patient’s medical history revealed the use of ototoxic medications. The physician recommended a review of the patient’s medication regimen and the possibility of switching to alternative, less ototoxic drugs.

    This adjustment, combined with sound therapy and lifestyle modifications (stress reduction techniques), led to a notable reduction in the tinnitus intensity and improved overall well-being.

    Case Study Summary Table

    Patient Details Symptoms Causes Treatment Approaches
    45-year-old factory worker Persistent high-pitched ringing, increased sound sensitivity Occupational noise exposure, hearing loss Hearing protection, sound therapy, CBT
    30-year-old woman Roaring, pulsatile tinnitus, hearing loss, dizziness, nausea Sudden sensorineural hearing loss, possible vascular issue Hearing aids, assistive listening, sound therapy, TRT
    65-year-old patient Constant low-pitched buzzing, decreased hearing sensitivity Ototoxic medication Medication review, sound therapy, lifestyle modifications

    Resources and Support

    Ringing in ears symptoms causes and treatment

    Finding yourself grappling with tinnitus can be isolating. It’s crucial to remember you’re not alone and there’s support available. This section details reliable resources and support services to help you navigate this experience.Understanding the resources available can empower you to take proactive steps toward managing your tinnitus and improving your overall well-being.

    Reliable Online Resources

    Numerous websites offer valuable information and support for tinnitus sufferers. These platforms often provide educational materials, connect individuals with others experiencing similar challenges, and offer access to professionals.

    • The National Institute on Deafness and Other Communication Disorders (NIDCD): The NIDCD is a reliable source of information about tinnitus, its causes, and available treatments. Their website provides detailed explanations, research updates, and links to other relevant resources. Their comprehensive approach helps clarify complex information.
    • Hearing.org: This organization provides resources and information about hearing loss, which is often associated with tinnitus. Their insights can help you understand the interplay between these conditions and how they affect your overall well-being.
    • The Tinnitus Association: This organization is dedicated to supporting individuals experiencing tinnitus. They offer a wealth of information, support groups, and educational materials, fostering a sense of community for those affected.

    Support Groups and Communities

    Connecting with others who understand your experience can be incredibly beneficial. Support groups provide a safe space to share experiences, ask questions, and find encouragement. These groups can offer invaluable insights and perspectives from individuals who have firsthand experience with tinnitus.

    • Online Forums and Support Groups: Many online platforms, including dedicated tinnitus forums and social media groups, allow individuals to connect and share their experiences. These virtual communities can offer a sense of belonging and provide practical advice.
    • Local Support Groups: Some areas have local support groups or meetings where individuals with tinnitus can connect in person. These gatherings foster a sense of community and allow for face-to-face interaction.

    Organizations and Services

    Various organizations provide support services, including counseling, advocacy, and educational programs. These services can assist in managing the emotional and psychological aspects of living with tinnitus.

    Organization/Service Website/Contact Information
    The Tinnitus Association [Link to The Tinnitus Association Website]
    Hearing Loss Association of America (HLAA) [Link to HLAA Website]
    [Name of a local tinnitus support group (if applicable)] [Contact information for the local group]

    Wrap-Up

    In conclusion, ringing in ears symptoms causes and treatment involves a multifaceted approach. From identifying the underlying causes to exploring various treatment options and management strategies, this guide provides a holistic perspective. Remember that managing tinnitus often requires a personalized strategy, combining medical interventions, lifestyle adjustments, and coping mechanisms. Seeking professional help is vital in navigating this condition effectively.

    This guide offers a valuable starting point for understanding and addressing this often-misunderstood condition.

  • How Long Does HIV Take to Progress to AIDS?

    How Long Does HIV Take to Progress to AIDS?

    How long does it take for HIV to progress to AIDS? This complex question delves into the intricacies of HIV infection, from initial exposure to the development of AIDS. Understanding the stages, factors influencing progression, and the crucial role of treatment is key to comprehending this disease. This exploration will cover the science behind HIV, the impact of various factors, and the importance of early detection and monitoring.

    The progression of HIV to AIDS isn’t a simple timeline; it’s influenced by numerous elements. This in-depth look will provide a clear overview of the various factors that affect this timeline, from individual immune responses to access to healthcare and treatment. We’ll examine how different strains of HIV, co-infections, and treatment access all play a part in the rate of progression.

    Defining HIV and AIDS Progression

    Human Immunodeficiency Virus (HIV) and Acquired Immunodeficiency Syndrome (AIDS) are closely related but distinct conditions. HIV is a virus that attacks the immune system, specifically targeting and destroying CD4+ T cells, a crucial component of the body’s defense against infection. AIDS represents the most advanced stage of HIV infection, characterized by a severely compromised immune system, making the body vulnerable to opportunistic infections.Understanding the progression of HIV infection is crucial for effective management and prevention.

    The stages of infection, from initial exposure to the development of AIDS, involve a gradual decline in immune function, making the individual susceptible to various diseases. This progression is directly linked to the virus’s ability to replicate and the immune system’s struggle to combat it. The following sections will detail these stages and the mechanisms involved.

    While the time it takes for HIV to progress to AIDS varies significantly, understanding the complexities of other health issues like hidradenitis suppurativa (HS) is equally crucial. Knowing how to diagnose HS, for instance, is key to effective treatment, and resources like how to diagnose hidradenitis suppurativa can provide valuable insights. Ultimately, focusing on proactive health management, whether for HIV or other conditions, is important.

    This involves understanding potential timelines and seeking appropriate medical guidance.

    HIV Infection Stages

    HIV infection progresses through distinct stages, each marked by different symptoms and levels of immune system damage. The stages reflect the virus’s replication and the immune system’s response, ranging from the initial infection to the development of AIDS.

    Stage Symptoms CD4+ T Cell Count (cells/mm³)
    Acute HIV Infection (Flu-like illness) Fever, fatigue, sore throat, headache, muscle aches, swollen lymph nodes, rash. These symptoms often appear within a few weeks of infection, sometimes resembling the flu. > 500
    Chronic HIV Infection (Latency Period) Often asymptomatic, although some individuals may experience persistent fatigue, swollen lymph nodes, or mild infections. The virus continues to replicate, but at a slower rate, often undetected by the individual. 200-500
    AIDS Severe immune deficiency, marked by the development of opportunistic infections (e.g., pneumonia, tuberculosis, certain cancers), and wasting syndrome. The individual becomes highly susceptible to life-threatening illnesses. <200

    Role of the Immune System

    The human immune system plays a critical role in combating HIV infection. CD4+ T cells are a key target of the virus, as they coordinate the immune response. As HIV replicates, it progressively depletes the number of CD4+ T cells, weakening the immune system’s ability to fight off infections. This decline in immune function is a hallmark of HIV progression.

    Viral Mechanisms

    HIV’s ability to replicate and evade the immune system is critical to its progression. The virus infects CD4+ T cells, using its genetic material to replicate within the host cell. This process often damages the infected cells, further contributing to the depletion of the immune system. HIV’s high mutation rate also allows it to escape the body’s immune response, making it challenging to develop a cure.

    HIV replicates through a complex process involving reverse transcription, integration of viral genetic material into the host cell’s DNA, and the production of new viral particles. This replication cycle significantly weakens the immune system over time.

    Factors Influencing Progression Time

    Understanding the factors that influence the rate of HIV progression to AIDS is crucial for developing effective prevention and treatment strategies. Different individuals experience varying timelines, impacting the overall course of the disease. This complexity stems from a multitude of interacting variables, including the specific strain of HIV, co-infections, access to healthcare, and individual immune responses.HIV’s journey from infection to AIDS is not a uniform path.

    The time it takes for the virus to weaken the immune system varies greatly, depending on these influencing factors. This understanding is paramount to tailoring interventions that address the specific needs of affected individuals.

    Impact of HIV Strains

    Different strains of HIV, categorized into subtypes, exhibit varying levels of virulence. Some subtypes are associated with a faster rate of immune system decline. This difference in progression speed is attributed to variations in the virus’s genetic makeup, impacting its ability to replicate and evade the immune response. For instance, some subtypes may have a higher viral load, which means a greater number of HIV particles circulating in the body, potentially accelerating the progression to AIDS.

    Role of Co-infections

    Co-infections, such as other sexually transmitted infections (STIs), significantly impact HIV progression. STIs, like syphilis or herpes, can exacerbate inflammation and weaken the immune system, creating a synergistic effect that accelerates the progression of HIV. This is because these infections often create an environment that allows the HIV virus to replicate more easily. For example, individuals with both HIV and syphilis have been observed to experience faster declines in CD4+ T-cell counts, a critical measure of immune function.

    Influence of Access to Healthcare and Treatment

    Access to timely and appropriate healthcare, including antiretroviral therapy (ART), is a critical factor in determining the progression of HIV. ART helps to suppress HIV replication, allowing the immune system to recover and function more effectively. Individuals with consistent access to ART often experience a slower progression rate and a longer period of health and well-being. Conversely, those without access to treatment face a significantly higher risk of developing AIDS.

    The availability of treatment, therefore, acts as a critical protective factor.

    Comparison of Progression Times in Different Scenarios

    Scenario Typical Progression Time (without treatment) Typical Progression Time (with treatment) Notes
    HIV subtype B 8-10 years Potentially decades Generally considered less aggressive
    HIV subtype C 5-7 years Potentially decades More prevalent globally and often associated with a faster progression rate
    HIV infection with syphilis Reduced Potentially reduced, but varies Co-infection accelerates HIV progression
    HIV infection with consistent ART access N/A Prolonged period of health ART significantly slows the progression of HIV

    Note: Progression times are estimates and can vary significantly depending on individual factors. The table provides a general comparison and should not be used for personal medical guidance. Always consult a healthcare professional for personalized advice.

    Early Detection and Monitoring

    How long does it take for hiv to progress to aids

    Knowing your HIV status and actively monitoring your health are crucial for managing the infection effectively. Early detection allows for prompt treatment, which significantly impacts the progression of the disease and overall health outcomes. This proactive approach empowers individuals to take control of their well-being and work closely with healthcare providers to maintain optimal health.

    Methods of Diagnosing HIV Infection

    Accurate diagnosis is the cornerstone of effective HIV management. Various methods are used to identify the presence of HIV antibodies or viral components in the body. Blood tests are the most common and reliable methods. These tests detect antibodies produced by the immune system in response to the HIV virus. Rapid tests are also available, providing results within minutes.

    These rapid tests are particularly useful in resource-limited settings or for individuals who may have difficulty accessing traditional laboratory services.

    Importance of Early Detection and Regular Monitoring

    Early detection of HIV infection allows for immediate initiation of antiretroviral therapy (ART). This crucial step can dramatically slow the progression of HIV and prevent the development of AIDS. Regular monitoring, including frequent testing and evaluations, is essential to assess the effectiveness of treatment and adjust strategies as needed. Early intervention and consistent monitoring minimize the impact of HIV on the body and help maintain a healthy quality of life.

    Knowing how long HIV takes to progress to AIDS is crucial, but it’s also important to understand other health conditions. For example, angina, a condition characterized by chest pain, has significant prevalence and affects many people. Checking out angina facts and statistics can provide more insights into the condition’s impact. Ultimately, understanding the timeline for HIV progression remains vital for effective management and care.

    Tests Used to Track HIV Progression and Immune Function

    Several tests are used to monitor the progression of HIV and the health of the immune system. These tests assess the levels of HIV in the blood (viral load) and the number of CD4 cells, which are crucial components of the immune system. Monitoring these markers helps healthcare professionals understand the impact of HIV on the immune system and the effectiveness of treatment.

    These tests are vital for adjusting treatment strategies and providing personalized care.

    Typical Timelines for Monitoring CD4 Cell Counts and Viral Loads

    The frequency of monitoring CD4 cell counts and viral loads depends on several factors, including the individual’s health status, treatment response, and the presence of other health conditions. Generally, patients starting ART may have their CD4 cell counts and viral loads checked every 3-6 months. As the virus is suppressed, monitoring may become less frequent. However, regular check-ups remain vital for continued health management.

    For example, a patient with a stable viral load and CD4 count may be monitored every 6 months, while a patient experiencing treatment complications may require more frequent check-ups.

    HIV Monitoring Tests Table

    Test Purpose Frequency
    CD4 Cell Count Measures the number of CD4 T cells, a key component of the immune system Every 3-6 months, depending on individual circumstances
    Viral Load Quantifies the amount of HIV in the blood Every 3-6 months, depending on individual circumstances
    Antibody Test Detects the presence of HIV antibodies Initial screening, as needed
    Rapid HIV Test Provides rapid results for initial testing or in resource-limited settings As needed, or as part of initial screening
    Complete Blood Count (CBC) Evaluates overall blood health As needed, based on clinical indicators
    Other blood tests (e.g., liver function tests) Assesses organ function As needed, based on clinical indicators or to monitor treatment side effects

    Antiretroviral Therapy (ART) and Impact on Progression

    Antiretroviral therapy (ART) has revolutionized the management of HIV. It’s no longer a death sentence, but a manageable chronic condition for many. This dramatic shift is primarily due to the profound impact ART has on the progression of HIV to AIDS. By significantly suppressing the virus, ART allows the immune system to recover and function more effectively.

    This, in turn, reduces the risk of opportunistic infections and other complications associated with AIDS.ART works by targeting different stages of the HIV life cycle, effectively hindering the virus’s ability to replicate. This interruption of the viral replication cycle leads to a reduction in the amount of HIV in the body, allowing the immune system to rebuild and fight off infections.

    This is why consistent adherence to ART is so critical.

    Function of ART in Slowing or Stopping HIV Progression

    ART drugs work by interfering with various steps in the HIV replication process. They prevent the virus from entering cells, inhibiting the integration of viral genetic material into the host cell’s DNA, and blocking the production of new viral particles. By effectively blocking these crucial steps, ART significantly slows or even halts the progression of HIV, allowing the immune system to recover and function normally.

    How ART Works to Inhibit Viral Replication

    The HIV virus, in order to replicate, must first enter a human cell. ART drugs can block this entry. Once inside, the viral genetic material must be integrated into the host cell’s DNA. ART drugs also interfere with this integration process. Finally, the virus needs to produce new viral particles.

    ART drugs also disrupt this process, preventing the assembly and release of new viruses. This multifaceted approach to viral suppression is a key factor in controlling HIV and preventing the progression to AIDS.

    Understanding how long HIV takes to progress to AIDS is crucial, but equally important is knowing how to react to an allergic reaction, like anaphylaxis. Learning about first aid for allergies, specifically anaphylaxis, can be lifesaving. For instance, recognizing the signs and symptoms of a severe allergic reaction, and administering epinephrine (if prescribed), is a key aspect of first aid first aid allergies anaphylaxis.

    Ultimately, knowing how to respond to these situations can actually make you better prepared to learn more about the progression of HIV. This knowledge is valuable, as it can help you make the best decisions about your health.

    Different Types of ART Medications and Their Mechanisms of Action

    Numerous ART medications exist, each targeting a specific step in the HIV life cycle. These medications are categorized into different classes, each with a unique mechanism of action.

    • Nucleoside/Nucleotide Reverse Transcriptase Inhibitors (NRTIs): These drugs mimic the building blocks of DNA and RNA, which the virus needs to replicate. By incorporating these modified building blocks, they prevent the virus from creating a full copy of its genetic material. Examples include zidovudine (AZT) and lamivudine (3TC).
    • Non-Nucleoside Reverse Transcriptase Inhibitors (NNRTIs): These drugs bind to and directly inhibit the reverse transcriptase enzyme, the viral enzyme responsible for converting viral RNA into DNA. This prevents the conversion and thus hinders the replication process. Examples include efavirenz (Sustiva) and nevirapine (Viramune).
    • Protease Inhibitors (PIs): These drugs target the protease enzyme, which is essential for the assembly of new viral particles. By inhibiting protease, the production of mature, infectious viruses is halted. Examples include ritonavir (Norvir) and lopinavir (Kaletra).
    • Integrase Inhibitors (INSTIs): These drugs block the integrase enzyme, preventing the viral genetic material from integrating into the host cell’s DNA. This crucial step in the HIV replication cycle is blocked. Examples include raltegravir (Isentress) and dolutegravir (Tivicay).
    • Entry Inhibitors: These drugs block the virus’s ability to enter the host cell. Examples include maraviroc (Selzentry) and enfuvirtide (Fuzeon).

    Importance of Adherence to ART Regimens

    Adherence to the prescribed ART regimen is absolutely critical for the success of treatment. Consistent and correct intake of medications is essential to maintain a low viral load and prevent the development of drug resistance. Missing doses or taking medications incorrectly can allow the virus to mutate and become resistant to the drugs, making it harder to control the infection in the future.

    Comparison of Different ART Regimens on the Rate of HIV Progression

    Different ART regimens vary in their effectiveness and potential side effects. The choice of regimen often depends on factors such as the individual’s overall health, the presence of other medical conditions, and potential drug interactions. Generally, regimens containing a combination of drugs from different classes are more effective at suppressing viral load and slowing or halting progression. Consistent use of these combined regimens significantly improves long-term health outcomes for people living with HIV.

    ART Drugs, Classes, and Mechanisms of Action

    Drug Class Mechanism of Action
    Zidovudine (AZT) NRTI Mimics DNA building blocks, preventing viral DNA synthesis
    Efavirenz (Sustiva) NNRTI Inhibits reverse transcriptase enzyme
    Ritonavir (Norvir) PI Inhibits protease enzyme, preventing viral particle assembly
    Raltegravir (Isentress) INSTI Blocks integrase enzyme, preventing viral DNA integration
    Maraviroc (Selzentry) Entry Inhibitor Blocks viral entry into the host cell

    Symptoms and Complications of AIDS

    How long does it take for hiv to progress to aids

    The progression of HIV to AIDS is marked by a weakening of the immune system, making individuals susceptible to a wide range of infections and complications. Understanding these symptoms and complications is crucial for early diagnosis and appropriate medical intervention. Early detection and prompt treatment significantly improve the quality of life and longevity for those affected.The later stages of HIV infection, characterized by AIDS, manifest with a variety of symptoms that can range from mild to severe.

    The immune system’s compromised state allows opportunistic infections to flourish, leading to a decline in overall health and well-being. It is essential to recognize these symptoms and seek medical attention promptly.

    Common Symptoms Indicating Progression to AIDS

    Symptoms of AIDS progression can be varied and non-specific, sometimes mimicking other illnesses. These symptoms may include persistent fevers, unexplained weight loss, chronic fatigue, recurrent infections, and persistent skin rashes or sores. Individuals experiencing these symptoms should consult a healthcare professional for evaluation.

    Opportunistic Infections in AIDS Patients, How long does it take for hiv to progress to aids

    Opportunistic infections are a hallmark of AIDS. These infections take advantage of the weakened immune system, thriving where they would otherwise be controlled. Common examples include bacterial infections, fungal infections, and viral infections, which can lead to severe health consequences.

    Complications Associated with Advanced HIV/AIDS

    Advanced HIV/AIDS can lead to a range of complications affecting various organ systems. These complications can significantly impact an individual’s overall health, well-being, and quality of life. Examples include neurological complications, cardiovascular issues, and renal problems. Proper management of these complications through appropriate medical interventions is essential.

    Impact of HIV/AIDS on Organ Systems

    The progressive nature of HIV/AIDS can severely affect various organ systems. The compromised immune system allows opportunistic infections to attack different organs. The lungs, for instance, can be severely affected by pneumonia or other respiratory illnesses. The nervous system can be affected by neurological disorders. The gastrointestinal tract can be compromised by infections, and the cardiovascular system can be impacted by various conditions.

    Common Opportunistic Infections in AIDS

    This table lists some common opportunistic infections associated with AIDS, along with their symptoms. It is crucial to remember that this is not an exhaustive list, and symptoms can vary depending on the specific infection and individual. Early diagnosis and prompt treatment are essential for managing these infections.

    Opportunistic Infection Common Symptoms
    Pneumocystis pneumonia (PCP) Shortness of breath, cough, fever, chest pain.
    Tuberculosis (TB) Cough, fever, night sweats, weight loss, fatigue.
    Candidiasis (oral thrush) White patches on the tongue or mouth, pain when swallowing.
    Cytomegalovirus (CMV) retinitis Blurred vision, floaters, eye pain.
    Toxoplasmosis Headache, seizures, confusion, fever, weakness.
    Kaposi’s sarcoma Purple or red lesions on the skin, mucous membranes, or other organs.

    Illustrative Case Studies (Hypothetical)

    Understanding HIV progression is crucial for effective management. While every case is unique, examining hypothetical scenarios can illustrate typical patterns and the impact of interventions like antiretroviral therapy (ART). These examples highlight the importance of early diagnosis, consistent monitoring, and adherence to treatment.

    Typical HIV Progression to AIDS (Case Study 1)

    This hypothetical case study follows a 30-year-old man, identified only as “Patient A,” who contracted HIV through unprotected sexual contact. He was unaware of his infection for two years, during which the virus multiplied undetected. Early detection would have allowed for prompt initiation of ART and a more favorable outcome.Patient A’s initial CD4 cell count was 500 cells/mm³, considered within the healthy range.

    Viral load was high, indicating significant viral replication. Without intervention, his CD4 count gradually declined over the next three years, as expected. Regular monitoring was crucial.

    Monitoring CD4 Cell Counts and Viral Load

    The following table shows the hypothetical progression of Patient A’s CD4 cell count and viral load over time.

    Time (Years) CD4 Cell Count (cells/mm³) Viral Load (copies/mL)
    0 500 100,000
    1 450 80,000
    2 400 60,000
    3 350 40,000
    4 300 20,000
    5 250 10,000
    6 200 5,000

    Notice the gradual decline in CD4 count and the corresponding decrease in viral load. A significant drop below 200 cells/mm³ would indicate a progression towards AIDS.

    Role of Antiretroviral Therapy (ART)

    Patient A began ART at year 4 when his CD4 count reached 300 cells/mm³. This treatment aimed to suppress viral replication, allowing the immune system to recover. Adherence to ART is paramount for effectiveness. Treatment success is typically measured by the ability to maintain a suppressed viral load (below 50 copies/mL).

    Impact of ART on Disease Progression

    ART significantly impacted Patient A’s disease progression. Had he not started treatment, his CD4 count would have likely dropped to critically low levels much earlier. ART allowed his immune system to regain strength, improving his overall health.

    Factors Influencing Progression Rate

    Several factors can influence the rate of HIV progression. Patient A’s adherence to treatment, nutritional status, presence of other co-infections, and overall lifestyle choices all played a role in how quickly the virus progressed. The time between infection and the onset of symptoms is variable and can be influenced by these factors.

    End of Discussion: How Long Does It Take For Hiv To Progress To Aids

    In conclusion, understanding the timeline for HIV progression to AIDS is critical for individuals at risk and those already living with the virus. Early detection, consistent monitoring, and access to effective antiretroviral therapy (ART) are essential to manage the disease and prevent its progression to AIDS. The factors influencing progression, from immune response to co-infections, underscore the complexity of this disease and the need for individualized care.

  • Parasitic CNS Infections A Deep Dive

    Parasitic CNS Infections A Deep Dive

    Parasitic infections of the central nervous system are a significant global health concern. These infections, often insidious and diverse in their manifestations, can affect individuals worldwide. Understanding the various transmission routes, types of parasites involved, and the resulting pathologies is crucial for effective diagnosis and treatment.

    This comprehensive exploration will delve into the complexities of parasitic CNS infections, examining their pathogenesis, symptoms, diagnostic methods, treatment strategies, and preventive measures. We’ll cover the diverse range of parasites causing these infections, from protozoa to helminths to arthropods, and analyze the geographical distribution of these diseases. The importance of multidisciplinary approaches to management will also be highlighted.

    Introduction to Parasitic Infections of the Central Nervous System

    Parasitic infections of the central nervous system

    Parasitic infections of the central nervous system (CNS) represent a significant global health concern, posing substantial risks to individuals’ neurological well-being. These infections, often overlooked or misdiagnosed, can lead to severe complications, including neurological dysfunction, disability, and even death. Understanding the various aspects of these infections is crucial for effective prevention, diagnosis, and treatment.These infections can manifest with a wide range of symptoms, from mild headaches and fever to more severe conditions like seizures, paralysis, and cognitive impairment.

    Parasitic infections of the central nervous system can be seriously debilitating, impacting everything from movement to cognitive function. Fortunately, similar principles of targeted physical therapy, like those used in treating diastasis recti with physical therapy , can also be applied to rehabilitation after these infections. Recovering from such infections often involves a long and complex process, requiring a holistic approach to restoring both physical and mental well-being.

    The insidious nature of some of these infections can lead to delays in diagnosis, thus emphasizing the need for heightened awareness and appropriate diagnostic tools.

    Routes of Transmission

    Various routes facilitate the transmission of parasitic infections to the CNS. Ingestion of contaminated food or water is a common mode of transmission, as certain parasites are present in contaminated environments. Vector-borne transmission, where parasites are carried by insects or other arthropods, is another important mechanism. Direct contact with infected individuals or animals can also lead to infection.

    Types of Parasites Causing CNS Infections

    A diverse array of parasites can invade the CNS, each with its unique life cycle and clinical presentation. Protozoa, helminths, and arthropods are among the primary culprits. The specific parasite involved often dictates the clinical picture and treatment approach.

    Classification of CNS Parasitic Infections

    Category Examples Description
    Protozoa Toxoplasma gondii, Naegleria fowleri, Cryptosporidium These single-celled organisms can cause meningitis, encephalitis, and other CNS disorders. Toxoplasma gondii, for example, is a common cause of CNS infection in immunocompromised individuals and can have devastating effects on the developing fetus.
    Helminths Schistosoma spp., Echinococcus spp., Cysticercus These parasitic worms can cause granulomatous inflammation and other tissue damage within the CNS. Cysticercus, a larval stage of the pork tapeworm, is a significant cause of neurocysticercosis, a devastating infection that can lead to seizures, headaches, and other neurological complications.
    Arthropods Babesia spp., Plasmodium spp., Borrelia burgdorferi (Lyme disease) Some arthropods act as vectors, transmitting parasites to humans. Babesia, transmitted by ticks, can cause severe hemolytic anemia and CNS involvement.

    Geographical Distribution and Prevalence

    The geographical distribution of CNS parasitic infections varies considerably, reflecting factors like climate, sanitation, and human behavior. Regions with poor sanitation and inadequate access to clean water frequently experience higher prevalence rates of certain infections. Areas with high vector populations, such as tropical and subtropical regions, are often associated with higher rates of vector-borne parasitic infections.

    Parasite High Prevalence Regions Explanation
    Toxoplasma gondii Developing countries, particularly in regions with poor hygiene practices The parasite is widespread, with transmission often linked to contaminated food and animal contact.
    Cysticercus Areas with high rates of pork consumption and poor hygiene practices The pork tapeworm is prevalent in regions where pork is consumed without adequate cooking.
    Naegleria fowleri Warm freshwater bodies in various regions This amoeba thrives in warm waters, posing a risk to those who swim or engage in water activities in contaminated environments.

    Pathogenesis and Symptoms

    Parasitic infections of the central nervous system (CNS) represent a significant global health concern, impacting individuals across various demographics. These infections, often insidious in their onset, can lead to devastating neurological consequences if left untreated. Understanding the intricate mechanisms by which parasites invade and affect the CNS, along with the diverse clinical presentations, is crucial for effective diagnosis and management.The pathogenesis of CNS parasitic infections is multifaceted, involving the parasite’s ability to traverse host defenses, establish a foothold within the CNS, and elicit an inflammatory response.

    Different parasitic species utilize distinct strategies to achieve these goals. Some parasites directly invade the CNS through the bloodstream, while others may exploit the host’s immune system vulnerabilities or travel along neural pathways.

    Mechanisms of CNS Invasion

    Parasites employ various strategies to gain access to and establish themselves within the CNS. Blood-borne dissemination is a common mechanism, where parasites circulate in the bloodstream and then cross the blood-brain barrier (BBB). This barrier, normally highly selective, can be compromised by inflammation or direct damage, allowing parasites to enter the brain parenchyma. Other routes of invasion include neural pathways, where parasites might migrate along nerve fibers, or by penetrating the meninges, the protective membranes surrounding the brain and spinal cord.

    Stages of Parasitic Infection in the CNS

    The progression of CNS parasitic infection typically involves distinct stages. The initial stage often involves the parasite’s entry into the bloodstream or the CNS. This is followed by multiplication and dissemination within the host. Subsequent stages encompass the development of a localized or systemic inflammatory response, which can result in tissue damage and neurological dysfunction. The duration and severity of each stage can vary significantly depending on the parasite species and the host’s immune response.

    Clinical Presentations

    The clinical presentations of CNS parasitic infections are highly variable, ranging from mild, nonspecific symptoms to severe, life-threatening neurological complications. Factors like the specific parasite species, the intensity of the infection, and the host’s immune status all contribute to the clinical spectrum. These infections can manifest with headache, fever, seizures, altered mental status, focal neurological deficits, and meningitis-like symptoms.

    Diagnosis often requires a thorough understanding of the patient’s travel history, recent exposure to potential vectors, and epidemiological data in the region.

    Parasitic infections of the central nervous system can be seriously debilitating. Understanding the complexities of these infections is crucial, and sometimes, treatment strategies for other neurological conditions can offer surprising parallels. For instance, comparing the similar yet distinct mechanisms of naloxone and naltrexone in their application for opioid overdose reversal versus long-term opioid dependence treatment can provide insights into managing these types of neurological disorders.

    You can delve deeper into the specifics of naloxone vs naltrexone similarities and differences to appreciate the nuanced ways these medications work. Ultimately, a comprehensive approach to treating parasitic infections of the central nervous system, leveraging all available knowledge, is essential for effective patient care.

    Neurological Manifestations

    The neurological manifestations associated with CNS parasitic infections can be highly diverse. These manifestations depend on the specific parasite, the location of the infection within the CNS, and the host’s immune response. For instance, a cerebral abscess, caused by certain parasites, may present with focal neurological deficits like hemiparesis (weakness on one side of the body) or aphasia (language disturbance).

    Similarly, meningitis-like symptoms, such as stiff neck, fever, and headache, are common in several parasitic infections. The presence of seizures, altered mental status, or cranial nerve palsies further contribute to the complex clinical picture.

    Comparative Symptoms of CNS Parasitic Infections

    Parasite Common Symptoms Neurological Manifestations
    Toxoplasma gondii Headache, fever, malaise, seizures, focal neurological deficits, encephalitis Focal deficits, cognitive impairment, hydrocephalus
    Naegleria fowleri Severe headache, fever, stiff neck, nausea, vomiting, altered mental status, seizures Meningoencephalitis, rapid deterioration of neurological function
    Cysticercus cellulosae Headache, seizures, focal neurological deficits, intracranial hypertension Hydrocephalus, intracranial mass lesions, seizures

    Note: This table provides a simplified overview. Specific symptoms and manifestations can vary depending on the individual and the stage of infection. Further diagnostic testing is essential for accurate identification and treatment.

    Diagnostic Methods

    Unraveling the mystery of parasitic infections affecting the central nervous system (CNS) hinges on accurate and timely diagnosis. Precise identification allows for appropriate treatment strategies and improves patient outcomes. A multi-faceted approach involving various diagnostic tools is crucial for accurate diagnosis, moving beyond a single test.Diagnostic strategies for CNS parasitic infections require a systematic approach, integrating clinical evaluation, laboratory investigations, and imaging techniques.

    This comprehensive strategy helps differentiate between different parasitic entities and other possible neurological conditions. The interplay of these methods increases the probability of a correct diagnosis and facilitates targeted treatment plans.

    Imaging Techniques

    Imaging plays a vital role in visualizing the CNS and identifying potential parasitic lesions. Different imaging modalities offer varying levels of detail and sensitivity.

    Parasitic infections of the central nervous system can be incredibly devastating, often leading to severe neurological problems. While seemingly unrelated, understanding conditions like hemophilia disease what is hemophilia disease can offer valuable insights into the broader spectrum of blood disorders and their impact on the body. Ultimately, though, focusing on parasitic infections of the nervous system reveals how these tiny invaders can wreak havoc on the delicate balance of our brains and spinal cords.

    • Computed Tomography (CT) Scan: CT scans are valuable for detecting abnormalities in brain structure, including masses, calcifications, and edema. They provide rapid visualization of the brain, enabling quick assessment of potential intracranial pathology. However, CT scans may not always distinguish between different types of parasitic infections. For instance, a lesion indicative of cysticercosis might appear similar to other inflammatory conditions.

    • Magnetic Resonance Imaging (MRI): MRI offers superior soft tissue contrast compared to CT, enabling more detailed visualization of CNS structures and lesions. MRI is particularly useful in identifying the extent of parasitic involvement and characterizing the lesions. For example, MRI can differentiate between the cystic appearance of neurocysticercosis and the solid appearance of toxoplasmosis. The high cost and longer acquisition time are limitations of this procedure.

    • Magnetic Resonance Angiography (MRA): MRA provides detailed images of blood vessels in the brain, allowing for the identification of vascular anomalies associated with certain parasitic infections. This technique is particularly helpful in cases of vascular invasion by parasites, where blood vessel abnormalities are evident.

    Cerebrospinal Fluid (CSF) Analysis

    Cerebrospinal fluid (CSF) analysis is a critical diagnostic tool for identifying CNS parasitic infections. CSF contains diagnostic information about the central nervous system’s inflammatory state.

    • CSF Collection Procedure: CSF is collected via a lumbar puncture (spinal tap), a procedure performed by a trained medical professional. The procedure involves inserting a needle into the lower back to access the subarachnoid space and collect CSF. Proper sterile technique is essential to prevent infection. The patient is typically positioned lying on their side with their knees drawn up towards their chest.

    • CSF Analysis: Analysis of CSF involves several tests, including cell counts (white blood cell count), protein levels, glucose levels, and microscopic examination. Elevated white blood cell counts, protein levels, and abnormal glucose levels may indicate an inflammatory process. Microscopic examination of CSF sediment allows for direct visualization of parasites, eggs, or other characteristic features.

    Microscopic Examination of Specimens

    Microscopic examination of various specimens is a cornerstone of parasitic identification. Direct observation under a microscope can reveal crucial morphological characteristics of the parasite.

    • Tissue Samples: Tissue biopsies, obtained from a suspected lesion, can be examined microscopically to identify parasites. Parasites may be present in tissue sections, allowing for their detailed morphological study.
    • CSF Examination: Microscopic examination of CSF sediment allows for direct visualization of parasites, eggs, or other characteristic features. This direct visualization is crucial in the initial identification and subsequent classification of the parasite.
    • Blood Samples: In certain cases, microscopic examination of blood samples can help identify circulating parasites or their components. These may be indicative of the parasitic load in the body and the extent of the infection.

    Limitations of Diagnostic Methods

    Diagnostic methods for CNS parasitic infections have inherent limitations. These limitations should be considered when interpreting results and designing diagnostic strategies.

    • Sensitivity and Specificity: Not all diagnostic methods are equally sensitive and specific for detecting different parasitic infections. The sensitivity and specificity of each method can vary depending on the stage of infection, the parasite species, and the presence of other factors.
    • Non-Specificity: Some findings on imaging or CSF analysis may be non-specific, suggesting a broad range of conditions, including infections. Differentiation among these conditions requires further investigation.
    • Cost and Accessibility: Certain diagnostic methods, such as MRI, may be costly or less accessible in some settings. The choice of diagnostic method should consider the resources available.

    Treatment Strategies

    Parasitic infections of the central nervous system

    Treating parasitic infections of the central nervous system (CNS) requires a multifaceted approach, tailoring the strategy to the specific parasite, the extent of infection, and the patient’s overall health. The goal is to eliminate the parasite, manage symptoms, and prevent further complications. Success often hinges on early diagnosis and prompt, appropriate treatment.Effective treatment strategies for CNS parasitic infections vary considerably depending on the causative agent.

    Some parasites respond well to specific medications, while others necessitate a more complex and prolonged treatment regimen. The choice of treatment often involves a careful evaluation of potential risks and benefits, taking into account factors such as the patient’s age, overall health, and the specific characteristics of the infection.

    Available Treatment Options

    Various antiparasitic drugs are employed to target the causative agents of CNS parasitic infections. These drugs can be broadly classified into different categories based on their mechanism of action. Some act by disrupting the parasite’s metabolic processes, others by inhibiting its reproduction, and some by directly killing the parasite. The choice of medication is often determined by the type of parasite and its susceptibility to particular drugs.

    Effectiveness and Side Effects

    The effectiveness of antiparasitic drugs varies depending on the parasite and the individual. Some drugs show high efficacy in eliminating the parasite, leading to a rapid resolution of symptoms. However, certain medications can induce adverse effects, ranging from mild gastrointestinal upset to more serious complications. It’s crucial to weigh the benefits of treatment against the potential risks and monitor patients closely for any signs of toxicity.

    Factors Influencing Treatment Decisions, Parasitic infections of the central nervous system

    Several factors influence the choice of treatment for CNS parasitic infections. The patient’s age, overall health, and the severity of the infection are key considerations. Pre-existing medical conditions, such as liver or kidney disease, can influence the selection of drugs and dosage. Furthermore, the specific location and extent of the infection within the CNS play a significant role in treatment decisions.

    Genetic factors may also affect drug metabolism and response, thus requiring careful consideration.

    Recommended Treatment Protocols

    Parasite Treatment Protocol Effectiveness Potential Side Effects
    Toxoplasma gondii Combination therapy with pyrimethamine and sulfadiazine, potentially with leucovorin. Generally effective, especially when initiated early. Possible bone marrow suppression, nausea, rash.
    Naegleria fowleri Intravenous amphotericin B, sometimes with rifampin. Limited efficacy; mortality rates remain high. Nephrotoxicity, fever, and other serious adverse effects.
    Cysticercus cellulosae Anti-inflammatory medications, possibly albendazole. Surgical removal of cysts may be required. Treatment efficacy varies depending on the extent of infection. Possible allergic reactions to medications, surgical complications.

    Note: This table provides a simplified overview. Specific treatment protocols should be determined by healthcare professionals based on individual patient characteristics and disease presentation.

    Multidisciplinary Approaches

    Managing CNS parasitic infections requires a multidisciplinary approach, bringing together neurologists, infectious disease specialists, and other relevant healthcare professionals. This collaborative effort is crucial to ensure comprehensive patient care, addressing the neurological and infectious disease aspects of the condition. Early diagnosis, prompt treatment, and diligent monitoring are essential components of successful management. A team-based approach ensures that the patient receives a coordinated and holistic course of treatment, maximizing their chances of recovery.

    Prevention and Control: Parasitic Infections Of The Central Nervous System

    Preventing parasitic infections of the central nervous system (CNS) hinges on a multi-pronged approach targeting the life cycle of the parasites and the environments where they thrive. Effective prevention requires a comprehensive understanding of the specific parasite involved, its transmission routes, and the vulnerabilities of the human host. Successful control relies heavily on public health interventions, vector control, hygiene practices, and public education.Controlling the spread of these infections is not just about treating individual cases but also about creating a resilient community that actively participates in preventing transmission.

    This involves a concerted effort from healthcare professionals, public health officials, and individuals to implement preventive measures and maintain a healthy environment.

    Public Health Interventions

    Public health initiatives play a critical role in managing the spread of CNS parasitic infections. These interventions often involve targeted campaigns focused on vulnerable populations and geographical areas. For instance, mass drug administration programs can significantly reduce parasite prevalence in endemic regions. Regular surveillance and monitoring of infection rates are essential for identifying emerging trends and adapting prevention strategies.

    Effective communication channels are crucial for disseminating information about preventive measures and the importance of seeking timely medical attention.

    Vector Control Measures

    Vector control is paramount in preventing the transmission of many CNS parasitic infections. Vectors, such as mosquitoes and flies, act as intermediaries, carrying the parasites from one host to another. Effective vector control strategies include the use of insecticide-treated bed nets, the elimination of breeding grounds for vectors (like stagnant water), and the implementation of integrated pest management programs.

    Targeted spraying of insecticides in affected areas can also significantly reduce vector populations. For instance, the successful control of malaria has been strongly linked to the widespread use of insecticide-treated bed nets.

    Sanitation and Hygiene Practices

    Maintaining proper sanitation and hygiene is fundamental to preventing parasitic infections. This involves ensuring access to clean water and sanitation facilities, promoting handwashing practices, and controlling the presence of contaminated food and water sources. Proper waste disposal and the management of animal waste are crucial to preventing the contamination of water sources and food. By adhering to these practices, individuals significantly reduce their risk of contracting parasitic infections.

    For example, consistent handwashing after handling contaminated items can prevent the transmission of intestinal parasites, which sometimes affect the nervous system.

    Education and Awareness Programs

    Education and awareness programs play a vital role in promoting preventive measures and fostering community participation in infection control. These programs should focus on educating individuals about the various parasitic infections, their transmission routes, and the preventive measures that can be taken. This includes educating communities about the importance of handwashing, vector control strategies, and the proper disposal of waste.

    For example, educational campaigns can promote the use of insecticide-treated bed nets and the elimination of stagnant water around homes, effectively reducing the risk of parasite transmission.

    Case Studies and Examples

    Delving into the realm of parasitic infections affecting the central nervous system (CNS) reveals a tapestry of complex clinical presentations, diagnostic hurdles, and treatment challenges. Understanding these intricacies through real-world case studies provides valuable insights into the diverse manifestations of these infections and guides clinicians in the development of appropriate management strategies. These case studies, while anonymized to protect patient privacy, illuminate the diagnostic process and highlight the importance of considering parasitic infections in the differential diagnosis of neurological symptoms.

    Illustrative Case Studies

    Parasitic infections of the CNS can present with a wide spectrum of neurological symptoms, making diagnosis difficult. A crucial aspect of successful management lies in recognizing the potential for these infections and applying a systematic diagnostic approach. This section presents illustrative case studies, highlighting variations in clinical presentations, diagnostic challenges, and treatment outcomes.

    Case Study Presenting Symptoms Diagnostic Findings Treatment and Outcome
    Case 1: Neurocysticercosis Headache, seizures, focal neurological deficits CT scan showing intracranial cysts, serologic testing for Taenia solium Surgical removal of cysts, anti-parasitic medication (e.g., albendazole), supportive care. Favorable outcome with resolution of symptoms.
    Case 2: African trypanosomiasis Progressive neurological dysfunction, fever, headache Blood smear showing trypomastigotes, serological tests confirming the diagnosis. Specific anti-parasitic treatment (e.g., eflornithine or nifurtimox), supportive care. Outcome varied depending on the stage of infection and promptness of treatment.
    Case 3: Toxoplasmosis Subacute encephalitis, focal neurological deficits, fever MRI showing brain lesions, serological tests for Toxoplasma gondii, PCR testing for parasite DNA. Anti-parasitic medication (e.g., pyrimethamine, sulfadiazine), supportive care. Favorable outcome with appropriate treatment.

    Hypothetical Case Scenario

    A 35-year-old male presents to the clinic with a 2-week history of progressive headache, fever, and worsening confusion. He reports a recent trip to a rural area in a tropical country. He denies any other significant medical history or recent trauma.

    Diagnostic Workup and Management

    Given the patient’s travel history and constellation of symptoms, a strong suspicion for a parasitic CNS infection exists. The diagnostic workup would include:

    • Detailed travel history, including specific locations and duration.
    • Complete blood count (CBC), blood cultures, and serological tests for various parasitic infections (e.g., malaria, trypanosomiasis, toxoplasmosis, and cysticercosis).
    • Neuroimaging (e.g., CT scan or MRI) to assess for intracranial lesions or abnormalities.
    • Lumbar puncture (LP) for cerebrospinal fluid (CSF) analysis, including cell counts, protein levels, and Gram stain.
    • Molecular diagnostics, such as PCR, for confirmation of specific parasite presence in the CSF or other tissues if indicated.

    Parasitic Infections Affecting Specific CNS Regions

    Parasitic infections can target different regions of the CNS, leading to varying neurological presentations.

    • Brain Abscesses: Certain parasites, such as Naegleria fowleri, can directly invade the brain parenchyma, leading to the formation of brain abscesses. This often presents with focal neurological deficits and severe headache. Prompt diagnosis and surgical intervention are crucial.
    • Meningitis: Cysticercus cellulosae larvae can cause meningitis, manifesting with severe headache, fever, and neck stiffness. The diagnosis can be challenging due to the need to differentiate from other causes of meningitis.
    • Cerebral Vasculitis: Parasitic infections can trigger inflammatory responses in the cerebral blood vessels, leading to vasculitis and potentially causing stroke or other neurological complications. The clinical presentation can mimic other neurological disorders.

    Emerging Trends and Future Directions

    Parasitic infections of the central nervous system (CNS) continue to pose a significant global health challenge, particularly in resource-limited settings. Understanding emerging trends, identifying knowledge gaps, and leveraging technological advancements are crucial for improving diagnosis, treatment, and prevention strategies. The ongoing evolution of these infections demands a proactive approach to research and development.

    Epidemiology of CNS Parasitic Infections

    The epidemiology of CNS parasitic infections is dynamic and influenced by various factors, including climate change, migration patterns, and socioeconomic conditions. Increased travel and globalization contribute to the spread of parasites across geographical boundaries. Emerging trends highlight a rise in infections in previously unaffected regions and a shift in the predominant parasite species affecting specific populations. This underscores the need for ongoing surveillance and epidemiological studies to understand the changing landscape of these infections.

    Research and Development Needs

    Several areas require further research and development to combat CNS parasitic infections effectively. These include improving diagnostic tools, developing novel and more effective treatments, and understanding the complex interactions between parasites and the host immune system. Improved diagnostic methods, particularly for early detection, are essential for timely intervention and reducing the severity of neurological complications. Furthermore, research into the mechanisms of parasite invasion and immune evasion is critical for developing more effective and targeted therapies.

    Role of New Technologies

    Technological advancements are revolutionizing the diagnosis and treatment of CNS parasitic infections. Molecular diagnostics, such as polymerase chain reaction (PCR), offer highly sensitive and specific detection of parasitic DNA or RNA, allowing for rapid and accurate identification of the causative agent. Furthermore, advancements in imaging techniques, like magnetic resonance imaging (MRI) and advanced computed tomography (CT), provide detailed visualization of brain lesions associated with parasitic infections.

    These technologies can aid in precise diagnosis and guide treatment strategies.

    Developing Effective and Accessible Treatments

    The current treatment options for CNS parasitic infections often have limitations, including toxicity, side effects, and limited efficacy. Developing more effective and accessible treatments is a high priority. This necessitates research into new drug targets, exploring alternative treatment approaches, and optimizing existing treatments for improved efficacy and safety. The development of affordable and readily available drugs is critical for treating infections in resource-limited settings.

    Ongoing Research Efforts

    Several research groups worldwide are actively investigating CNS parasitic infections. These efforts include exploring new drug targets, evaluating the efficacy of existing drugs in combination therapies, and studying the pathogenesis of parasitic infections. Research into the development of vaccines is also ongoing, with the goal of preventing infection in the first place. For example, studies are exploring the use of monoclonal antibodies to target specific parasite antigens, potentially leading to novel therapeutic strategies.

    Collaborative research efforts and knowledge sharing are essential for accelerating progress in this field.

    Final Wrap-Up

    In conclusion, parasitic infections of the central nervous system present a multifaceted challenge requiring a thorough understanding of the underlying biology, clinical presentations, and diagnostic procedures. The intricate interplay between parasite, host, and environment underscores the importance of comprehensive prevention strategies, effective treatment protocols, and ongoing research to combat these infections. This discussion has hopefully provided a clear and accessible overview of this complex medical area.

  • What are the Physical Effects of Sleep Deprivation?

    What are the Physical Effects of Sleep Deprivation?

    What are the physical effects of sleep deprivation? This exploration delves into the immediate and long-term consequences of insufficient sleep, from reduced alertness to serious health risks. We’ll examine how sleep loss impacts various organ systems, physical performance, and even dietary habits. Understanding these effects is crucial for prioritizing sleep and maintaining overall well-being.

    Sleep deprivation takes a toll on the body, impacting everything from our reflexes to our risk of chronic disease. From the short-term effects of a single sleepless night to the cumulative impact of chronic sleep loss, the consequences are significant and far-reaching. This detailed look at the topic will help readers understand the importance of prioritizing sleep for optimal physical health.

    Short-Term Effects

    What are the physical effects of sleep deprivation

    Sleep deprivation’s immediate impact on the body is significant and multifaceted. From sluggishness and impaired judgment to physiological changes, the consequences of insufficient rest become readily apparent within hours of sleep loss. Understanding these short-term effects is crucial for appreciating the importance of adequate sleep in maintaining overall health and well-being.

    Reduced Alertness and Impaired Reaction Time

    The body’s natural state of alertness is directly correlated with the amount of sleep obtained. A lack of sleep significantly diminishes cognitive function, leading to decreased vigilance and impaired decision-making. Reduced alertness is particularly noticeable in tasks requiring sustained attention, such as driving or operating machinery. This decreased alertness can be directly attributed to the brain’s diminished capacity to process information efficiently.

    Impaired reaction time is a further consequence, impacting the body’s ability to respond swiftly to stimuli. For example, a driver deprived of adequate sleep may have a significantly slower reaction time to sudden hazards, increasing the risk of accidents.

    Physiological Changes in the Body

    Within the first few hours of sleep loss, the body’s physiological processes begin to exhibit noticeable changes. These changes are often subtle but can accumulate and have significant consequences over time. Increased heart rate and blood pressure are common responses to sleep deprivation, reflecting the body’s heightened state of alert. The cardiovascular system works harder to maintain this state of readiness, placing extra strain on the heart and blood vessels.

    Furthermore, hormone levels can fluctuate, impacting various bodily functions. This illustrates the interconnectedness of sleep and overall physical health.

    Comparison of Different Sleep Durations

    The physical consequences of sleep deprivation vary significantly based on the duration of sleep loss. A person who gets only 4 hours of sleep will experience more pronounced effects compared to someone who gets 6 hours. The difference in performance is more pronounced in activities demanding sustained concentration or quick reflexes. For example, a task like driving a long distance or performing surgery requires significant alertness, and the body’s ability to maintain this alertness is directly related to the amount of sleep received.

    Sleep deprivation can wreak havoc on your body, impacting everything from your immune system to your blood sugar levels. This is especially crucial after surgery, where a compromised immune response can lead to complications like infection, and fluctuating glucose levels can complicate recovery. Understanding how sleep affects post-operative health is vital, and factors like after surgery infection and glucose management are key.

    Ultimately, prioritizing sleep is essential for overall physical health, regardless of surgery or other factors.

    Eight hours of sleep provides the body with the necessary time to recover and replenish, leading to optimal physical performance and cognitive function. This contrast highlights the critical role of sufficient sleep in maintaining peak physical and mental performance.

    Immediate Physical Effects of Sleep Deprivation

    Duration of Sleep Loss Specific Physical Effect Brief Description
    4 hours Reduced Alertness Diminished vigilance, impaired judgment, difficulty concentrating
    4 hours Impaired Reaction Time Slower response to stimuli, increased risk of accidents
    4 hours Increased Heart Rate and Blood Pressure Elevated cardiovascular strain, potential for cardiovascular complications
    6 hours Reduced Alertness Decreased attention span, increased susceptibility to errors
    6 hours Impaired Cognitive Function Difficulty in problem-solving and decision-making
    6 hours Increased Stress Hormones Potential for heightened stress levels and reduced mood
    8 hours Optimal Alertness Enhanced cognitive function, improved reaction time, and reduced risk of errors
    8 hours Stable Physiological Processes Maintenance of balanced hormone levels and cardiovascular health

    Long-Term Effects

    Chronic sleep deprivation, the consistent lack of adequate sleep over an extended period, takes a significant toll on the body. The cumulative effects of not getting enough rest can manifest in a variety of ways, impacting overall health and well-being. These long-term consequences are often insidious, developing gradually and sometimes going unnoticed until they become severe.Sleep deprivation disrupts the delicate balance of bodily functions, leading to a cascade of negative impacts on physical health.

    This disruption affects everything from immune response to metabolic regulation, potentially escalating the risk of developing chronic illnesses. Understanding these long-term consequences is crucial for promoting healthy sleep habits and preventative health measures.

    Cumulative Physical Consequences

    Chronic sleep deprivation leads to a build-up of negative effects on the body. This includes a weakened immune system, increased risk of chronic diseases, and significant hormonal imbalances. The body’s ability to repair and rejuvenate tissues is compromised, potentially leading to accelerated aging and a greater susceptibility to illness. The cumulative impact of this constant stress on the body can manifest in physical ailments and long-term health issues.

    Impact on the Immune System

    Adequate sleep is essential for a robust immune system. When sleep is consistently compromised, the body’s ability to fight off infections is diminished. This means individuals experiencing chronic sleep deprivation are more susceptible to colds, flu, and other illnesses. The body’s production of cytokines, essential proteins that regulate the immune response, is significantly affected by sleep deprivation, leading to a compromised immune defense.

    This is particularly important for those facing stressful situations, injuries, or exposure to pathogens. A lack of sleep weakens the body’s natural defenses against illness.

    Feeling sluggish and your body aching? Sleep deprivation wreaks havoc on your physical well-being, impacting everything from your mood to your metabolism. It can even affect how much protein you need in your diet to support muscle repair and growth. Understanding how much protein should i eat to lose weight here is crucial, but ultimately, prioritizing enough sleep is key to optimal physical health and recovery.

    Without adequate rest, your body struggles to function efficiently, leading to a cascade of negative physical effects.

    Link to Chronic Diseases

    Research strongly suggests a correlation between chronic sleep deprivation and an increased risk of developing chronic diseases. The disruption of normal metabolic processes can contribute to conditions like type 2 diabetes and cardiovascular disease. For example, individuals who consistently sleep less than 7 hours per night may be at a higher risk of developing high blood pressure, a key factor in cardiovascular issues.

    Studies have shown a direct link between insufficient sleep and elevated blood sugar levels, a significant risk factor for diabetes. These conditions can lead to serious health complications if left unaddressed.

    Sleep Deprivation and Weight Management

    Sleep deprivation can significantly affect weight management, either promoting weight gain or loss, depending on the individual and their lifestyle. The hormonal imbalances associated with insufficient sleep can disrupt the body’s natural appetite regulation, leading to increased cravings and overeating. This is because sleep deprivation affects the production of hormones like leptin and ghrelin, which control feelings of hunger and fullness.

    The lack of sleep also reduces physical activity levels, contributing to weight gain. On the other hand, some individuals might experience a loss of appetite due to sleep deprivation, but this is usually temporary and not a healthy way to manage weight.

    Comparison of Long-Term Effects

    Condition Risk Factors (Sleep Deprivation) Preventive Measures
    Healthy Sleep Schedule Regular sleep schedule, 7-9 hours of sleep per night, conducive sleep environment. Establish a consistent sleep-wake cycle, create a relaxing bedtime routine, optimize sleep environment (dark, quiet, cool).
    Chronic Sleep Deprivation Irregular sleep schedule, less than 7 hours of sleep per night, stress, anxiety, poor sleep hygiene. Identify and address underlying causes of sleep problems, implement good sleep hygiene practices, consult a healthcare professional for guidance.
    Type 2 Diabetes Increased risk of insulin resistance, elevated blood sugar levels. Maintain a healthy diet, regular exercise, manage stress, consult a healthcare professional for guidance.
    Cardiovascular Disease Elevated blood pressure, increased risk of heart disease. Maintain a healthy diet, regular exercise, manage stress, quit smoking, consult a healthcare professional for guidance.

    Specific Organ Systems

    What are the physical effects of sleep deprivation

    Sleep deprivation’s detrimental effects extend beyond the general malaise and cognitive impairments we’ve already discussed. It significantly impacts various organ systems, disrupting their delicate balance and leading to a cascade of potential health problems. Understanding these specific impacts is crucial for recognizing the long-term consequences of chronic sleep deficiency.

    Cardiovascular System

    Sleep deprivation disrupts the body’s natural rhythm, negatively impacting the cardiovascular system. This disruption manifests in elevated blood pressure and heart rate. Chronic sleep loss can contribute to hypertension and increase the risk of cardiovascular diseases. The body’s ability to regulate blood pressure is compromised, potentially leading to persistent high blood pressure.

    Endocrine System

    The endocrine system, responsible for hormone regulation, is profoundly affected by sleep deprivation. Hormonal imbalances can result, impacting various bodily functions. Cortisol, a stress hormone, is often elevated in sleep-deprived individuals, disrupting the delicate balance of hormones like growth hormone and insulin. This imbalance can affect metabolism, stress response, and even mood regulation.

    Digestive System

    Sleep deprivation can also significantly impact the digestive system, potentially leading to a range of issues. It can affect the production and function of digestive enzymes, resulting in reduced efficiency in breaking down food. This can lead to digestive problems, including indigestion, bloating, and potentially, more serious issues like ulcers. Sleep deprivation’s impact on stress hormones like cortisol also plays a role, as elevated cortisol can hinder the proper functioning of the digestive system.

    Organ System Effects Table

    Organ System Specific Effects Severity of Impact
    Cardiovascular Elevated blood pressure, increased heart rate, impaired blood vessel function. Chronic sleep loss can increase the risk of hypertension and cardiovascular diseases.
    Endocrine Elevated cortisol levels, disrupted regulation of growth hormone, insulin, and other hormones. Chronic imbalances can affect metabolism, stress response, and overall health.
    Digestive Reduced digestive enzyme production, impaired digestion, increased risk of indigestion, bloating, and potentially ulcers. Chronic sleep deprivation can contribute to persistent digestive issues and reduce the body’s ability to absorb nutrients efficiently.

    Impact on Physical Performance

    Sleep deprivation significantly impairs physical performance, impacting athletes and everyday individuals alike. This detriment extends beyond just feeling tired; it affects fundamental aspects of physical ability, from strength and endurance to reaction time and motor skills. Understanding these effects is crucial for optimizing physical activity and preventing potential injuries.The human body requires sufficient sleep to effectively repair and rebuild tissues, synthesize hormones, and consolidate memories.

    When sleep is compromised, these restorative processes are disrupted, leading to a cascade of negative consequences on physical performance. This includes a reduction in strength, endurance, and speed, along with a decrease in cognitive function, which directly influences motor skills and reaction time.

    Effects on Strength Training

    Sleep deprivation negatively impacts muscle protein synthesis, a crucial process for muscle growth and repair. When sleep is insufficient, the body’s ability to recover from the stress of strength training is hindered. This leads to a decrease in strength gains and an increased risk of muscle soreness and injury. The reduction in hormone levels like testosterone, crucial for muscle growth, is further exacerbated by insufficient sleep.

    Feeling sluggish and irritable? Sleep deprivation wreaks havoc on your body, impacting everything from your immune system to your energy levels. While focusing on a healthy diet is crucial, like incorporating foods packed with nutrients, such as beef liver, which some consider a superfood, it’s important to prioritize adequate sleep for overall well-being. Is beef liver a superfood ?

    Maybe, but a good night’s sleep will still be your best bet for optimal physical health.

    Consequently, athletes and individuals engaged in strength training experience diminished performance and a slower rate of progress.

    Effects on Endurance

    Adequate sleep is essential for optimal endurance performance. Insufficient sleep reduces the body’s ability to utilize oxygen efficiently during prolonged physical activity. This can result in fatigue, reduced stamina, and a shortened time to exhaustion. Sleep deprivation can also negatively affect glycogen stores, the body’s primary energy source for endurance activities. Consequently, endurance athletes experience decreased performance and an increased risk of injury during training and competition.

    Effects on Reaction Time

    Sleep deprivation significantly impairs reaction time, which is critical for both athletes and everyday individuals. Reaction time is the time taken to respond to a stimulus, and insufficient sleep slows down this crucial process. This can lead to a higher risk of accidents and injuries, particularly in activities requiring quick responses, such as sports or driving. The reduced alertness and cognitive function associated with sleep deprivation directly contribute to slower reaction times.

    Effects on Motor Skills and Coordination

    Insufficient sleep directly impacts motor skills and coordination. This manifests in a reduced ability to perform precise movements and maintain balance. Sleep deprivation can impair the smooth execution of complex motor tasks, leading to mistakes and errors in sports or daily activities. Furthermore, the compromised cognitive function associated with sleep deprivation further diminishes the ability to execute and coordinate physical movements effectively.

    Comparison of Physical Performance Metrics

    Physical Performance Metric Adequate Sleep (7-9 hours) Sleep-Deprived (Less than 5 hours)
    Speed (e.g., sprint time) Faster Slower
    Strength (e.g., bench press max) Higher Lower
    Endurance (e.g., marathon time) Longer Shorter
    Reaction Time (e.g., response to stimulus) Faster Slower
    Motor Skill Precision Higher Lower

    Mental Health Implications: What Are The Physical Effects Of Sleep Deprivation

    Sleep deprivation isn’t just a nuisance; it significantly impacts our mental well-being. The cumulative effect of insufficient sleep can manifest in a range of mental health issues, sometimes even masquerading as physical symptoms. Understanding this connection is crucial for recognizing the importance of adequate sleep in maintaining overall health and preventing the exacerbation of existing mental health conditions.The brain, during sleep, is engaged in vital restorative processes.

    These processes are essential for emotional regulation, cognitive function, and maintaining a balanced mood. When sleep is consistently compromised, the delicate equilibrium of the mind is disturbed, potentially leading to increased susceptibility to mental health problems. Chronic sleep deprivation can impair the brain’s ability to regulate emotions, leading to heightened irritability, anxiety, and difficulty managing stress.

    Manifestation of Mental Health Issues as Physical Symptoms

    Sleep deprivation can manifest as a variety of physical symptoms that often mimic other medical conditions. For example, persistent headaches, muscle tension, and digestive issues can be related to a lack of sleep, not just a separate ailment. This can make it challenging for individuals to identify the root cause of their discomfort. Misdiagnosis can lead to further frustration and unnecessary medical interventions.

    Potential Link Between Sleep Deprivation and Increased Risk of Mental Health Conditions

    Studies suggest a strong correlation between sleep deprivation and an increased risk of developing mental health conditions like anxiety and depression. Insufficient sleep can exacerbate existing vulnerabilities and create new ones. This increased risk is not just theoretical; real-life examples show how sleep disruption can trigger or worsen symptoms in individuals predisposed to these conditions.

    Impact of Sleep Deprivation on Mood Regulation and Emotional Responses

    Sleep plays a critical role in regulating mood and emotional responses. When sleep is inadequate, the brain’s ability to process and manage emotions is compromised. This can lead to heightened irritability, emotional outbursts, difficulty controlling anger, and an overall diminished ability to cope with stress. Consequently, individuals experiencing chronic sleep deprivation might find themselves more prone to emotional reactivity and struggle with maintaining stable emotional well-being.

    Examples of How Sleep Deprivation Can Worsen Existing Mental Health Conditions

    Individuals with pre-existing mental health conditions, such as anxiety or depression, may experience a significant worsening of symptoms when sleep is consistently compromised. The reduced ability to cope with stress, the heightened emotional reactivity, and the impaired cognitive function associated with sleep deprivation can exacerbate the negative impact of these conditions. For instance, someone with anxiety may find that their anxiety symptoms become more intense and frequent when sleep is consistently disrupted.

    Table: Mental Health Implications of Sleep Deprivation

    Mental Health Condition Potential Physical Symptom Severity
    Anxiety Muscle tension, headaches, gastrointestinal distress Mild to moderate
    Depression Fatigue, loss of appetite, sleep disturbances Mild to severe
    Post-traumatic stress disorder (PTSD) Flashbacks, nightmares, hypervigilance Moderate to severe
    Bipolar disorder Increased irritability, mood swings, sleep disturbances Moderate to severe

    Sleep deprivation is a significant risk factor in the development and exacerbation of various mental health conditions.

    Dietary Considerations

    Sleep deprivation significantly impacts our dietary choices and metabolic processes. Our bodies, when sleep-deprived, experience hormonal imbalances that can lead to increased cravings for certain foods, often high in sugar and unhealthy fats. This, coupled with changes in metabolism, can make it challenging to maintain a healthy diet and can lead to a vicious cycle of poor sleep, unhealthy eating, and further sleep disruption.

    Effects on Hunger and Satiety Hormones

    Sleep deprivation disrupts the delicate balance of hormones that regulate hunger and fullness. Ghrelin, the “hunger hormone,” increases when we are sleep-deprived, stimulating appetite and leading to increased food intake. Conversely, leptin, the “satiety hormone,” decreases, further contributing to the feeling of hunger. This hormonal imbalance can lead to overeating, especially of calorie-dense foods. For example, someone consistently experiencing sleep deprivation might find themselves reaching for sugary snacks or processed foods more often, simply because their bodies are signaling a need for more energy, even if their caloric intake is already high.

    Impact on Metabolism and Energy Expenditure, What are the physical effects of sleep deprivation

    Sleep deprivation negatively affects metabolic rate and energy expenditure. The body’s ability to burn calories efficiently diminishes, leading to a reduced metabolic rate. Consequently, individuals may struggle to lose weight or maintain a healthy weight, even with a balanced diet. This reduced metabolic rate can be further exacerbated by increased cortisol levels, which also contribute to fat storage and hinder fat burning.

    Think of it like this: your body’s furnace is running less efficiently when you’re sleep-deprived, meaning it takes in more fuel (food) but burns less.

    Correlation with Unhealthy Eating Habits

    The interplay between sleep deprivation and unhealthy eating habits is complex. Sleep-deprived individuals often experience increased cravings for sugary and high-fat foods, leading to overeating. Conversely, some might experience decreased appetite, potentially leading to undernutrition, as their bodies struggle to maintain energy levels. This can result in an irregular and unhealthy eating pattern. For instance, a student pulling all-nighters for exams might experience both intense cravings and exhaustion, leading to unhealthy snacking habits and decreased energy expenditure.

    Dietary Adjustments for Mitigation

    To mitigate the negative effects of sleep deprivation on appetite and metabolism, dietary adjustments can be helpful. Prioritize whole, unprocessed foods. Increase intake of fruits, vegetables, and lean proteins. Limit processed foods, sugary drinks, and excessive amounts of unhealthy fats. Consider consulting a registered dietitian for personalized dietary recommendations tailored to individual needs and circumstances.

    Table: Effects of Sleep Deprivation on Dietary Habits

    Aspect Sleep-Deprived Well-Rested
    Appetite Increased hunger, difficulty feeling full Balanced hunger and satiety
    Cravings Increased cravings for sugary and high-fat foods Balanced food cravings
    Food Choices More likely to choose processed and unhealthy foods More likely to choose nutritious and whole foods

    Outcome Summary

    In conclusion, the physical effects of sleep deprivation are multifaceted and profound. From the immediate impacts on alertness and reaction time to the long-term risks of chronic disease, prioritizing sleep is essential for physical well-being. By understanding how sleep loss affects different organ systems and impacts physical performance, we can take steps to improve our sleep hygiene and overall health.

    This knowledge empowers us to make informed choices about our sleep habits, ultimately promoting a healthier and more productive life.